Monday, 17 October 2011

South West RepRap meet up October 2011

Just a quick post about the South West (UK) RepRap regional meeting event last weekend.

If you want to come along (everyone welcome) to the next one please check the Regional South West RepRap forum here and also the eMaker forum.

First a BIG thank you to Rob for hosting the event, providing us all with a great stew (Really Good) and also the RepRap CAKE !!! (See below)

RepRap Cake by Rob's other half.

Thank you to Cadical (Rich) for a really good overview of loads of 3D software programs, tools and gadgets (I'm pondering a 3D mouse as I type this) and the Kinetic demo's were really cool - 3D scanning next time I think.

Thanks to Faberdashery for providing Drinks and the great pumpkin growing kits!
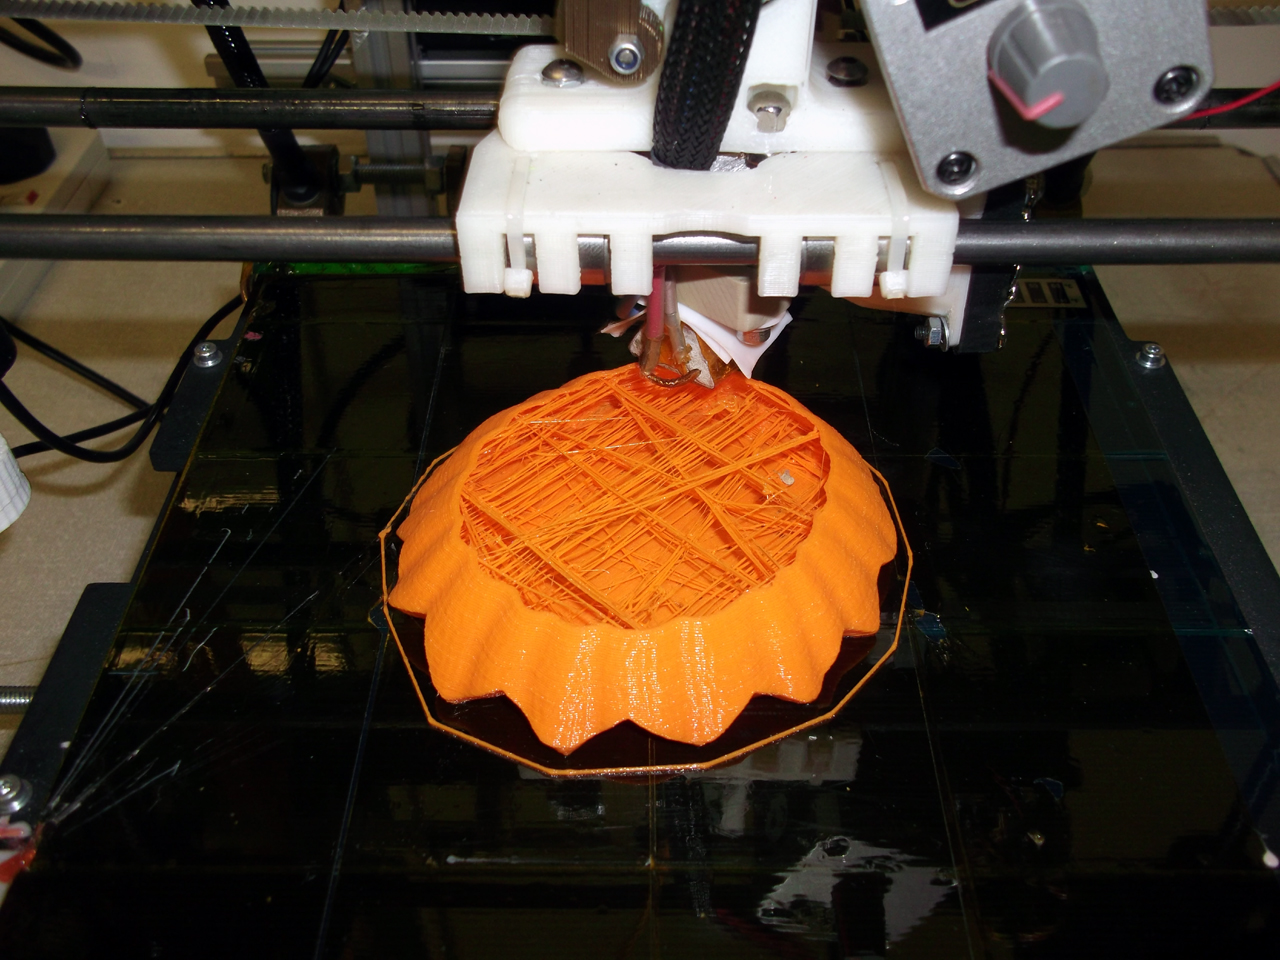
Real Pumpkins for inspiration !

There were plenty of eMaker Huxley's around the place. Jean-Marc was also there, but I didn't get a picture of him or his eHuxley that was printing very well indeed.

We had some great discussions about 3D printing, materials and plastic's, machine upgrades and future design ideas and generally everything you would want to discuss with like-minded creators.

So thanks to everyone for making the day great fun.

Just a few of the machines and prints, I didn't get time to take any more photo's


I can't wait until the next time, I hope lots of you can make the next one, they are a very fine way to spend a day. Good times.

If anyone is up for a massive object challenge (May need a group of you) I have put a very large Pumpkin up on thingiverse Here, it's not my design, but I have sliced it up and scaled each piece to make a really grand sized Pumpkin.

And one last thing - I have a Flickr Account now, so I'll pop up pictures here at random points in time.
http://www.flickr.com/photos/richrap/ along with all the usual places.

Cheers,

Rich.

Friday, 7 October 2011

The 'Art' of failure - When 3D prints go wrong and lessons from failure

Everyone has the odd bad print or failure that results in something interesting or frustrating depending on how urgently you needed the part to print.

Here are some of my failures and tips on how to avoid them and lessons learnt. (And if you can help me explain what happened last weekend to one of my PLA filament rolls I would be most interested - see at the end).

It may sound odd, but it's really essential that you fail when doing 3D printing, It tells you so much about your machine, the boundaries you can operate in and how good or bad things can be. If all you do is print with safe settings or never play with the electronics or firmware the you are missing so much of this wonderful project.

You also can't just be told what settings to use and how fast to run etc. you need to feel how your particular machine works and what it's capable of. So experiment, and when you think you have the perfect settings, turn down the extruder temperature until your filament drive fails, that's then a good reference point.
Also increase print speed until your hot-end can't keep up even with a few tens of degrees C hotter than you think you should be running, that's another good reference point.

Below are a few of my print failures during the summer, and some reasons for the failure where I know what happened.

My most common form of failure with ABS is the hobbed bolt filament transport getting jammed up.

Usually there are two reasons for this -
If you print too fast for your hot-end to keep up melting the plastic then usually after the first slower layer layer it will start to jam and grind the filament in the hobbed bolt teeth, then you need to clean it all out.

I have also observed hobbed bolt jamming from using too much extruder reversal when printing lots of small complex parts (a set of many gears for example), the extra too-and-fro on the filament can cause grinding and jamming, but not with all ABS.
I have discovered that some of my ABS needs to be printed at a slower rate to stop this from happening, other ABS I can print faster and I don't get any problems. ABS for me is generally more of a pain to print with.

Pink ABS - This failure was inadequate heating in the hot-end for the speed of solid fill - Solution for me was to use a different hot-end design so I could print faster and get better heat transfer into the filament at speed.

ABS from China Orange - Printing too fast, this part is quite hard to print, it has a very small base to secure it to the heated bed and it's quite small so it prints too-quickly.

On the left it's printed as a shell, (80mm/sec) total disaster, the warp is significant as the layers have no time to cool and they just make a mess, eventually the extruder nozzle will kick the part off the heated bed.

On the right the same part but printed with infill, and 50% slower (40mm/sec), similar problem really, the part was kicked off the bed at this point.

When you print a small object too fast it's odd watching prints that are still mostly molten they bend and move around while more plastic is added, eventually it all ends in failure.

Solution  - Print more than one part at a time, or slow down the print quite a lot, my quick solution was to print the part in PLA, it printed fine at 80mm/sec.

A few things are wrong with this print, but other than the temperature being wrong the main issue was the Y motor had not enough drive current, Solution - Increase motor current on your stepper drive.

I have yet to have a hobbed-bolt failure with Makerbot ABS, only machine failures have caused prints to fail other ABS plastic seems to have very different properties to deal with.


PLA - I love this print - A more extreme version of under current motors, the red lines on the print show where i was playing with the motor current on the steppers, at the bottom the Y motor current is low causing slip every few layers, I then turned it down and you see a regular slip every layer change, I then turned it up to the correct setting and the top printed ok. I let this print finish just for the fun of it,

And it's also an awesome demonstration of overhang! Who needs support material.

This one is the opposite problem, the X motor current is too high also causing part sheer but this is due to the stepper driver overheating and shutting down. If you can identify this is happening, you may need to use a fan on your stepper drives depending on your mechanical make-up and motor type or you may be able to reduce your motor drive current a little.

Parts that are not anchored down really well can pop-off of the print bed, causing havoc and destruction everywhere they get pushed around by your hot-end.
This extruder gear came loose and slid itself into a bigger gear and the print continued for quite a few more layers before I spotted it. 

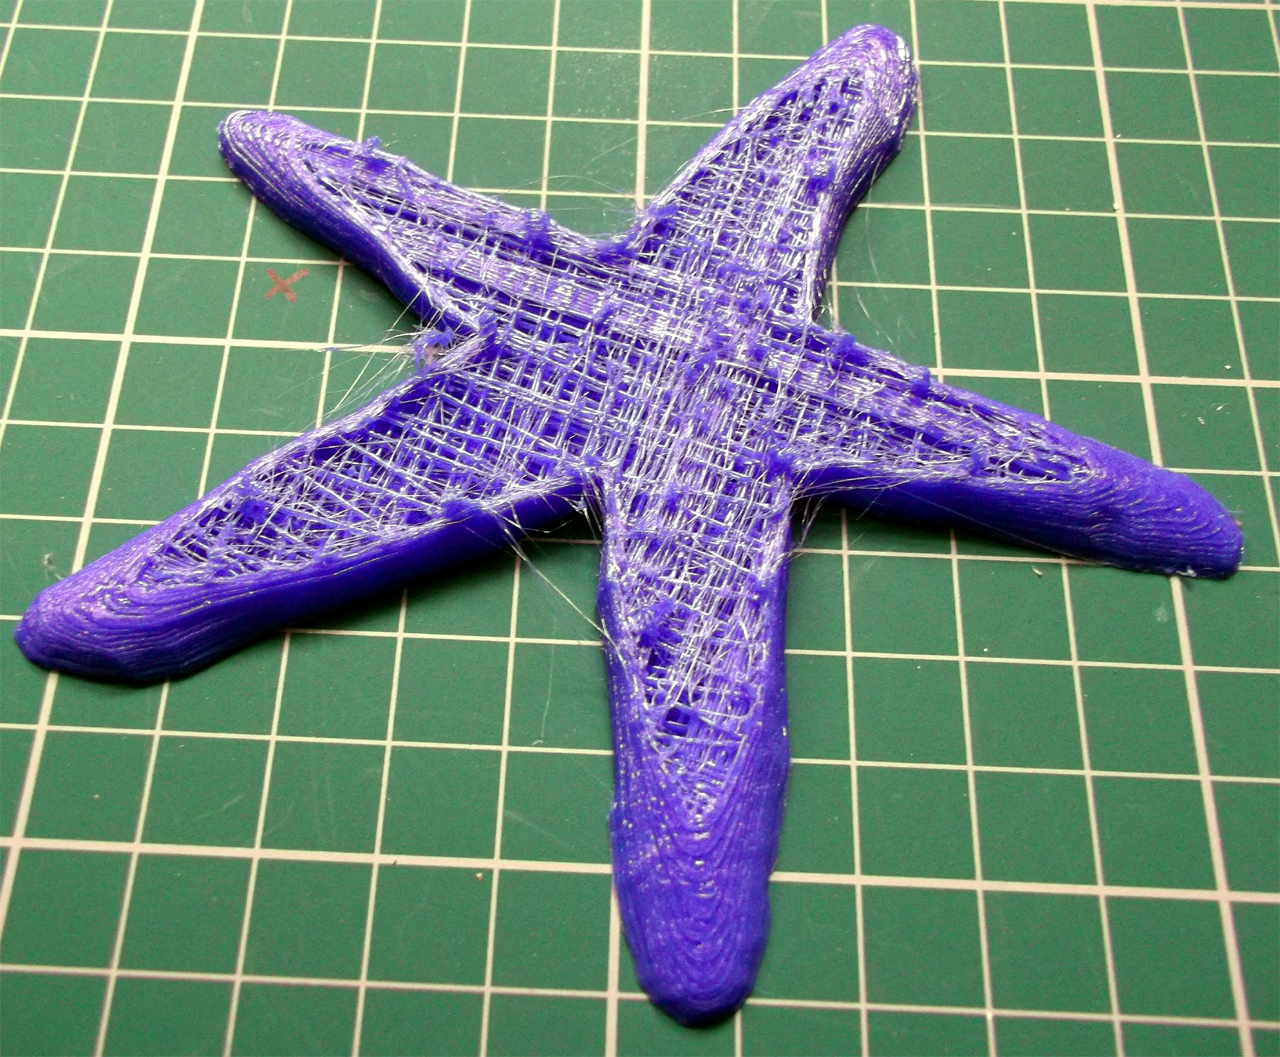
PLA Starfish, This was my fault, It just ran out of filament during the build! poor starfish.


The other thing you get in 3D printing is lots of bits and outlines, this was less than one month of evening printing.

If only we could recycle it.... one day.

Temperature
Temperature of your hot-end is very linked to extrusion speed and also print quality.
If you print at about 30mm/sec then a lower temperature of anything between 165 to 190 Degrees C is usually fine but as you increase temperature or speed (or both) things start to get interesting.

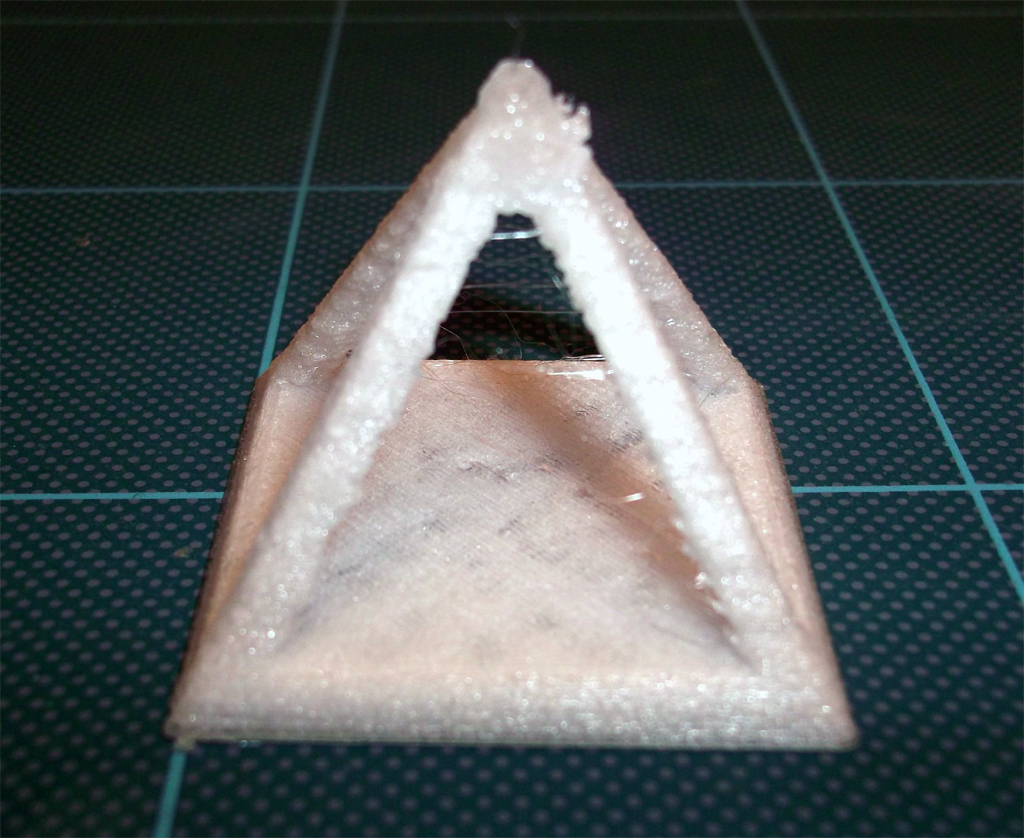
In this picture you can see the effect of temperature on translucent PLA at a fixed print speed.
The heated bed was 65 degrees C and the print speed is 60mm/Sec.

I started off at 205 Degrees C then increased to 215, at these temperatures the PLA starts to produce loads of tiny bubbles and gives the print a matt and frosted effect. Back to 195 and the PLA looks as you would expect.

Bonus points if you can guess what model this is (check out the reflection).

It's possible to produce nice effects on your models by altering print temperature.

Opaque PLA tends to go slightly matt at higher temperatures and low-to-normal speeds, I don't see evidence of bubbles, but it's hard to tell exactly what's happening.

When I print at over 120mm/sec I need to have Opaque PLA at +225 Degrees C, and translucent at +215 Deg C, at this speed and temperature you do not see the matt/frosted effect in the finished object, I guess that's just down to the limited time the Plastic spends in the heated chamber unless anyone can give a better explanation?

And talking of PLA and temperature - Last weekend I had a roll of PLA shatter on me!
This was one of the last rolls of China sourced 3mm PLA and it's about 4 months old, I keep them in plastic boxes and I have Makerbot Black PLA and Ultimachine White PLA rolls that are much more tightly wound than this PLA from China and they are also in the same sort of boxes, I also had Red and Yellow Chinese PLA from the same manufacturer stored in a similar way and that's still just fine. 

All my other Plastic is stored in plastic bags and cardboard boxes all the time.
Now, here in the UK we have experienced quite hot/cold weather changes for October, so I'm putting it down to that, but I still don't really understand why it happened just to this roll. Over a period of many hours I could hear the PLA 'ping' and shatter into lots of smaller pieces, very odd. It seems to have settled down and some parts of the coil are fine, even the centre section that was more tightly wound?

Hot-end Jamming - 
My only other odd failure was the jamming of hardened filament at the hot-end, this seems happen after many months of printing due to build-up of solid materials, probably because I tend to run PLA hotter and faster than 'normal' which leads me to my top-tip I'm still investigating - 
Top Tip - I would be interested if anyone else has spotted this  - If you start to see very, very fine 'hairs' of plastic on your printed parts for no real reason you can think of, this may be a sign that your hot-end is about fail, from build-up of hard material. I have spotted this on the last two times my hot-end needed cleaning, it will need disassembling and maybe drilling and cleaning out, after that it will be back to normal and work for many more months. as long as the PTFE sleeve or barrier has not degraded, then it will fail again quite quickly - keep an eye out for the 'hairs'

Some questions for you -
What's your best failure or most spectacular!
Any tips for testing the boundaries of your machine and 3D printing, please comment below -
Anyone done any 'Art' with failed prints?
Thanks for reading and go make something fail, you will learn loads!

Rich.

Wednesday, 5 October 2011

TCT Live show (UK) 3D printing and more

I visited the TCT Live show at the NEC in Birmingham last week. A lot of really interesting stuff, too much to detail everything here, so here are a few highlights for me. If you do nothing else, please Read the section below on Geoff McCormick.
One of the highlights of the TCT show for me was a presentation by Geoff McCormick. Geoff is passionate about lots of things connected to 3D printing and the social / economic side of design and development using technology spread all over the world (open-source / sharing networks and joint development projects).
I know he is a fan of Fab-Lab so must be aware of RepRap, I would have liked to talk to him further, we only briefly discussed the Microsoft Gadgeteer project (It's an ARM7 Arduino style Open-source tool-kit) - Yes I know it does not sound like Microsoft... but they are throwing money at it.


Geoff's presentation was unfortunately wasted on many of the people present, but that's just an indication that many industries have no idea what's changing and how seemingly implausibility things become possible when you get a load of people together who are passionate about problems and finding solutions to them. So many of the companies at that show should take a big look at what's going on with open hardware, open software, community projects, digital playgrounds and personal manufacturing in general, it would be an eye-opening experience for many I'm sure. Ways to turn these many channels of development into commercially successful products or business ideas should really be a critical focus for most established companies and investors or they will all wonder what happened and why they missed out..

The customer is King, at some point soon businesses will need to tailor make almost everything or someone else will.

Please take a look at these reports that were used as the basis of Geoff's presentation - They highlight key trends that will drive growth in Creative industries and they provide very interesting views on the colliding digital and physical world in which we all interact.


Executive summary - New models, new markets, new makers
Baseline Report - BRIDGING THE DIGITAL AND PHYSICAL WORLD
Key findings - this is excellent food for thought - Final Report

And - Where to next?

 Back to the TCT Show -
Mcor were at the show, with their A4 paper based 3D printer. About £9,000 for the printer and it uses normal office paper. Still can't convince myself of it's eco-credentials as it's going to use bleached copier paper and waste quite a bit of it in every print. It's back to subtractive manufacturing, but a nice machine and the 'printed' parts looked great.

I was highly disappointed by the HP 3D printer, I had expected great things, it seems a lot slower than any other 3D printer I have seen and the quality was just average, the ABS plates are throw away after just a few prints and it's really expensive


Bits From Bytes had their new '3D Touch' printer, it's like a BFB3000 with new electronics and a touch-screen interface and a Memory stick slot on the front for printing from.

A1 Tech had a BFB3000 making a bit of a mess printing something?, it went on printing this badly for a while, the raft had lifted and the print head was catching, causing quite a mess over the object. Sadly not a good advert for the technology.

But they did have plenty of nice printed objects on a desk.

Renishaw Laser SLS 3D printing (Sorry for the high reflective surface, hopefully you can make out the Laser doing it's job.

Nice Objet printed materials using different resins.


All the usual suspects were there, the big players and a few technologies I had always wanted to see in action (Laser sintering and full colour powder printing and also multi material resin printing).

Did anyone else go to the show?

I would be really interested in your comments or thoughts on Geoff's reports? what do you think?

Thanks for reading.

Rich.

Monday, 3 October 2011

Yearly review of my Rep-Rapping adventures Sep2010 -> Sep2011

Wow! that went quickly. Review Sep 2010 - > Sep2011

I have some really interesting things planned for the next 12 months rep-rapping, but here is a round-up of my adventures in the last 12 months -


Starting out -
When I first started I made a few incorrect assumptions about the available DIY 3D printers out there, this initially led me to design and build my Screwball-Bot, very strong, highly accurate, but quite slow and VERY heavy.

My advice to anyone thinking about making 'the ultimate', 'strong' 3D printer out of T-slot and ballscrews, don't do it. It's just way overkill, I really enjoyed making Screwball-Bot and I have a really cool plan for it's ongoing use but a Prusa Mendel is almost as accurate, much faster and much easier to build.

If you want a 3D printer make a Prusa Mendel. but if you really want (and need) to be able to Mill/CNC then maybe T-slot and ballscrews are still a good option for you, but think if you will ever really do that when you have a 3D printer? I have never bothered with Subtractive / CNC machining even though I have a machine that could do it really well.
And if you don't fancy sourcing all the parts for making a Prusa, check out the eMaker Huxley, it's a lovely machine (I have one) and is a great way to start on your journey into DIY 3D printing.

Screwball-Bot Links - Concept, Design, Build-up, Wiring, Bowden_Extruder, Test, Printed Results with Reprap Host,  printed results with Skeinforge, Multicolour Printing

Most popular Blog posts -
According to the stats my most popular Blog post is on Skeinforge V41, it now needs an update and maybe a few more details about how to refine settings and what some of the other functions do so maybe I should do an updated one, and as many people now use SFACT maybe that's also worth a write-up.
* We have Skeinforge V42 just landed officially, that's going to be fun - check out the SKIN function* -

Polycarbonate Printing has rocketed up to the number 2 spot.

The other most popular posts are my DIY hot-end and the high-power hot-end
The Filament joiner
Colour 3D printing
Pimp my Mendel - Mendel *Bling*
Masterclass event Organised by eMaker
Bowden Extruder and 1.75mm Push-fit Hot-end

Not many people showed much interest in the Microscopy I did on extruded filament, which is a shame as I thought that was quite neat and I need to do some more to help with understanding the Polycarbonate printing process.

Multicolour printing (Layer selective colour printing) -
 
One of my most interesting adventure was into colour printing, this was always planned from the very start and now we are seeing all sorts of new ways to do this, so it's going to be really fun watching future progress in this area.

My particular way was to join sections of coloured filament together (with my filament joiner)
And as far as I know at least one other person has managed to do the same, with cool results.

Printed by Lenbok

And as Rep-G now has a Dual extruder option, things like these below are starting to pop-up.


Prusa Mendel's -
Building them is addictive, they are just so neat, and it's great helping people build them up.
My collection is growing.
My original Bath Mendel that's currently being upgraded.
And the pimped-up Mendel *BLING* is working well.
My eMaker Huxley Machine (Number 8) - Blog post on this planned.
Shortly the British Mendel will be posted, I'm planning on that machine to accommodate a dual extruder
And then after that who knows, but I'm really enjoying watching progress with the Vertical X carriage challenge by bryanandaimee and I have some other ideas for a 'Hybrid Prusa'
All of my machines have built-in Filament holders, it's quickly the first problem anyone faces after getting the printer working.

Firmware -
I'm only really using Sprinter because of the SDCARD support and the fact it works really, really well and is very easy to understand.
Many others are worth watching, but for me until they have SDCARD support I don't have time to test them.

Electronics -
This would have been an obvious area for me to develop, but so many people are working on hardware enhancements at the moment I'm more than happy to use what's already available.

I have not tried Gen 6 or Gen 7 and don't really see a personal need to use them, the SDCARD support of RAMPS and Sanguinololu electronics are really important to me, so I'm looking forward to any new hardware with local memory or SD support the connection to the PC is becoming much less important.
LCD displays and menu / navigation keys are also increasing in use.

Extruder's -
Again, at the start I believed that I could make the 'ultimate' Extruder, and I believe 'this design' is good and works extremely well as a Bowden set-up. But for Prusa Mendel I would recommend you start with Greg's excellent accessable WADE style and as I have done, then refine aspects for what you need.

Hot-Ends (and cool/cold zones) -
It sometimes looks like Everyone tries to make their own Hot-ends when starting out, (It's the most searched term on my blog stats) it is a critical area of the machine and can have such a massive effect on reliability and quality.
I have made quite a few now and I'm still not completely happy with all aspects but for what it's worth my current angle on this is to use 2 x 10Ohm 3W resistor's in parallel for heating element, a triangle shaped heating block and a PTFE liner (tube) for filament transport that goes right from the hot-end to just short of the Hobbed bolt inside the extruder body.
I Still use PEEK (and PTFE) as the cool transition zone but any new investigations will start to use Stainless steel (and other materials) as the 'cool' zone.
And use these Thermistors, they are so much easier than the tiny ones normally used.

I also have a little fan duct for assisting the cool-end that's designed to fit onto Greg's X-Carriage, this really helps quality and is essential for extreme long-running print runs or build-plates.

Plastic (Filament) -
I have found out a lot about plastic and still have so many more things to learn and experiment with in this area, but for a status so-far I can say the following -

PLA - (Start with PLA), it's easy to extrude and gives good results. My favourite PLA supply is from Faberdashery, it's simply the best filament I have used to date, dimensionally excellent between different colours and batches, colour intensity and choice is amazing and it extrudes so smoothly, no blobs, less ooze and no bubbles and best of all it's not brittle - (I have now used and tested many colours from 8 different PLA suppliers all over the world - a future Blog post planned on this).

ABS - I use it for Extruder's, X-carriages and Y bearing holders and I don't like using it. yes you can get some funky colours but it's annoyingly softer than PLA so I personally tend to get more filament drive issues (clogged hobbed bolts usually) I need to find a nicer way to use it more, but it's not my preferable material.
Again tried 5 different suppliers so far and usable quality seems more of an issue with ABS than with PLA.

Polycarbonate - I'm still testing and not very many (any?) people seem to have used it in DIY 3D printing, but WOW! it's strong and could be the very best material to use for machine-part Rep-rapping, very interesting. - And thanks to everyone that has contacted me about the Blog post and testing, I have had a tremendous response and it's great to see so many enthusiastic and supportive people involved in this wonderful project. Thank you.

PC-ABS - Still to test this mix, the intention is to lower the required extruding temperature.

Other materials - stay tuned, some more are planned (I'm also open to ideas?)

Meeting people (other rep-rappers) 'in real life' -
It was a good year for sharing, we had a really great Masterclass weekend organised by Jean-Marc of eMaker and for me the West of England RepRap user group is starting to get organised and planning to meet regularly.

I can't wait to see what we all do in the next year, it's going to be great!

Resources and contact-
My Youtube channel is here, all HI-Def video content.
Thingiverse Here
You can find me on the Reprap Forum (PM me if you want to make contact)
eMaker forum
Reprap Wiki
And at some point soon I'll find time to try IRC
Should I bother with twitter?

I love reading other people's Blogs, far too many to list, but thanks to all the re-rappers that have helped, problem-solved, discussed or generally inspired me to be part of this great project.

So if you have managed to read this far down I would really like to hear from you on what you would like me to investigate, design, experiment with over the next year? I don't have infinite time or resources, but I'm interested and up for any challenge connected to 3D printing.

Also this would be a great time to tell me what you like and dislike about my Blog posts or content?

Any feedback greatly appreciated.

I wonder what 2012 will bring to our industry? Predictions anyone?

Rich.

Friday, 30 September 2011

Indestructamendel - Polycarbonate 3D Printing with Prusa Mendel

A little while back I posted on the Reprap Forum about printing with Polycarbonate, no one seemed to have done this yet so I had some pure Polycarbonate filament made up and some other mixes to enable some further experimentation and testing, here are my initial results and findings with Pure Polycarbonate.


Firstly if you are not exactly sure why Polycarbonate is worth investigating for 3D printing, take a look at the Wikipedia page, basically it's strong and impact resistant (It's used in the making of bullet proof glass) temperature resistant and luckily it is a thermoplastic so can be extruded (at the right temperature). It can be bent and formed while cold without cracking or deform and it is also very 'crystal' clear, but that's actually not so important for us as will become apparent below.

Don't confuse Polycarbonate with Acrylic or Plexi-glass, they shatter and crack, Polycarbonate tends to just bend and deform and after much effort will eventually stretch like very hard rubber until it eventually breaks.

It's a really amazing material, the 'diamond' of plastic, I was excited to test it out.

I have used sheet Polycarbonate for all sorts of things so I already had an idea of what to expect when thinking about extrusion.
  • It has a high melting temperature (glass transition is about 150 Degrees C)
  • It flows at around the 280 - 300 Degrees C point
  • It is stiff so 3mm filament would have been a problem to coil and feed into the extruder
  • It's hard so should work well in a Hobbed bolt filament transport system (geared extruder drive)
  • I already had a new hot-end design that I was confident would work at 300 Degrees C 
My test Polycarbonate Coil was manufactured at 1.6mm which will work in a 1.75mm extruder.

I did a few temperature tests and free air extrusion tests to see what the extruded filament looked like, it's one of the cleanest extrusions I have seen in free-air (290 Degrees C)


After changing my extruder Esteps and calibrating infill for 0.3mm layer height I started testing.

My first test was with the good old Pyramid model. Looking back I should have started with cubes or something requiring less extruder reversals, but it was a good test.
I was getting a small amount filament buckle in the cool-end, not a big issue, but extruder reversal needed tweaking a little.
Firstly I started at a reasonable speed of 30mm/sec print and 180mm/sec Travel.
Hot end at 280 Degrees C and the Heated bed set at 95 Degrees C
I was expecting warp and the extruder to jam, it didn't and printed ok.

I then printed again and lowered the temperature until it jammed up.
This was a really interesting failure mode !

It didn't do what I was expecting. Normally when you lower the temperature to work a lower limit eventually the hobbed bolt grinds through the filament and carves a chunk out of a single point and the teeth get all jammed up.

With the Polycarbonate it kept on driving the filament into a tightly packed block under the Hobbed bolt all around the spare space under the drive just before the opening, as the filament was still being driven I didn't even realise it until I started to see it bulge from under the hobbed bolt.
I didn't take a photo of it jammed up in the extruder, but here is it after extraction from the extruder, it's been stretched a little by me pulling it out, but you can see the failure mode really well.

And remember this filament is completely cold (room temperature) when it's doing this, amazing stuff!

That just told me that Polycarbonate is one of the best materials to use with Hobbed bolt transport and actually it can be extruded at a much lower temperature than I expected as long as you are not printing too fast- more on speed and temperature below - 

I was reasonably surprised by printed Pyramid looking so 'snow-white' I had initially expected it to look clear, so I experimented with Speed and temperature for the next six Pyramids.

What I discovered was that the slower you print and the lower the temperature the 'whiter' the printed object.
Also lots of reversal moves gives the object a snow-white appearance.
Strength does not seem to be affected by the appearance or speed of printing or indeed temperature.

If you print hotter and faster the more clear the object becomes.

This Pyramid above was printed at 120mm/Sec and 305 degrees C, I don't think it's going to get much more transparent than this due to the many extruder reversals? That's my theory as the free-air extruded filament is clear so something is causing it to change, or maybe other factors like moisture are playing a part?

I pulled the hot filament out of the extruder to see what it looked like, you can see the filament is slightly buckled in the drive channel, this is due to the fact it's 1.6mm and my extruder is designed for 1.75mm filament, but not a big problem with this strong material.
What's really interesting is that the melted part is the same snow-white colour I can see in the printed object.
This needs more investigation, maybe I should to try to dry the filament to see if moisture is some of the cause to this? Anyone have any ideas?

Here is a short video showing Polycarbonate printing on Prusa Mendel, you can watch it below or in High Def on Youtube Here

Polycarbonate Printing


This should give you an idea of how strong Polycarbonate is, you can bend it when cold and even put a knot in it. 

The video below shows Polycarbonate filament being bent, manipulated and tied to show strength and flexibility, you can also view this in High Def on Youtube Here


PC and PC-ABS Filament test

As a way to compare PC printing material take a look at the below videos showing PLA and ABS in the same manner. This is part of a wider material testing program I'm doing at the moment.

Further 3D Printing material test comparisons - 
To give you an idea of how difference material handle, take a look at the videos below or on Youtube Here, where I bend twist and break some different filament types and supplies to see how they behave.

A range of PLA 3D printing plastic filament being bent and manipulated

A range of PLA 3D printing plastic filament being bent and manipulated


Future tests will be on a much wider range of suppliers and materials along with printed parts, for an example of how different materials perform after being printed look at the below video where I destroy some printed Pyramids.

Part Destruction! - lets pull apart some Pyramids

In the video below I pull and snap apart some printed Pyramids of different material types, they are all made with 20% infill and printed at 80mm/sec with 3 solid layers.

Printed object destruction

Other 3D printing materials - I'm really interested in what other experiences people have had with different material types in 3D printing, please contact me if you want to be involved in materials testing and /or you have any experience of different plastic's.
If you also want to test Polycarbonate materials then please do contact me.
I'm not a plastic's expert or have training on materials analysis but I'm really interested in how different types perform in 3D printing and how blends or mixes of plastic may help enhance our machines and objects.

Future test - PC-ABS

I have some other spools of mixed Polycarbonate materials, the intention was to lower the extrusion temperature and make it even easier and lower cost to use PC on RepRap.
I will get around to testing these types when I make another dedicated extruder.

I would really like to add this info to the Reprap.org wiki pages, but I could do with some help on creating pages and sections. At this time references to PC do not exist on the wiki.
Ideally A page like this for PLA needs to be made for Polycarbonate.

If anyone can help me please get in contact or PM me on the RepRap forum, thanks.

Thanks for reading and please leave a comment.

Rich.

Tuesday, 13 September 2011

Upgrade your bed springs –> improve your print quality

Just a quick note and upgrade for you to consider - If you have a Prusa or any other machine with little springs on your build bed / heated bed especially if they are springs from biro pens think about upgrading them.

I was getting more and more issues going faster on my Prusa, most of these manifested themselves as less fine outer surfaces and less alignment on the vertical walls. So after fixing all my vertical Z issues (de-couple the Z motor mounts, make sure the rods are really straight, and adding Z rod bearing stabilisers) the only thing remaining was a little wobble on my build-bed. This wobble gets more and more the faster you print / accelerate / stop etc, so I changed my bed springs from the 'official' little ones from biro pens to ones usually used on the Extruder Idler.

On the left is a ground spring normally used on the extruder. On the right the 'official' bed spring is usually sourced from a disposable biro pen.

Change to a firm spring, under good compression.


Old Pen spring fitted, bit floppy

You need a firm spring, and make sure they are well compressed, mind you don't distort the build bed but keep them reasonably tight to stop wobble.

The change was really good and well worth doing.  I'll try to post the before and after printed objects, but I would recommend giving it a go especially if you are upping the print speeds on your machine past 80+mm/sec or having a fast machine travel speeds around ~200+mm/sec

Let me know if you change them and if it also improved your print quality.

Rich.