Thursday 11 April 2013

3D Printing with Nylon 618 filament in Tie-Dye colours


 * Tie-Dye 3D printing with Nylon 618 *


Taluman Nylon 618 is a very versatile printing material. Nylon does not require a heated bed, has low warp, and cooling fans are not required for both big or tiny printing.


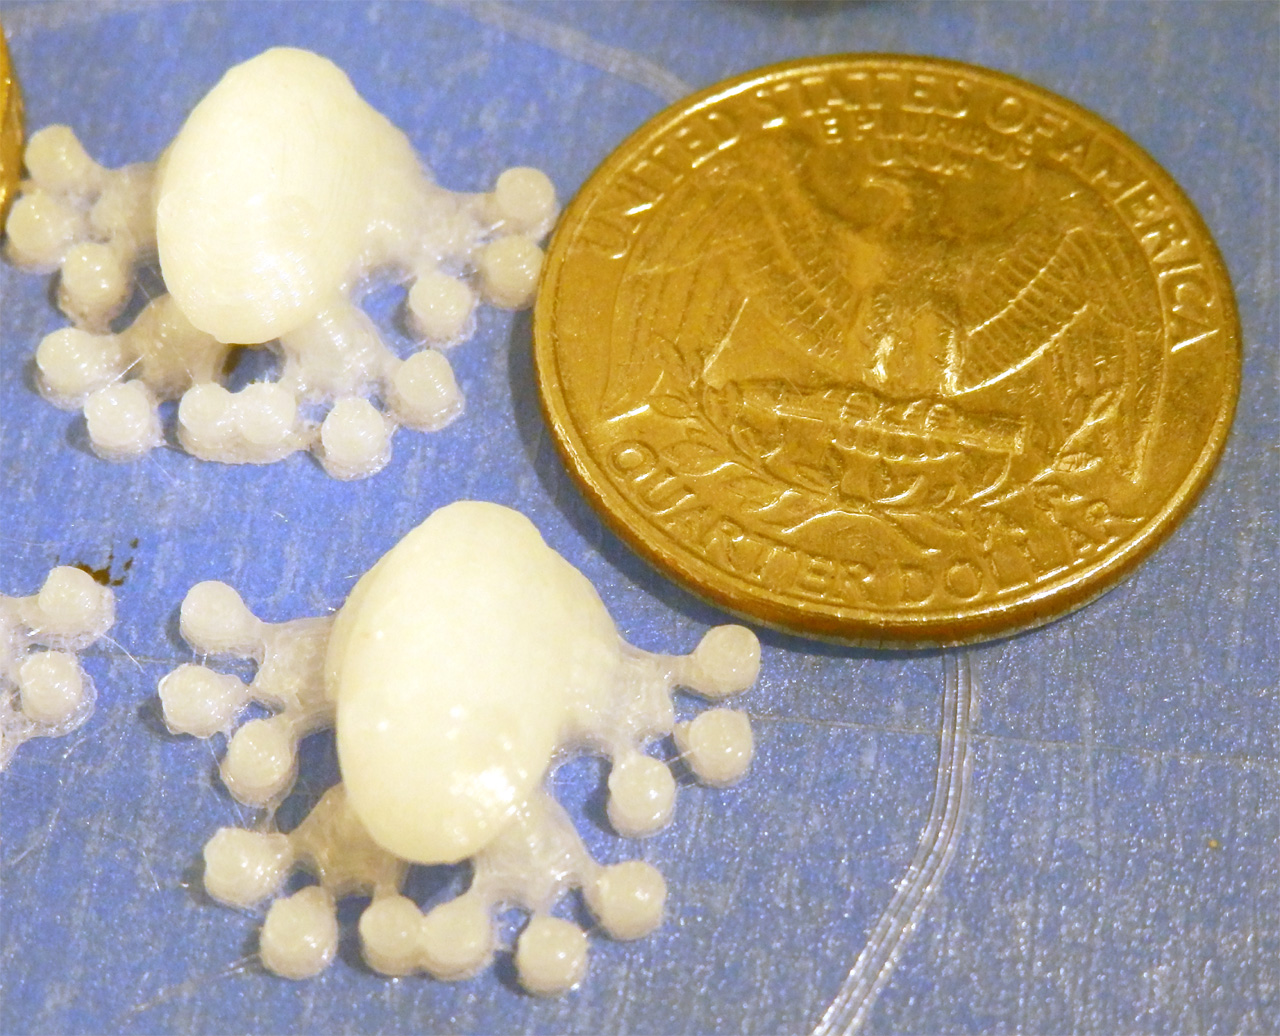
You can print big and really tiny things in Nylon

No fans or heated beds required!


Nylon has amazing self-bonding properties making any FFF (layer-by-layer) printed objects very strong and less prone to de-lamination.

Natural Nylon 618 material.

Another aspect of its development was the ability to colour the Nylon with fabric Dye. That hits almost every spot for me!

From the moment I spotted the 618 Nylon was available I wanted to try colouring the raw filament with more than one colour, something I have always wanted manufacturers to make is a range of filaments that have changes of colour during the roll or even across the roll, now I had a way to do it myself.

Taulman 3D recommends printing with the natural filament and then dyeing the parts afterwards for best results, but I wanted to see what happened when dyeing the filament first as that sounded a lot more fun.

Nylon 618 Intro video- 

Here is an introduction video going over the simple Filament Dyeing process, You can also watch it in HD on YouTube Here -

I wanted as simple method as possible to dye the filament rolls, nothing too messy or complicated, so obviously I ignored the instructions...


I used powder based Rit dye, this is compatible with Nylon, if you try anything else, do make sure it's suitable, some Dye's state they are not, and some (Dylon for example) don't seem to give any real advice on Nylon. Other specific acid based dyes are designed for Nylon, but getting hold of them is not all that easy in the UK, seems a little easier in the US.

The Rit Dye website recommends adding Vinegar when trying to dye Nylon, I can say that really didn't work for me, and seemed to make the dye almost useless. I’m not sure why it didn't help as the acid content of Vinegar or other things like citric acid are often used when dying Nylon based products.

You can use other natural dyes for Nylon, Cotchineal (squashed bugs) makes a very strong red dye, Turmeric and tea also work on Nylon.

Other links suggest adding add extra Salt to the Dye, this does not seem to hinder the dyeing process, but it's hard to say if it also helped with my particular setup as I only did it with one colour and that was an already  dark shade.

After ignoring the instructions for the dye and most other information I could find, I just boiled a kettle of water, and added around 200ml to the Rit Dye sachet in a glass Jam jar – stirred for 1 minute until dissolved.

It's a good idea to tie-wrap or secure the filament into a coil before dyeing. Also you want to drop the filament into hot (boiling if possible) water before putting it into the dissolved dye. Just for a few minutes to get it up to temperature.

Here is a before and after shot.

Note - the Nylon based tie-wraps also dye really well!

This is how it's done -

Then I just put the hot filament into a Zip-top bag and poured in the 200ml of dye, as you can see I wanted just half or less of the coil to be covered in the bag (depending on bag size).


Leave it for 30mins and shake/swish it about in the bag once or twice if you remember.
You can leave it for longer, but 30mins seems to be a good time to get a nice colour from this extra concentrated dye.


After 30mins or longer, you can remove the coil, and rinse in warm water, then cold water.


The one I added vinegar too was unfortunately the magenta (pink/fuchsia) so that really didn't work at all well, and ended up being more like a light pink/orange for some reason – I'll try again without the vinegar next time.


The yellow was done just with the Dye, this worked really well and was very fast acting and seems to give the strongest colour when printed.


For the Teal (dark green) I tried adding salt, this didn't seem to help and maybe needed longer to get a deep colour, hard to tell, but next time I use Rit dye it's going to be just plain.

Basically I would warn against adding Vinegar or salt and try to keep the dye as hot as possible for as long as possible.


You could do a whole coil if you lay it down in a zip bag or boil it up in a pan, or if like me you want a mixed filament 'tartan look' ;) rotate the filament in the bag and add another colour. Dye the next section like above, rinse and repeat.


Starting to look rather awesome don't you think?

In the end you should have tie-dye filament! you then need to dry out really well before use.


I'm sure you could wrap and bind the filament in all sorts of ways with rubber bands or plastic to get some really interesting and colourful effects.


I did think about drying it in an oven, I have done this before with ABS and PLA, this should also work well for Nylon, but as I was going away for a week I decided to leave the coils in an airing cupboard at a slightly elevated temperature, this worked extremely well and all of my spare ABS is stored in this cupboard permanently to keep out any moisture.

Another trick mentioned on the RepRap forums (by Sublime) is to put your filament in a metal of wooden box with a low wattage light bulb (~25w) to keep it dry. You can of course use desiccant sachets, but remember these really only do absorb a tiny amount of moisture and need to be dried themselves for re-use.


Printing with the filament is just as normal, I didn't see any issues at all with it. No steam or pops as the filament was really dry, actually better than when it had been originally delivered.
Layer bonding seems as strong as with natural Nylon, the only change I decided to make was to increase the temperature of the print to 235 degrees C.


And one final note, if you plan to use Nylon for printing, MakeAlot directed me that the best surface material to print on is Tufnol (Whale brand) this cotton weave, resin based laminate is often used for mechanical jigs in the electronics or test area. You need to get the Whale brand type and not other similar products based on fiberglass or composites.

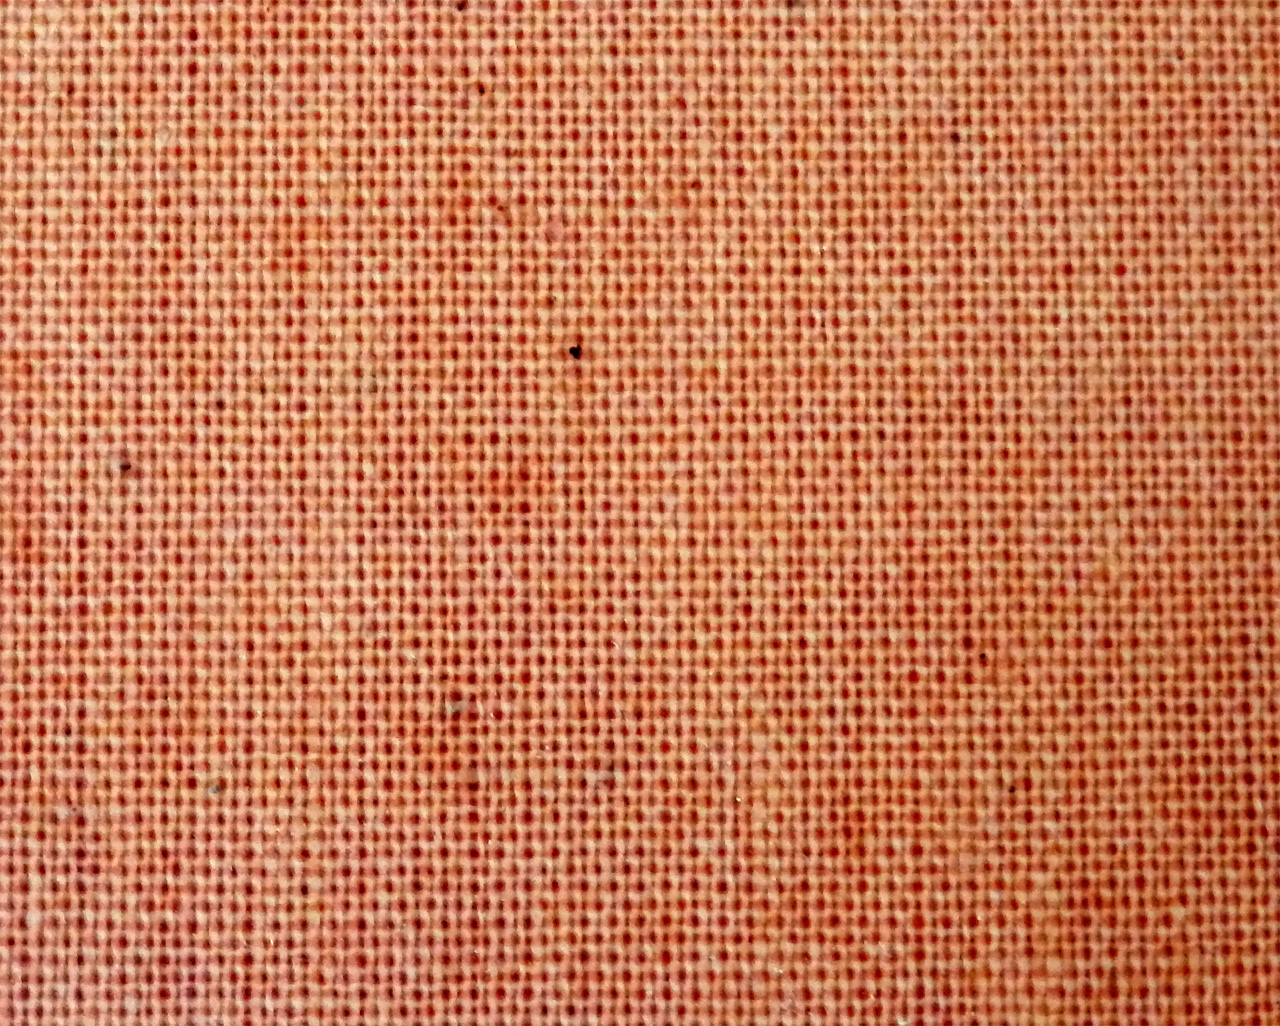
This is what the Tufnol (Whale brand) surface looks like.

It will go by different names over in the US (often Garolite LE) and may have other names where you are.


Tie Dye Printing and Destruction testing Nylon 618 video- 

Here is a video showing the printing of Nylon on Tantilus and Rostock, I also do a little destruction testing at the end, showing the relative strength against PLA - You can also watch it in HD on YouTube Here

After initial testing I had been lowering the print temperature of the natural Nylon down to 225, but I noticed the dark Teal colour looked shinier and smooth at a little higher temperature, so 235 Deg C is my now normal setting for Nylon @60mm/sec printing speed using a 0.4mm J-head nozzle.

Blended Natural and Teal bands add another dimension to the Tron and Plus Vases

Cutting the filament cross section shows that the dye penetrates in about 85%, so you have a tiny core of natural looking filament, this obviously all gets melted together in the extruder nozzle but it’s interesting that the colours do not seem to really fade in the extruding process as I thought it might, you do end up with nice and unique looking parts, especially when the filament is cross multi-coloured.


I expect that doing a better dyeing process, having more agitation and constant high heat would dye the entire filament and produce even stronger colours.


I was originally trying to get a mix of Cyan, Magenta and Yellow filament, and where these colours mixed should have also given me Red, Green and Blue. But I could only get hold of Teal (dark green) instead of Cyan and I also didn't allow the coils to mix enough as I rotated them for each of the coloured dips.


I like this method as after you have dyed your coil there is nothing else to do, where as dyeing the parts after printing would be a pain each time you made a printed object, so I'm please how the first test came out and will dye more Nylon Filament with some other colours next time.


I have printed all these models using both the Tantillus printer as this was setup for 1.75mm Filament and also the Rostock for bigger models, both with cold Tufnol print surfaces.


Printing bigger Nylon prints on the Rostock also seems to work extremely well, I have only done a few so far, but the Rostock seems very happy with Nylon too.

And they stay very stretchy, the dye does not seem to make any difference to layer bonding or stretch.


I really love these gunny sacks, they print well and look great.


Many thanks for the great models by Ben Malouf (BenitoSanduchi) and Perry Engel (Cerberus333) these really make wonderful test pieces for Nylon printing and being thin walled they don't take very long to print. Check out more of Ben's work on Thingiverse Here and Perry's Here


Let me know what you think and send me some pictures if you try out any Tie-Dye printing!


I bought 3 rolls of the Taulman 618 filament, and dyed a lot of it, all sorts of different colour mixes, many I have not yet had time to try out, and it does go a very long way when printing hollow pots!

Plenty more great things to print out that deserve the Tye-Dye treatment, let me know what you would like to see Tye-Dye 3D printed and I'll do my best.


Very excitingly as I typed this up, Taulman3D has just announced a new clear Nylon 645 material with very high strength properties, I can't wait to try it out. I can imagine dyeing this new clear material would look rather fantastic when printed.


In other 3D news - 

E3D All metal hot-end -

I just received a new all metal hot-end from e3d-Online, it's one of the best machined objects I have ever received. And this really is an all metal hot-end, no PTFE inserts or sealing tape, just a stainless thermal junction and Aluminium heater block and heat-sink.
If it operates as good as it looks, we should have another option for really high temperature printing.

It's not as heavy as it looks :) it has a J-head compatible Groove mount that fits perfectly into Greg style extruders and all the modified Bowden hot-end mounts I have made so far.

I plan to test it with Nylon, Polycarbonate, PLA, ABS and PC-ABS and any other materials I can get my hands on very soon.
I may need to change the thermistor over to a thermocouple for some materials, but I will let you all know how it performs.

3D Printing Presentation in Cheltenham - 

Also, I will be speaking about RepRap and 3D printing along with demo's at the Cheltenham design festival -  April 13th, do come along if you can and say hello.

Thanks for reading, happy printing.

Rich.

Monday 8 April 2013

Rostock Delta 3D printer build

Rostock !

Hello and welcome to the Rostock build, it's take a while to get this one documented, I blame that on having way too much fun with my printers and development at the moment, I'll try to be a little quicker on future projects.


The Rostock 3D printer was originally developed by Johann C. Rocholl and is now quite well established in RepRap terms, it's over a year old and has had many different spin-off's and variants by other users and developers. Even Johann has a new design (Kossel Wiki here) based on the openbeam Aluminium construction.

I rather liked the simplicity of the original design, and while I thought about making an aluminium T-slot design around the time SeeMeCNC were doing their very impressive development, I settled on just a few small changes for my Rostock build.


The Rostock has a Delta configuration (Stewart platform) rather than the more common Cartesian coordinate system used by most other RepRap's. The main difference with a Delta based system is that motion on the vertical Z axis is achieved by driving all three positional motors together, this is due to the fact they are in a triangular configuration.

The main downside is that you need twice the machine height as vertical print area due to the way all the push-rods are required to be moved vertically to position the nozzle in X and Y directions.

The mechanical set-up looks complicated, but Rostock has less components than a 'normal' RepRap printer.
It's a very efficient and compact positioning system using only three motors, all able to be driven at high speed by belts or even with 'Spectra' fishing line.


This is a overview video of my Rostock build, you can also see it on YouTube in HD here

Building it up - 

First print out a set of plastic parts from Johann's Github Archive -

The universal joints are a little tricky to print and can be done with a 0.5mm nozzle, but they work better printed with a 0.4mm nozzle.

The rod ends are designed to have either carbon fiber  fiberglass, aluminium tube or wooden rods inserted into them. - I opted for hardwood dowels glued into place, make sure they are all the same length.

As with most RepRap machines many of the key parts are 3D printed. The push-rods can be fully printed if you prefer, Johann's diagonal rods.

The main Carriage and universal joints are assembled like this, using M3 bolts, washers and captive nuts (hidden on the inside of each joint arm).
They should be tight and still rotate freely, but not spin. 

Carriage arms are added - I used black heat shrink on the rods to keep them smooth.


You need three vertical rod carriages, these carry 2 x 8mm (LM8UU) Linear bearings or bushings.
Linear bearings are very noisy on this printer (I used them) I would strongly recommend thinking about using printed PLA/Nylon bushings or any other type of brass or plastic bushing rather than linear bearings.

Image by Propsfactory

Next time I take this printer apart, I'm going to replace the LM8UU's with these nice printed ones by Propsfactory printed in Nylon 618.

You should just have a small clearance on the vertical carriage ends, you may need to use quite thin zip ties for the LM8UU/Bushings or they can catch on the joints.


The finished carriage its then attached to the bushings/LM8uu's with zip ties.


Three motor mounts, for Nema17 motors.

You will also need some 12mm Plywood or similar material for the base, and you can use the same for the top, I used 6mm Clear Polycarbonate sheet as I will be adding further rigidity with some aluminium T-slot.

The Plywood plate and top dimensions can be found here - Many thanks Culain

One of my small modifications was to add feet to this printer, it serves to raise the platform so both the electronics and power supply can be fitted neatly under the ply platform. It also provides a stable base.

These Rostock feet can be found here, 3 different versions and my Sketchup file if you need it.

Nema 17 motors can be attached and if you want the optional bearing support can also be added.

I fitted the bearing support as I had originally intended to make the printer run with Spectra line, I dropped this early on as I wanted to get the system up and running, but after using Spectra line with the Tantillus printer, I will take another look at implementing it on Rostock.

Spectra line idler - a simple brass bushing and two printed rings.

I had the whole Rostock carriage working with Spectra line, but I was not happy with my motors, they were under-powered Unipolar types (I'll go into that in a separate post) so for now I switched back to using normal 2.5mm Belts.

In the original Rostock design, more 12mm Ply wood panels were used for the upright supports, I replaced them with lightweight 20mm x 40mm Extruded aluminium uprights (800mm tall).

Using aluminium sections makes it easy to attach extruders, filament spools and other things to the machine and gives it a clean look compared to more sheets of ply wood.

Electronics - 

I'm sticking to my slightly unconventional 5 point mounting system for the Heated bed, this always works so well for me. I added PET tape for insulation and to help further protect the PCB tracking. The solid copper side will be used for the print surface.

Cooking mesh as the insulator, Aluminium foil and card as the heat shield / reflector

Wiring and thermistor - then mount it to the Ply wood platform with spacer washers, as required.


I'm using the Arduino Mega and RAMPS 1.4 board for this build, it's the last one I have, so for future projects the RUMBA or Megatronics boards will be used, or maybe something else... 


Three hall effect sensors are fitted to the tops of each axis, these are ideal for a machine like Rostock as the home position is all the way at the top. Upon printing, the head moves down to the print surface. Hall effect sensors use small magnets fitted on the carriage to be triggered, you can tune them with a on-board trim pot, so micro-fine accuracy for the first layer can be obtained, and they repeat position detection perfectly.

All the electronics and power supply are mounted on a cut up plastic chopping board for ease of assembly.
I'm using a 20A 12V supply.


All connected up and still easy to access if required.

Extruder - 
This is a modified Greg's extruder, for Bowden drive and 1.75mm filament.

I have still not yet found (or designed) anything better than the Geared Greg's extruder with Herringbone gears. All direct drive extruders I have tried to date, are in my opinion, a waste of time. 

It can be mounted on the T-slot at an angle suitable for the bowden tube and the very tall Z travel.

Files for this Bodwen Geared Extruder can be found here - The Sketchup file is also added - and it also works well for many other printers, not just Rostock.

Hot End - 

I'm using a J-Head Mk-V-BV for the hot-end, 0.4mm nozzle and 1.75mm filament guide From Hotends.com - they totally rock, and handle abuse and constant running without getting upset.

I originally tried a J-head clone, but had a rather poor experience with that, the supplier has since made further modifications and I have a modified one to try out, I'm planning a hot-end comparison mega-test at some point soon. A recent explosion of new designs are popping up all over the place. - keep an eye out for that.

For the J-head mount I originally downloaded this version by Piit79 shown below, 
After printing one, I decide not to use it, but to make some modifications, shown below.

My original modifications added more stability to the mount and also added M4 bolts for the Groove mount found on most J-heads.

The revised design worked, but I didn't like the bowden clamp method, so I removed it and replaced with a screw in Pneumatic fitting ,the same as the Extruder. This always works really well and even allows the tube to rotate if required.

The heat shield shown was a nice idea but I didn't end up using it as it restricted air flow to the PEEK block and I found that the extra vertical M3 bolts were not required.

You can get the J-head extruder mount files here - Sketchup file also included if you want to change anything.

Next it was wired and ready to calibrate and test.

I also added a standard 4 line LCD and SD slot to the RAMPS electronics, you can see below.

As you can see from the above Rostock is tall, but uses a smaller amount of desk space than a typical RepRap 3D printer. 

Sitting on the Rostock print bed above is a Tantillus 3D printer for size comparison, it can print some really big things!
I made a matching Glow in the Dark enclosure for the LCD and SD card, modified and based on the nice model by Chri here


It mounts on the short section of 20mm T-slot at the front of the machine and sits at a 45 degree angle - nice and easy to use and see.

Did I mention this Rostock glows!

This Rostock printer is completely made in Glowbug Yellow PLA from Faberdashery
It Glow in the Dark for that little bit extra special printing experience.

Firmware and Calibration- 

The firmware used on Rostock is a modified version of Marlin, Johann removed the Cartesian engine and replaced it with the Delta coordinate system, so for anyone familiar with Marlin it's simple to get up and running.

You can get the Firmware for Rostock and Kossel on Johann's Github  page here

If you have not made too many changes to the standard sized Rostock, it's almost all set-up for you, but as always check the config.h carefully, especially for electronics type, end-stop orientation and type and not forgetting your extruder calibration.

One really great thing about this printer is the fact the carriage moves out of the way before a print and you have a Z offset defined in the firmware. for me this was set at 395mm with a 4mm heated Glass bed, but it's great when you need to print on other surfaces. All you need to do it adjust this offset for any difference in print surface thickness. No further adjustments of end-stops needed after initial setup. In four months I have not adjusted them once.

When I want to print with Nylon, I just clip a 2mm plate of Tufnol onto the Glass bed and adjust the Z offset to 393mm.

First print- 

My first print was the Bud vase by MakeAlot, this was super sized to cover a good proportion of the print surface and allowing a good check the vertical build area.

Hairspray on heated mirror-glass - works well.

After fine calibration with the hall effect end-stop sensors, I had a flat and level bed. I have also started using Hair-spray with PLA on glass, it works well and is not quite as powerful as watered down PVA glue, so part release is much easier.

I used 10% infill with the Bud vase, and concentric infill allows you to quickly see if you have any Z axis alignment issues.

I was rather stunned how well Rostock does vertical alignment, it's easily the best printer for speed, accuracy and layer alignment that I have built to-date.

I had some minor issues on layer-change caused by retraction speed and length, but after increasing that from 3mm to 4mm and speeding up the extruder to 40mm/Sec in firmware Rostock was printing well.

Another very small print and 0.25mm layers, shows how good the layer alignment is with Rostock. (Small version of the Tiki statues, see below)


This is collection of Rostock printing various things, you can also see it on YouTube in HD here


Printing Big Stuff- 

Next stop was to print some things I have always wanted to try at a large scale.

Before Rostock I was limited to about 145mm height on the big MendelMAX, now I have almost 400mm of Z build height.

The obvious next choice being any of the the amazing Math Art designs by Asher Nahmias ( AKA - @Dizingof) 


First up was the Lava vase, this is a very detailed model, with many folds and only small overhangs, it's easy* to 3D print and looks great.

*easy is relative, almost anything with 3D printing can be a total nightmare if you don't have things set-up well :)

You can print it hollow, but the base section needs at least 5% support the the internal floor.


Next up was another model by Dizingof, this time the rather interesting Water Lilly Vase -


Really nice detail on this design and again easy to FFF 3D print.

The finished print is just under 280mm High

The Trinocular 3pot vase is nice, but I over estimated the use of infill (15%) on this one and it ended up weighing over 400gramms - and I ran out of Yellow plastic right at the end of the build - 


So here is a quick tip for when you get to the end of a spool during a print - 
For 1.75mm Filament it's quite hard to manually join, but if you use a small section of 3mm Outer and 2mm Inner diameters PTFE tube, you can join it very easily.

First cut the tail and of the existing filament being used in your machine (yellow above) and slide on the short tube section, then have your new filament end ready (pearl white) and melt the end of the first filament (yellow) slide up the tube so half of the now melted yellow end is in the tube, and slide in your second filament.

Heat the outside of the tube again, just a little and push both filaments together, then pull slightly apart and roll the tube in your fingers.

You will end up with a nice strong join that should have no problems going through your extruder, even in a bowden configuration.


The small tube should not cause a problem, it will usually just be at the front of your extruder, just remember to remove the tube section the next time you change filament or change colour.

Another top tip is to always use a small sponge clamped around your filament before it goes into your extruder.

This was collected from about 750g (~400M) of loose 1.75mm filament, it had been sat around for a few weeks on a open spool, but it's amazing how much dust and fluff can be trapped in your material, just imagine that clogging up your extruder and hot-end.

Tornado Vase design my Mere, considerably bigger than the original.

Another favorite - The Teethy Tiki model by Perry Engel (AKA - Cerberus333) - do check out the other designs by Perry, they are really nice and great fun too.

Still not maxing out my build height - this print is 340mm tall (13.5")

The Heart Vase design by JelleAtProtospace printed big, (Also makes a great sweet bowl when half printed)


It also has another name on Thingiveres... I'll leave that to your imagination.


Many thanks to Johann C Rocholl for designing the most innovative and inspiring RepRap 3D Art printer of 2012. Hopefully in 2013 will see some equally wonderful open source designs.

I have already started designing my own version of a 3D Delta printer, as I was so impressed with this one.

I originally posted this Rostock 3D printer build over on the 3D printing industry Website, a rather good place for all news and views relating to 3D printing, do check it out, I'm sure you will find it very interesting.


In other 3D news - 

I made up an Eggbot printer for Easter printing with my kids, they love it - here's a quick shot of very first prints -

 It's just about dialled in now - getting some nice results from this little machine -


I'll do a post about how to build one up at some point, but if you can't wait, I printed out this one from Glasswalker, and do a search on eggbot for designs to inspire and print out onto your choice of Egg shaped object. Happy Eggster.


I'll have another post very soon with some very interesting printing effects...

Thanks for reading, happy printing.

Rich.