* Tie-Dye 3D printing with Nylon 618 *


Taluman Nylon 618 is a very versatile printing material. Nylon does not require a heated bed, has low warp, and cooling fans are not required for both big or tiny printing.


Nylon has amazing self-bonding properties making any FFF (layer-by-layer) printed objects very
strong and less prone to de-lamination.

Another aspect of its development was the ability to colour the Nylon with fabric Dye. That hits almost every spot for me!


You can print big and really tiny things in Nylon
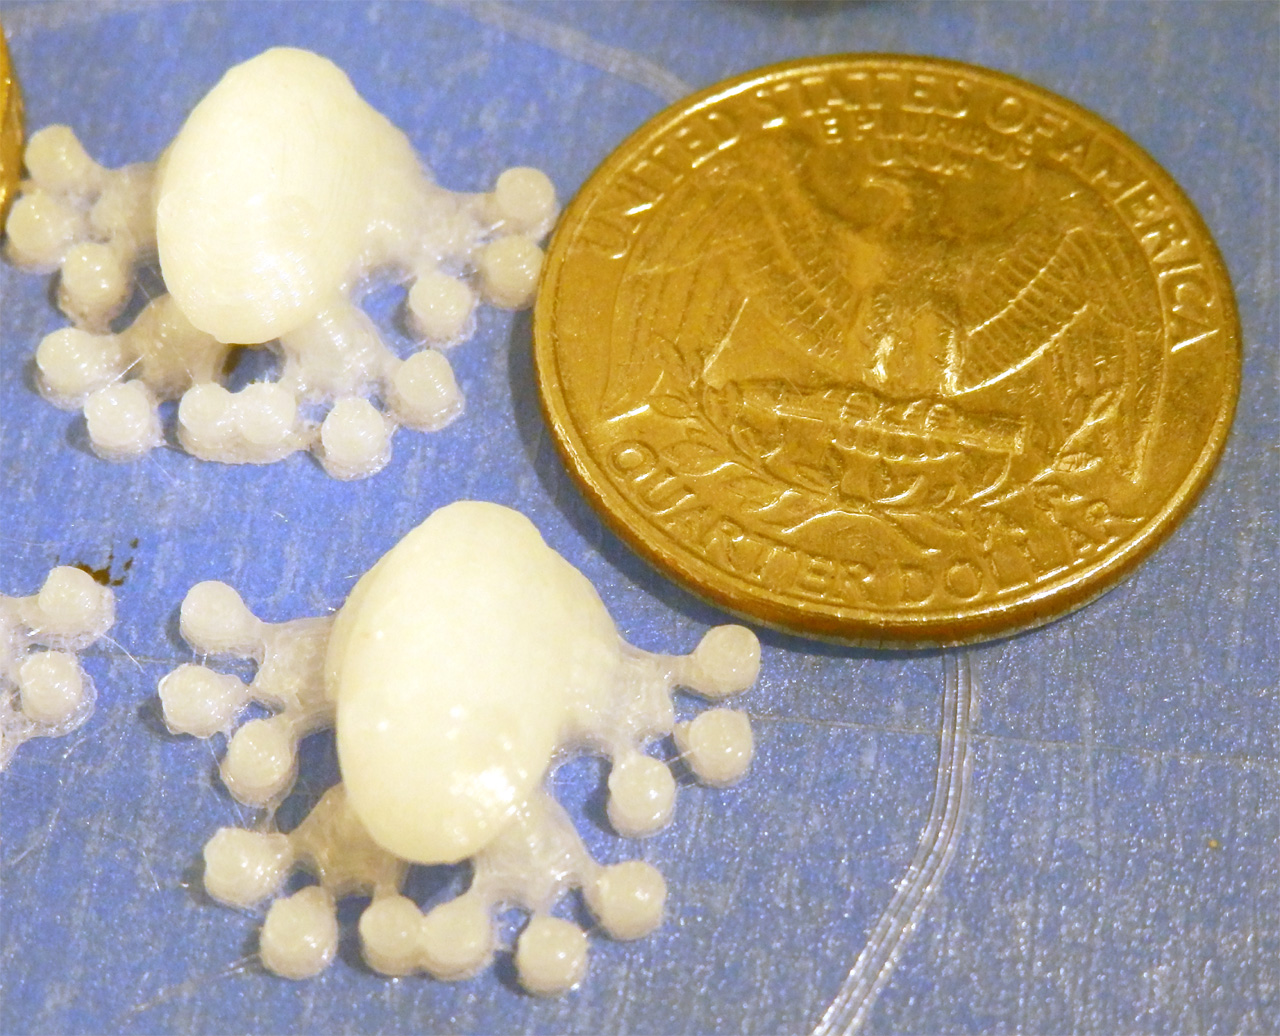
No fans or heated beds required!


Natural Nylon 618 material.
Another aspect of its development was the ability to colour the Nylon with fabric Dye. That hits almost every spot for me!
From the moment I spotted the 618 Nylon was available I
wanted to try colouring the raw filament with more than one colour, something I
have always wanted manufacturers to make is a range of filaments that have
changes of colour during the roll or even across the roll, now I had a way to
do it myself.
Taulman 3D recommends printing with the natural filament and
then dyeing the parts afterwards for best results, but I wanted to see what
happened when dyeing the filament first as that sounded a lot more fun.
Nylon 618 Intro video-
Here is an introduction video going over the simple Filament Dyeing process, You can also watch it in HD on YouTube Here -
I wanted as simple method as possible to dye the filament
rolls, nothing too messy or complicated, so obviously I ignored the instructions...

I used powder based Rit dye, this is compatible with Nylon,
if you try anything else, do make sure it's suitable, some Dye's state they are
not, and some (Dylon for example) don't seem to give any real advice on Nylon.
Other specific acid based dyes are designed for Nylon, but getting hold of them is not
all that easy in the UK, seems a little easier in the US.
The Rit Dye website recommends adding Vinegar when trying to
dye Nylon, I can say that really didn't work for me, and seemed to make the dye
almost useless. I’m not sure why it didn't help as the acid content of Vinegar
or other things like citric acid are often used when dying Nylon based
products.
You can use other natural dyes for Nylon, Cotchineal
(squashed bugs) makes a very strong red dye, Turmeric and tea also work on
Nylon.
Other links suggest adding add extra Salt to the Dye, this
does not seem to hinder the dyeing process, but it's hard to say if it also
helped with my particular setup as I only did it with one colour and that was an already dark shade.
After ignoring the instructions for the dye and most other information I could find, I just boiled a
kettle of water, and added around 200ml to the Rit Dye sachet in a glass Jam
jar – stirred for 1 minute until dissolved.
It's a good idea to tie-wrap or secure the filament into a
coil before dyeing. Also you want to drop the filament into hot (boiling if
possible) water before putting it into the dissolved dye. Just for a few
minutes to get it up to temperature.


Here is a before and after shot.

Note - the Nylon based tie-wraps also dye really well!
This is how it's done -

Then I just put the hot filament into a Zip-top bag and
poured in the 200ml of dye, as you can see I wanted just half or less of the
coil to be covered in the bag (depending on bag size).


Leave it for 30mins and shake/swish it about in the bag once
or twice if you remember.
You can leave it for longer, but 30mins seems to be a good
time to get a nice colour from this extra concentrated dye.


After 30mins or longer, you can remove the coil, and rinse in warm water, then cold water.


The one I added vinegar too was unfortunately the magenta
(pink/fuchsia) so that really didn't work at all well, and ended up being more
like a light pink/orange for some reason – I'll try again without the vinegar
next time.

The yellow was done just with the Dye, this worked really
well and was very fast acting and seems to give the strongest colour when
printed.

For the Teal (dark green) I tried adding salt, this didn't
seem to help and maybe needed longer to get a deep colour, hard to tell, but
next time I use Rit dye it's going to be just plain.
Basically I would warn against adding Vinegar or salt and
try to keep the dye as hot as possible for as long as possible.

You could do a whole coil if you lay it down in a zip bag or
boil it up in a pan, or if like me you want a mixed filament 'tartan look' ;)
rotate the filament in the bag and add another colour. Dye the next section
like above, rinse and repeat.

 Starting to look rather awesome don't you think?

 Starting to look rather awesome don't you think?
In the end you should have tie-dye filament! you then need
to dry out really well before use.

I'm sure you could wrap and bind the filament in all sorts
of ways with rubber bands or plastic to get some really interesting and
colourful effects.


I did think about drying it in an oven, I have done this
before with ABS and PLA, this should also work well for Nylon, but as I was
going away for a week I decided to leave the coils in an airing cupboard at a
slightly elevated temperature, this worked extremely well and all of my spare
ABS is stored in this cupboard permanently to keep out any moisture.
Another trick mentioned on the RepRap forums (by Sublime) is to put your
filament in a metal of wooden box with a low wattage light bulb (~25w) to keep
it dry. You can of course use desiccant sachets, but remember these really only
do absorb a tiny amount of moisture and need to be dried themselves for re-use.

Printing with the filament is just as normal, I didn't see
any issues at all with it. No steam or pops as the filament was really dry,
actually better than when it had been originally delivered.
Layer bonding seems as strong as with natural Nylon, the
only change I decided to make was to increase the temperature of the print to
235 degrees C.


And one final note, if you plan to use Nylon for printing, MakeAlot directed me that the best surface material to print on is Tufnol (Whale brand) this cotton weave, resin based laminate is often used for mechanical jigs in the electronics or test area. You need to get the Whale brand type and not other similar products based on fiberglass or composites.

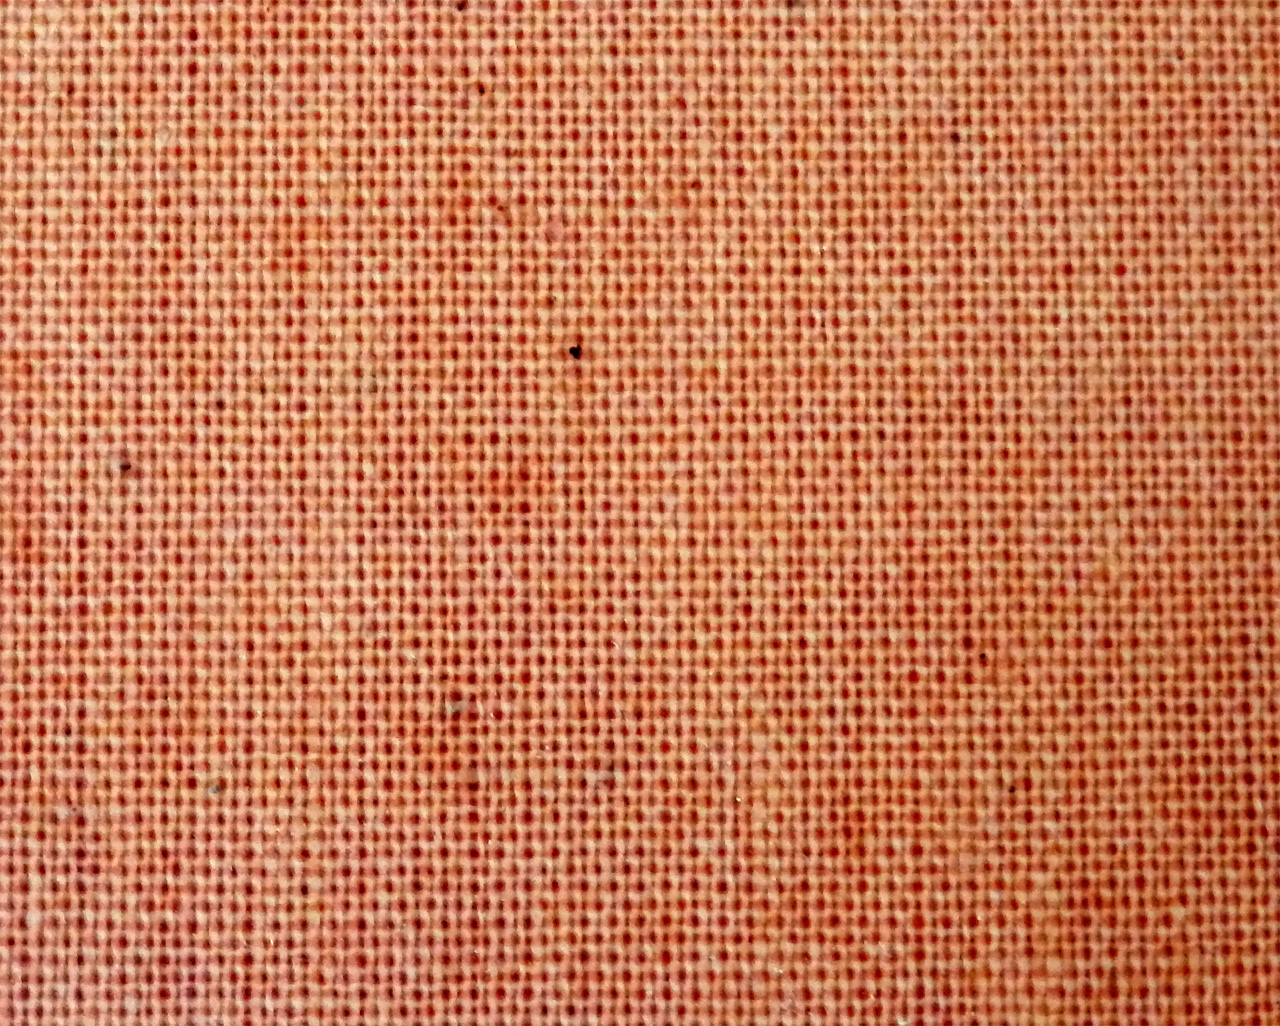
This is what the Tufnol (Whale brand) surface looks like.
It will go by different names over in the US (often Garolite LE) and may have other names where you are.

Tie Dye Printing and Destruction testing Nylon 618 video-
Here is a video showing the printing of Nylon on Tantilus and Rostock, I also do a little destruction testing at the end, showing the relative strength against PLA - You can also watch it in HD on YouTube Here -
After initial testing I had been lowering the print
temperature of the natural Nylon down to 225, but I noticed the dark Teal
colour looked shinier and smooth at a little higher temperature, so 235 Deg C
is my now normal setting for Nylon @60mm/sec printing speed using a 0.4mm J-head
nozzle.

Cutting the filament cross section shows that the dye
penetrates in about 85%, so you have a tiny core of natural looking filament,
this obviously all gets melted together in the extruder nozzle but it’s
interesting that the colours do not seem to really fade in the extruding process
as I thought it might, you do end up with nice and unique looking parts,
especially when the filament is cross multi-coloured.

I expect that doing a better dyeing process, having more
agitation and constant high heat would dye the entire filament and produce even
stronger colours.


I was originally trying to get a mix of Cyan, Magenta and
Yellow filament, and where these colours mixed should have also given me Red, Green
and Blue. But I could only get hold of Teal (dark green) instead of Cyan and I
also didn't allow the coils to mix enough as I rotated them for each of the
coloured dips.

I like this method as after you have dyed your coil there is
nothing else to do, where as dyeing the parts after printing would be a pain
each time you made a printed object, so I'm please how the first test came out
and will dye more Nylon Filament with some other colours next time.

I have printed all these models using both the Tantillus printer
as this was setup for 1.75mm Filament and also the Rostock for bigger models, both with cold Tufnol print surfaces.


Printing bigger Nylon prints
on the Rostock also seems to work extremely well, I have only done a few so far, but the Rostock seems very happy with Nylon too.


And they stay very stretchy, the dye does not seem to make any difference to layer bonding or stretch.


Many thanks for the great models by Ben Malouf (BenitoSanduchi) and Perry Engel (Cerberus333) these really make wonderful test pieces for Nylon printing and being thin
walled they don't take very long to print. Check out more of Ben's work on
Thingiverse Here and Perry's Here


Let me know what you think and send me some pictures if you
try out any Tie-Dye printing!

I bought 3 rolls of the Taulman 618 filament, and dyed a lot of it, all sorts of different colour mixes, many I have not yet had time to try out, and it does go a very long way when printing hollow pots!
Plenty more great things to print out that deserve the Tye-Dye treatment, let me know what you would like to see Tye-Dye 3D printed and I'll do my best.

Very excitingly as I typed this up, Taulman3D has just announced a new clear Nylon 645 material with very high strength properties, I can't wait to try it out. I can imagine dyeing this new clear material would look rather fantastic when printed.
In other 3D news -
E3D All metal hot-end -

I just received a new all metal hot-end from e3d-Online, it's one of the best machined objects I have ever received. And this really is an all metal hot-end, no PTFE inserts or sealing tape, just a stainless thermal junction and Aluminium heater block and heat-sink.
If it operates as good as it looks, we should have another option for really high temperature printing.
It's not as heavy as it looks :) it has a J-head compatible Groove mount that fits perfectly into Greg style extruders and all the modified Bowden hot-end mounts I have made so far.
I plan to test it with Nylon, Polycarbonate, PLA, ABS and PC-ABS and any other materials I can get my hands on very soon.
I may need to change the thermistor over to a thermocouple for some materials, but I will let you all know how it performs.
3D Printing Presentation in Cheltenham -
Also, I will be speaking about RepRap and 3D printing along with demo's at the Cheltenham design festival - April 13th, do come along if you can and say hello.
Thanks for reading, happy printing.
E3D All metal hot-end -

I just received a new all metal hot-end from e3d-Online, it's one of the best machined objects I have ever received. And this really is an all metal hot-end, no PTFE inserts or sealing tape, just a stainless thermal junction and Aluminium heater block and heat-sink.
If it operates as good as it looks, we should have another option for really high temperature printing.
It's not as heavy as it looks :) it has a J-head compatible Groove mount that fits perfectly into Greg style extruders and all the modified Bowden hot-end mounts I have made so far.
I plan to test it with Nylon, Polycarbonate, PLA, ABS and PC-ABS and any other materials I can get my hands on very soon.
I may need to change the thermistor over to a thermocouple for some materials, but I will let you all know how it performs.
3D Printing Presentation in Cheltenham -
Also, I will be speaking about RepRap and 3D printing along with demo's at the Cheltenham design festival - April 13th, do come along if you can and say hello.
Thanks for reading, happy printing.
Rich.


