Showing posts with label build. Show all posts

Thursday, 1 February 2018

DIY Heated DryBox for 3D Printing filament - under $20

DIY Heated DryBox

In this blog post and Video I'm showing you how to make a simple heated drybox for your 3D printing filament that you can use whilst 3D Printing.


With just a few basic items from eBay (or similar) and some 3D design files to print (links at the bottom of this post) - you can make a drybox for both storage and in use while 3D printing.


An overview video of the heated drybox (including a #MasterSpool update) can be seen below and over on my Youtube channel here.


For an overview and background to this project, do take a look at the video, I'll dive straight into the main components in this blog post below - 

Polymaker Polybox - spotted at the recent TCT show.

During the TCT show in October last year, I had a chance to take a quick look at the Polymaker polybox. It's a neat enclosure, but I quickly realised that it is just an enclosure, that's all.

I pack all my filament in sealed zip-lock bags with desiccant. That's usually good enough for storage, but some materials do require drying or heating before use.

For some time I have been planning to build a dry heated storage box. 

Now that I know the Polybox just monitors temperature and humidity I decided to build my own, but with a heating capacity installed too.

It's surprising how simple it is to make a heated dry box with off-the-shelf components and a little 3D printing.

The polybox has a number of bearings that polymaker filament spools run on, I didn't want to do that because I use a lot more different types of materials, some use cardboard spools, and having the spool edges run on bearings, just creates cardboard fluff.

Other spools are very small (Taulman Nylon), they simply would not reach across the bearing points.

I decided to keep it simple and allow spools to be mounted on a standard sized spool mount. Different diameter mounts could then be printed as required.

As a minimum I wanted a box that would fit 2 x 1kg spools of filament and allow both to feed independently if required.

This one is a straightforward build - you should find it quite simple to print out the required 3D printed parts - assemble and make up the rest of the heated dry-box. Any questions - just ask.

The main component I used for heating is a simple flexible reptile heater - you can find these on eBay for just a few USD - Search for '15*28CM Adjustable Temperature Reptile Heating Heater Mat' 

The other main electronic component is the temperature and humidity monitor device, I opted for a round module, but you can get square and also ones with separate temperature sensing probes etc.


For the above temperature/Humidity sensor just search eBay for 'Mini LCD Celsius Digital Thermometer Hygrometer Temperature Humidity Meter Gauge'

Three 12mm cable glands make up the power in and dual filament out ports - just a simple 12mm hole will allow these to fit perfectly.

I bought a pack of 100 of  these way back in 2010 - so I have been finding uses for them ever since :)

Print out the 3D printed parts - I used FormFutura ReForm rPET filament for the above.

The printed spool holder uses a section of M8 threaded rod and two M8 nuts.

Lastly bags fg 50g desiccant can be fitted under the heater - they can easily be removed or changed at any time.


The reptile heater just slides in the grooves in the 3D printed parts.


Cable goes out of the back  of the box - allow yourself some slack cable so you can lift up the 3D printed parts to insert desiccant.

Optionally you can print out a seal for the lid - I made the above using ColorFabb nGen Flex - it has just the right level of flex, but not too floppy to easily seat onto the top of the box.


Fit the remaining two cable glands and use oversized tube to allow filament to feed out of your dry-box.

That's it. It uses 7w while being on, and does not take long to get to a stable ~30 Degrees C temperature - humidity will quite quickly drop to under 14%.

It's really useful for any type of dedicated support material - being able to be used while still inside the heated dry-box. It will also be great for Nylon, wood filaments, CF, PolySmooth and many other materials that are sensitive to moisture.

Bonus device - 

I also have a little bonus invention for monitoring your filament coils while they are in Zip-Lock-Bags - here is the SpoolCheck sensor.


It uses exactly the same thermistor and humidity sensor, and a small packet of desiccant as the heated dry box project.


Just pop it in the centre of any 'standard' filament spool (or a loaded MasterSpool ) - and pop it all in a zip-lock bag.


You basically end up with a way to monitor filament in storage, and see if any is not in tip-top-condition :)


Even overnight you should see a drop in humidity inside your 'drybag'

The files for both the heated drybox and the SpoolCheck sensor are up on -


Please do let me know if you make a heated drybox or find the SpoolCheck sensor useful - best to catch me on Twitter usually.


* Edit - ( for clarity and to answer a common question) -

I get a lot of questions about the dry-box project - the most common are -

Will this dry out my (damp) filament? - It's designed to keep good filament in good condition and stable for printing. It's not an oven, so I still recomend drying out materials like Nylon and PETG in an oven if they have been in the open for days. - Then use the heated dry box when you use the material on a print to stop the material getting saturated with moisture.

What would be a good % of moisture to look for on the hygrometer? (Or what's the best percentage figure) -

The % shown on the hygrometer is relative to temperature, so it's not the most ideal indication as we are also using a heater inside the enclosure. You will actually see the percentage rise up after switching on the heater, this is quite normal and to be expected.

What you are looking for is stability of the system - so for me that's around a display of 30 degrees C and a percentage of also around 30%

If you use the same sensor in a sealed bag with silica gel, and the temperature drops, and the silica gel takes moisture out of the internal atmosphere, you will see readings of room temperature and percentages of around 10% to 25% if you just leave the same sensor out on the shelf, you will see much higher readings depending on where you live and the ambient conditions.

Short answer is that the heated drybox is to keep things warm, dry and stable. so a reading of 30 degrees and 30% is really good, and it's all working well. An even lower percentage is even better, but it's more important to keep things consistent, this way every time you use the material you should get the same quality print results.


And some general info on the heated dry-box system and why I use it for consistent printing - 

It's all about consistency and stability - so I can tune a material for use, and then know it's going to use the same settings next time - without the material being in a different state / damp / temperature etc. - 

The silica gel is still doing some of the work for the heated dry-box. I’m just using the heater to help maintain stability and provide some consistency, warming the air inside to around 30 degrees C and regardless of room temperature changes, keep humidity shown below 30% @ 30 Degrees C.

For storage I don’t care so much about temperature – as long as the humidity is also showing a low measurement – at this time of the year (winter in the UK) I expect around ~18 degrees C and 10-20% humidity inside a sealed dry bag with a silica gel packet. Everything is around 14% right now for me.

Good -  
  • Stable temperature (not too high) and stable humidity (under 30%).
  • Temperature rising and the percentage of humidity being shown going down.
  • Temperature dropping and the percentage of humidity being shown going down or staying stable.
  • If temperature goes up, I don’t want to see the humidity also go up, stable is good, lowering is even better.
Bad –
  • Temperature rising and the percentage of humidity being shown also going up.
  • An ambient temperature of ~25 Degrees C and a humidity measurement of around 50%. In these conditions Nylon will absorb enough moisture (in 6-8 hours) to make the material almost useless for 3D printing – you will see steam coming from the nozzle, bubbles on the extruded material, frosting of the Nylon being extruded, weak printed parts and poor layer bonding.
Really bad –
  • Temperature lowering and the percentage of humidity being shown also going up.

* Edit


Thanks for reading, see you next time.

Rich.


Please join me on Twitter @RichRap3D

My profile and posts over on Google+

Files and designs shared on YouMagine

Files and designs shared on Thingiverse

Files and designs shared on GitHub

Files and designs shared on Repables 

My Youtube channel is here, all 3D Printing in Hi-Def video content.

Monday, 11 January 2016

Building and using the BQ Hephestos Version 2 3DPrinter

It's the start of a new year - 2016 - Sales of 3D Printers are still on the increase.

In this post I'm looking at the new BQ Hephestos V2 3D printer kit -  (Pre-production version).


This is an easy-to-assemble 3D Printer kit aimed at individuals, makers, and the education sector.

Right now if you look around at some of the big 3D printing companies, it's all bad news, redundancies and re-organisations, shift in consumer demand, lots of excuses that 3D printing is not doing what they thought it would...

But that's just not the case for many smaller and middle-sized 3D printing manufactures as demand ramps up and things start to turn from more than just a hobby.

Some companies have so much demand that even the use of '3D Print-farms', making parts to make more 3D Printers, are not enough to keep up with increasing sales orders.

BQ is one of these fortunate companies with orders outstripping manufacturing capacity. They told me recently - "something was needed to increase and grow how many 3D Printer kits could be sold to an expanding and global audience" - Sales are good for BQ.
Prusa i3 - Hephestos Version 1 - Image from Bq.com

The original BQ Hephestos (Ver 1) is an Open-Source 'RepRap' made out of many 3D Printed parts and closely based on the popular Prusa i3 configuration.
BQ WitBox - Image from Bq.com

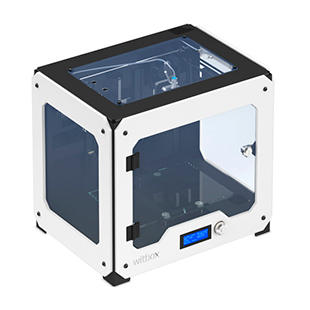
BQ's previous 3D Printer (The Witbox) Is also Open-Source, aimed at a higher overall specification and bigger, enclosed build area.

BQ have merged many of the best aspects of Witbox and Hephestos V1 and incorporated them into the Hephestos Version 2 (Kit) design.

I didn't have the opportunity to try out the Hephestos V1 or the Witbox, but I am familiar with the design. This post and video is about my experience using a pre-production Hephestos V2.

BQ have offices across Europe with a remit for education, and a willingness to be Open-Sourced in all they do. If you take a look over at the BQ 'Do It With Others - DIWO) - http://diwo.bq.com/ you can start to see what drives BQ forwards and how 3D printing is playing a significant part in this educational - maker direction.

One key aspect of the Hephestos V2 is that is uses no 3D Printed parts (well, it has one 3D printed fan duct, that's all). It's still all Open-Source and runs a customised version of the popular Marlin Firmware. It also still looks a little similar to the Prusa i3, but when you look closer it's had a completed re-design of the motion system and control electronics.

The Hephestos V2 is a great machine, as long as you take into account the limits of a cold build platform (not a problem for FilaFlex).


My introduction video for the Hephestos V2 explains more about the machine and what you can do with it -

Hephestos V2 Introduction video - (November 2015).


Please read below for further details and comments. An updated summary of the build, including some further enhancements and examples of printed parts from the Hephestos V2 can be seen my following video -

Hephestos V2 Update, pre-production build and machine upgrades -  (December 2015).

Kit Packaging...


Although the packaging is almost completely cardboard, it adds a considerable weight (pre-production kit packaging - things may change for the final version).


This is an ideal flexible plastic printer - 

If the Hephestos V2 printer was designed for anything in particular, I would say it was for printing in Flexible filaments like FilaFlex, NinjaFlex and SemiFlex - TPU / TPE materials.

The excellent extruder design allows 1.75mm flexibles to be printed very fast and accurately.

Certainly not everything is quite perfect, and I'm sure some of the pre-production issues will be ironed out before the launch and production shipments.

With the Hephestos V2, I'm not convinced that such a large build platform without a heated bed makes complete sense. But I do understand the benefit of having a low powered unit, for education sectors.

I have smaller delta printers (including my own 3DR design) that have no heated bed, I really like them, my children enjoy using them and they make sense because they have a small print area.

There is also no easy way to add a heated bed. The power supply can not deliver enough power and there is no easy way to mount either a PCB heater or a flexible silicone heat pad.

The electronic's do have options for a second extruder and possibly a heated bed, but the connector is not fitted on the version I have, so it will be interesting to see if BQ have a plan for customers that want or need a heated bed option.

In the video I show some of the key steps to build up this printer. It's easy to do, and the instructions are very clear and easy to follow.

I have also been experimenting with how well the Hephestos V2 prints in FilaFlex (It's fantastic).

All the great FilaFlex colours - Printed on the Hephestos V2 3D Printer.

I have also been printing a lot of moulds for various materials, including candle wax, soap, chocolate and clay. - More on this in a future blog post - keep a look out.


Casting materials (and foods) seem to release well from FilaFlex, so it's an easy process to design, make and use a 3D Printed flexible mould from the Hephestos V2.


Take a guess what this is...

This is a shock case for a Kindle Fire 7" tablet.


Designed to be easy to print and to protect the unit.


Inductive level sensing - 

The back of the glass build platform has a thin sheet of steel bonded to it. This is so the inductive sensor can accurately check the distance of the print nozzle to the build surface.


BQ have produced their own inductive sensor, it's fitted firmly behind the extruder and hot-end. Inductive sensors are good as a distance sensor because they don't require any physical contact to the surface.

You have to calibrate the sensor by setting the nozzle just touching the build plate and storing the offset distance, this is really easy to do with guided instructions on the LCD screen. My only frustration with this process is that you can't just easily change the offset distance value. The menu options make you do the level and distance process over again if it's not close enough for your first layer. (This was on the pre-production version - things may change before the machine is shipped).

Overall it's very accurate, I have not seen any deviation in sensing distance at all, the inductive sensor is a good solution for this type of 3D printer, it is not concerned by any surface coatings you apply or the type of material used for the build plate - as long as you have a flat sheet of steel underneath for it to sense. This is bonded to the back of the glass build plate for the Hephestos V2.

I really do like this printer, the kits is very easy to build and you get fantastic print results due to the very high quality parts that have been used. It's a very fast printer and the extruder is the best I have ever used for flexible filaments and it's also great for normal PLA plastic too.

BQ have not cut any corners (apart from lacking a heated bed, but we can forgive them for that), they have made a machine for a sensible price, using high quality parts that will last you a long time and produce great printed parts.


Final thoughts (about buying a 3D printer - of any type) - 

In a market that's racing to the bottom, it's not going to be easy for any company to stand out. Alternative 'generic' 3DPrinter kits can be sourced for a lot less than most machines on the market today, but do ask yourself if they are any good before parting with even a little money.

For me we are seeing an interesting time in Desktop 3D Printing, even more companies than ever are deciding to make their own model - a slight tweak here, a different configuration or size. But to the average user that wants a 3D Printer (or should I say they want the capability of 3D printed objects at home) - it's starting to get really confusing who and what machine to buy.

We are going to see many more revisions before the 'ultimate' desktop 3D printer is with us, and that will still take quite a long time (many more years) to happen. So my advice is still very similar if you are looking to get into 3D printing -

1) - Have a 'need' for a 3D printer - remember you can use 3D printing services if you need special parts printed (gold, ceramic, very high quality details).

2) - If you just 'want' a 3D printer - then that's fine. Spend some time thinking about what you may do with it, be sure to understand how long the print process takes (many hours most of the time).

3) - If you have a need and want to operate a desktop 3D printer, investigate if  plastic (FDM) printing or SLA (resin) based machines are more appropriate for your application.

4) - Value for money - this depends on many factors, how much support you wish to get from the manufacturer. If you want a kit or a ready-built machine, and how much you want to spend.

If you spend ~£150 / $200 / 200 euro on a 3D printer - even a kit, you may be disappointed, frustrated or need to spend more to get it working well - ( Like buying a new hot-end and/or extruder for example ).

5) - As a guide, it's still sensible to be thinking about spending around £500 / 700 euro / $750 as a minimum for a machine that can provide quality prints using good components in the design.

If you plan to spend more than £1500+ / 2000 euro / $2000 For a 'desktop 3D Printer' have a very good reason and do plenty of research first.

I have many more projects, 3D printer and material reviews along with development experiments coming up for this year, stay tuned and do get in contact.

Catch me on Twitter @RichRap3D

Or over on Google+

Thanks for reading, see you next time.

Richard.


Monday, 8 April 2013

Rostock Delta 3D printer build

Rostock !

Hello and welcome to the Rostock build, it's take a while to get this one documented, I blame that on having way too much fun with my printers and development at the moment, I'll try to be a little quicker on future projects.


The Rostock 3D printer was originally developed by Johann C. Rocholl and is now quite well established in RepRap terms, it's over a year old and has had many different spin-off's and variants by other users and developers. Even Johann has a new design (Kossel Wiki here) based on the openbeam Aluminium construction.

I rather liked the simplicity of the original design, and while I thought about making an aluminium T-slot design around the time SeeMeCNC were doing their very impressive development, I settled on just a few small changes for my Rostock build.


The Rostock has a Delta configuration (Stewart platform) rather than the more common Cartesian coordinate system used by most other RepRap's. The main difference with a Delta based system is that motion on the vertical Z axis is achieved by driving all three positional motors together, this is due to the fact they are in a triangular configuration.

The main downside is that you need twice the machine height as vertical print area due to the way all the push-rods are required to be moved vertically to position the nozzle in X and Y directions.

The mechanical set-up looks complicated, but Rostock has less components than a 'normal' RepRap printer.
It's a very efficient and compact positioning system using only three motors, all able to be driven at high speed by belts or even with 'Spectra' fishing line.


This is a overview video of my Rostock build, you can also see it on YouTube in HD here

Building it up - 

First print out a set of plastic parts from Johann's Github Archive -

The universal joints are a little tricky to print and can be done with a 0.5mm nozzle, but they work better printed with a 0.4mm nozzle.

The rod ends are designed to have either carbon fiber  fiberglass, aluminium tube or wooden rods inserted into them. - I opted for hardwood dowels glued into place, make sure they are all the same length.

As with most RepRap machines many of the key parts are 3D printed. The push-rods can be fully printed if you prefer, Johann's diagonal rods.

The main Carriage and universal joints are assembled like this, using M3 bolts, washers and captive nuts (hidden on the inside of each joint arm).
They should be tight and still rotate freely, but not spin. 

Carriage arms are added - I used black heat shrink on the rods to keep them smooth.


You need three vertical rod carriages, these carry 2 x 8mm (LM8UU) Linear bearings or bushings.
Linear bearings are very noisy on this printer (I used them) I would strongly recommend thinking about using printed PLA/Nylon bushings or any other type of brass or plastic bushing rather than linear bearings.

Image by Propsfactory

Next time I take this printer apart, I'm going to replace the LM8UU's with these nice printed ones by Propsfactory printed in Nylon 618.

You should just have a small clearance on the vertical carriage ends, you may need to use quite thin zip ties for the LM8UU/Bushings or they can catch on the joints.


The finished carriage its then attached to the bushings/LM8uu's with zip ties.


Three motor mounts, for Nema17 motors.

You will also need some 12mm Plywood or similar material for the base, and you can use the same for the top, I used 6mm Clear Polycarbonate sheet as I will be adding further rigidity with some aluminium T-slot.

The Plywood plate and top dimensions can be found here - Many thanks Culain

One of my small modifications was to add feet to this printer, it serves to raise the platform so both the electronics and power supply can be fitted neatly under the ply platform. It also provides a stable base.

These Rostock feet can be found here, 3 different versions and my Sketchup file if you need it.

Nema 17 motors can be attached and if you want the optional bearing support can also be added.

I fitted the bearing support as I had originally intended to make the printer run with Spectra line, I dropped this early on as I wanted to get the system up and running, but after using Spectra line with the Tantillus printer, I will take another look at implementing it on Rostock.

Spectra line idler - a simple brass bushing and two printed rings.

I had the whole Rostock carriage working with Spectra line, but I was not happy with my motors, they were under-powered Unipolar types (I'll go into that in a separate post) so for now I switched back to using normal 2.5mm Belts.

In the original Rostock design, more 12mm Ply wood panels were used for the upright supports, I replaced them with lightweight 20mm x 40mm Extruded aluminium uprights (800mm tall).

Using aluminium sections makes it easy to attach extruders, filament spools and other things to the machine and gives it a clean look compared to more sheets of ply wood.

Electronics - 

I'm sticking to my slightly unconventional 5 point mounting system for the Heated bed, this always works so well for me. I added PET tape for insulation and to help further protect the PCB tracking. The solid copper side will be used for the print surface.

Cooking mesh as the insulator, Aluminium foil and card as the heat shield / reflector

Wiring and thermistor - then mount it to the Ply wood platform with spacer washers, as required.


I'm using the Arduino Mega and RAMPS 1.4 board for this build, it's the last one I have, so for future projects the RUMBA or Megatronics boards will be used, or maybe something else... 


Three hall effect sensors are fitted to the tops of each axis, these are ideal for a machine like Rostock as the home position is all the way at the top. Upon printing, the head moves down to the print surface. Hall effect sensors use small magnets fitted on the carriage to be triggered, you can tune them with a on-board trim pot, so micro-fine accuracy for the first layer can be obtained, and they repeat position detection perfectly.

All the electronics and power supply are mounted on a cut up plastic chopping board for ease of assembly.
I'm using a 20A 12V supply.


All connected up and still easy to access if required.

Extruder - 
This is a modified Greg's extruder, for Bowden drive and 1.75mm filament.

I have still not yet found (or designed) anything better than the Geared Greg's extruder with Herringbone gears. All direct drive extruders I have tried to date, are in my opinion, a waste of time. 

It can be mounted on the T-slot at an angle suitable for the bowden tube and the very tall Z travel.

Files for this Bodwen Geared Extruder can be found here - The Sketchup file is also added - and it also works well for many other printers, not just Rostock.

Hot End - 

I'm using a J-Head Mk-V-BV for the hot-end, 0.4mm nozzle and 1.75mm filament guide From Hotends.com - they totally rock, and handle abuse and constant running without getting upset.

I originally tried a J-head clone, but had a rather poor experience with that, the supplier has since made further modifications and I have a modified one to try out, I'm planning a hot-end comparison mega-test at some point soon. A recent explosion of new designs are popping up all over the place. - keep an eye out for that.

For the J-head mount I originally downloaded this version by Piit79 shown below, 
After printing one, I decide not to use it, but to make some modifications, shown below.

My original modifications added more stability to the mount and also added M4 bolts for the Groove mount found on most J-heads.

The revised design worked, but I didn't like the bowden clamp method, so I removed it and replaced with a screw in Pneumatic fitting ,the same as the Extruder. This always works really well and even allows the tube to rotate if required.

The heat shield shown was a nice idea but I didn't end up using it as it restricted air flow to the PEEK block and I found that the extra vertical M3 bolts were not required.

You can get the J-head extruder mount files here - Sketchup file also included if you want to change anything.

Next it was wired and ready to calibrate and test.

I also added a standard 4 line LCD and SD slot to the RAMPS electronics, you can see below.

As you can see from the above Rostock is tall, but uses a smaller amount of desk space than a typical RepRap 3D printer. 

Sitting on the Rostock print bed above is a Tantillus 3D printer for size comparison, it can print some really big things!
I made a matching Glow in the Dark enclosure for the LCD and SD card, modified and based on the nice model by Chri here


It mounts on the short section of 20mm T-slot at the front of the machine and sits at a 45 degree angle - nice and easy to use and see.

Did I mention this Rostock glows!

This Rostock printer is completely made in Glowbug Yellow PLA from Faberdashery
It Glow in the Dark for that little bit extra special printing experience.

Firmware and Calibration- 

The firmware used on Rostock is a modified version of Marlin, Johann removed the Cartesian engine and replaced it with the Delta coordinate system, so for anyone familiar with Marlin it's simple to get up and running.

You can get the Firmware for Rostock and Kossel on Johann's Github  page here

If you have not made too many changes to the standard sized Rostock, it's almost all set-up for you, but as always check the config.h carefully, especially for electronics type, end-stop orientation and type and not forgetting your extruder calibration.

One really great thing about this printer is the fact the carriage moves out of the way before a print and you have a Z offset defined in the firmware. for me this was set at 395mm with a 4mm heated Glass bed, but it's great when you need to print on other surfaces. All you need to do it adjust this offset for any difference in print surface thickness. No further adjustments of end-stops needed after initial setup. In four months I have not adjusted them once.

When I want to print with Nylon, I just clip a 2mm plate of Tufnol onto the Glass bed and adjust the Z offset to 393mm.

First print- 

My first print was the Bud vase by MakeAlot, this was super sized to cover a good proportion of the print surface and allowing a good check the vertical build area.

Hairspray on heated mirror-glass - works well.

After fine calibration with the hall effect end-stop sensors, I had a flat and level bed. I have also started using Hair-spray with PLA on glass, it works well and is not quite as powerful as watered down PVA glue, so part release is much easier.

I used 10% infill with the Bud vase, and concentric infill allows you to quickly see if you have any Z axis alignment issues.

I was rather stunned how well Rostock does vertical alignment, it's easily the best printer for speed, accuracy and layer alignment that I have built to-date.

I had some minor issues on layer-change caused by retraction speed and length, but after increasing that from 3mm to 4mm and speeding up the extruder to 40mm/Sec in firmware Rostock was printing well.

Another very small print and 0.25mm layers, shows how good the layer alignment is with Rostock. (Small version of the Tiki statues, see below)


This is collection of Rostock printing various things, you can also see it on YouTube in HD here


Printing Big Stuff- 

Next stop was to print some things I have always wanted to try at a large scale.

Before Rostock I was limited to about 145mm height on the big MendelMAX, now I have almost 400mm of Z build height.

The obvious next choice being any of the the amazing Math Art designs by Asher Nahmias ( AKA - @Dizingof) 


First up was the Lava vase, this is a very detailed model, with many folds and only small overhangs, it's easy* to 3D print and looks great.

*easy is relative, almost anything with 3D printing can be a total nightmare if you don't have things set-up well :)

You can print it hollow, but the base section needs at least 5% support the the internal floor.


Next up was another model by Dizingof, this time the rather interesting Water Lilly Vase -


Really nice detail on this design and again easy to FFF 3D print.

The finished print is just under 280mm High

The Trinocular 3pot vase is nice, but I over estimated the use of infill (15%) on this one and it ended up weighing over 400gramms - and I ran out of Yellow plastic right at the end of the build - 


So here is a quick tip for when you get to the end of a spool during a print - 
For 1.75mm Filament it's quite hard to manually join, but if you use a small section of 3mm Outer and 2mm Inner diameters PTFE tube, you can join it very easily.

First cut the tail and of the existing filament being used in your machine (yellow above) and slide on the short tube section, then have your new filament end ready (pearl white) and melt the end of the first filament (yellow) slide up the tube so half of the now melted yellow end is in the tube, and slide in your second filament.

Heat the outside of the tube again, just a little and push both filaments together, then pull slightly apart and roll the tube in your fingers.

You will end up with a nice strong join that should have no problems going through your extruder, even in a bowden configuration.


The small tube should not cause a problem, it will usually just be at the front of your extruder, just remember to remove the tube section the next time you change filament or change colour.

Another top tip is to always use a small sponge clamped around your filament before it goes into your extruder.

This was collected from about 750g (~400M) of loose 1.75mm filament, it had been sat around for a few weeks on a open spool, but it's amazing how much dust and fluff can be trapped in your material, just imagine that clogging up your extruder and hot-end.

Tornado Vase design my Mere, considerably bigger than the original.

Another favorite - The Teethy Tiki model by Perry Engel (AKA - Cerberus333) - do check out the other designs by Perry, they are really nice and great fun too.

Still not maxing out my build height - this print is 340mm tall (13.5")

The Heart Vase design by JelleAtProtospace printed big, (Also makes a great sweet bowl when half printed)


It also has another name on Thingiveres... I'll leave that to your imagination.


Many thanks to Johann C Rocholl for designing the most innovative and inspiring RepRap 3D Art printer of 2012. Hopefully in 2013 will see some equally wonderful open source designs.

I have already started designing my own version of a 3D Delta printer, as I was so impressed with this one.

I originally posted this Rostock 3D printer build over on the 3D printing industry Website, a rather good place for all news and views relating to 3D printing, do check it out, I'm sure you will find it very interesting.


In other 3D news - 

I made up an Eggbot printer for Easter printing with my kids, they love it - here's a quick shot of very first prints -

 It's just about dialled in now - getting some nice results from this little machine -


I'll do a post about how to build one up at some point, but if you can't wait, I printed out this one from Glasswalker, and do a search on eggbot for designs to inspire and print out onto your choice of Egg shaped object. Happy Eggster.


I'll have another post very soon with some very interesting printing effects...

Thanks for reading, happy printing.

Rich.