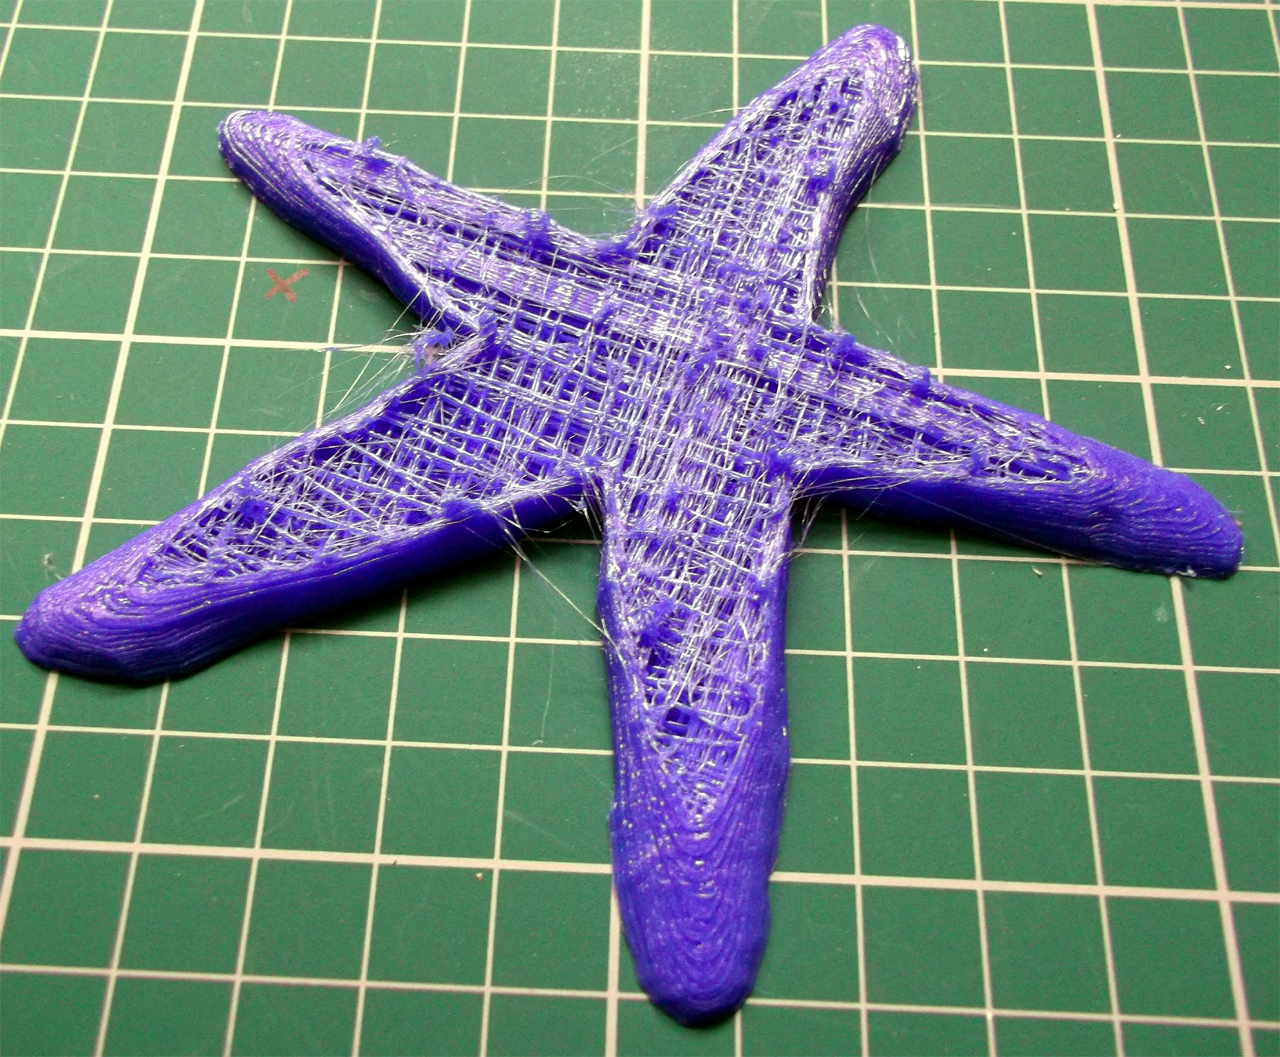
Sometimes you need to have more control over the way your 3D printer wants to print an object. This tutorial provides an example of how to change and optimise perimeter widths, to make the most of part strength or surface finish. I'll also give some examples of output Gcode and point out what to look for in selecting 'good' 3D printing tool-paths.
For this tutorial we are using Slic3r Version 1.1.7, but any recent version has the same ability to manually define the width of a printed perimeter.

Slic3r, Cura, Simply3D, Craftware and other applications 'slice up' our 3D model and converts it into layer-by-layer Gcode (instructions a 3D printer can understand). For any 3D printer that uses a filament (FFF/FDM) to create a model, it's quite important how the gcode instructions are sequenced, and also what order each section of every layer is printed.
Slicing programs are constantly evolving better algorithms to do a smarter job of model and tool-path creation, but most will not always produce an optimal print path for every type of model, or 3D printer configuration.
For this tutorial we are using Slic3r Version 1.1.7, but any recent version has the same ability to manually define the width of a printed perimeter.
Slic3r, Cura, Simply3D, Craftware and other applications 'slice up' our 3D model and converts it into layer-by-layer Gcode (instructions a 3D printer can understand). For any 3D printer that uses a filament (FFF/FDM) to create a model, it's quite important how the gcode instructions are sequenced, and also what order each section of every layer is printed.
Slicing programs are constantly evolving better algorithms to do a smarter job of model and tool-path creation, but most will not always produce an optimal print path for every type of model, or 3D printer configuration.
I documented this tutorial after experimenting with a new material that had some particular properties causing material expansion (oozing). I wanted to make a very clean printed tool-path as the object was a set of herringbone gears that needed to mesh well with each other. After doing a test 'slice' it was clear that some manual settings were required to print the object how I wanted.

The new Colorfabb material - is a Kevlar+PTFE composite material mix that is so slippery it shoots out the nozzle and has some tendency to ooze. I wanted to test wear resistance so an ideal object was a set of printed herringbone extruder gears. I'm not sure if/when Colorfabb will release this material, but if you get hold of any I suggest an extrusion temperature of only 155 Degrees C, this dramatically reduced ooze and helps to get really clean prints, if you also take the advice in this tutorial.
I almost always look at the output gcode produced by a slicing program before I hit print. Quite often I will adjust the settings after looking at the print path, and also how the material was planning to print out for certain aspects or features of the model.
For viewing the output gcode tool-paths I use Repetier-Host. It generates a clear way to visualize the plastic filament per layer, and also the movement path the extruder hot-end will take, to complete each layer. This is really useful to get an idea how a model will be printed on your machine. It also gives you an approximate print time, so again this is useful to compare print settings with gcode output and print time.
For this tutorial we are going to be using the Advanced tab under Print Settings, see below.
 As standard, Slic3r defaults to automatic extrusion width for all tool paths, apart from the first layer width. This is made twice as wide in an attempt to get the first layer to stick, and also to reduce time as the first is almost always printed more slowly than subsequent layers. Having a 200% increase in first layer width is also not always a good thing, especially if you need fine feature detail from the very first layer or want a nicer looking base.
After slicing your model with the standard automatic settings above, take a look at what extrusion widths Slic3r automatically selected for you. You can do this by opening the .gcode file in almost any text editor or by loading it into Repetier-Host.
This is just an example below - your numbers will be different and depend on the version of Slic3r.
; generated by Slic3r 1.0.1 on 2014-10-11 at 19:03:23
; layer_height = 0.25
; perimeters = 2
; top_solid_layers = 4
; bottom_solid_layers = 3
; fill_density = 0.45
; perimeter_speed = 75
; infill_speed = 80
; travel_speed = 320
; nozzle_diameter = 0.58
; filament_diameter = 2.88
; extrusion_multiplier = 1
; perimeters extrusion width = 0.58mm
; infill extrusion width = 1.18mm
; solid infill extrusion width = 1.02mm
; top infill extrusion width = 1.02mm
You will see at the top of the file a set of parameters, some you entered or selected and many of the widths Slic3r selected for you.
This guide is a focus on perimeters, but it equally applies to any other aspect of the printed line width (infill, first layer, top, support material etc.) With many objects, by specifying exact widths of printed perimeters you can get cleaner and stronger printed objects.
 Slic3r uses automatic calculation if set to '0'
For the purposes of this tutorial my 3D Printer nozzle size is 0.58mm and the selected layer height is 0.2mm - I have previously tuned the top solid and first layer extrusion width. I also leave others to default '0' (automatic) settings.
 In this tutorial the only thing we will be altering is the perimeter width from the default '0' (shown above), all other settings stay exactly the same so you can see the impact one change has on the resultant print-tool-path.
As standard Slic3r decided the best width of extruded filament to use from the nozzle size and the layer height you entered in the basic information about your 3D Printer. For printing at different layer heights Slic3r will adjust automatically but sometimes the automatic width produces an output tool-path that's not ideal, lets look at an example below.
In all images below we will view exactly the same layer of the model or stack of layers, this way we can compare exactly what the Slic3r perimeter width setting is doing to our print-tool-path.


Herringbone Extruder Gear set - Printed with a special PLA+Kevlar+PTFE composite material
The new Colorfabb material - is a Kevlar+PTFE composite material mix that is so slippery it shoots out the nozzle and has some tendency to ooze. I wanted to test wear resistance so an ideal object was a set of printed herringbone extruder gears. I'm not sure if/when Colorfabb will release this material, but if you get hold of any I suggest an extrusion temperature of only 155 Degrees C, this dramatically reduced ooze and helps to get really clean prints, if you also take the advice in this tutorial.
I almost always look at the output gcode produced by a slicing program before I hit print. Quite often I will adjust the settings after looking at the print path, and also how the material was planning to print out for certain aspects or features of the model.
For viewing the output gcode tool-paths I use Repetier-Host. It generates a clear way to visualize the plastic filament per layer, and also the movement path the extruder hot-end will take, to complete each layer. This is really useful to get an idea how a model will be printed on your machine. It also gives you an approximate print time, so again this is useful to compare print settings with gcode output and print time.
For this tutorial we are going to be using the Advanced tab under Print Settings, see below.
After slicing your model with the standard automatic settings above, take a look at what extrusion widths Slic3r automatically selected for you. You can do this by opening the .gcode file in almost any text editor or by loading it into Repetier-Host.
This is just an example below - your numbers will be different and depend on the version of Slic3r.
; generated by Slic3r 1.0.1 on 2014-10-11 at 19:03:23
; layer_height = 0.25
; perimeters = 2
; top_solid_layers = 4
; bottom_solid_layers = 3
; fill_density = 0.45
; perimeter_speed = 75
; infill_speed = 80
; travel_speed = 320
; nozzle_diameter = 0.58
; filament_diameter = 2.88
; extrusion_multiplier = 1
; perimeters extrusion width = 0.58mm
; infill extrusion width = 1.18mm
; solid infill extrusion width = 1.02mm
; top infill extrusion width = 1.02mm
You will see at the top of the file a set of parameters, some you entered or selected and many of the widths Slic3r selected for you.
This guide is a focus on perimeters, but it equally applies to any other aspect of the printed line width (infill, first layer, top, support material etc.) With many objects, by specifying exact widths of printed perimeters you can get cleaner and stronger printed objects.
For the purposes of this tutorial my 3D Printer nozzle size is 0.58mm and the selected layer height is 0.2mm - I have previously tuned the top solid and first layer extrusion width. I also leave others to default '0' (automatic) settings.
As standard Slic3r decided the best width of extruded filament to use from the nozzle size and the layer height you entered in the basic information about your 3D Printer. For printing at different layer heights Slic3r will adjust automatically but sometimes the automatic width produces an output tool-path that's not ideal, lets look at an example below.
When I sliced (with Slic3r Version 1.1.7) my usual herringbone gear set and looked at the output gcode using Repieter-Host. I noticed that it was attempting to do a lot of little infill lines and also had only part perimeters where I wanted as many solid perimeters as possible.
Slic3r (and most other gcode engines) give you a level of control over how wide or fine each extruded line is, for a given layer height.
In all images below we will view exactly the same layer of the model or stack of layers, this way we can compare exactly what the Slic3r perimeter width setting is doing to our print-tool-path.
Fig 1 - Shows in blue how the plastic material will be deposited for Layer 25 of our model. This gear is quite small, diameter across from tooth-to-tooth is about 18mm.
Fig 2 - Shows a close up of the same layer and path, lets take a closer look at what this is telling us.
The green line is the path that the extruder nozzle will take to draw (deposit) the material on this layer. As you can see above, the nozzle jumps across each gear tooth to fill-in a tiny square in every tooth. It also has a section of short fills in one of the middle layers for no obvious reason other than it calculated that the material could not fit. A series of short gaps were required so as not to pack-in too much material.
If this model was printed using the Fig 2 gcode, especially with any material that's prone to expansion, oozing or foaming (like the new Polymakr - Polywood, for example) it will most likely have wisps of material between the teeth and not be a very clean print. You can alter other Slic3r settings to limit crossing of perimeters, but for many other reasons, it's just too hard to combat every issue just by altering other settings, like retraction or sequence of printing. Manually tweaking the perimeter width gives a lot of control.
With printed gears it's a good idea to have a high level of infill and also many perimeters to add strength to the outer surface. If you can't do many outer perimeters because of a small teeth (features) - like out small gear above, then a fatter single perimeter is often better (and stronger) than a thin wall and a blob of infill.
Skipping forwards, below in Fig 3a - shows a comparison of the first 25 layers sliced with an automatic (0.58mm) perimeter and also a tuned 0.86mm perimeter.
Skipping forwards, below in Fig 3a - shows a comparison of the first 25 layers sliced with an automatic (0.58mm) perimeter and also a tuned 0.86mm perimeter.

On the left (0.86mm) machine movements are kept inside the gear teeth and the overall number of movements and extruder retractions is dramatically reduced.

Fig 3B - Above is a side view of the first 25 layers, this shows clearly how the wider perimeter produces a cleaner tool-path for the model print.
But how and why did I select 0.86mm as the ideal width? - well that still requires some trial and experimentation. You can't just guess as the next set of images below will show.

As Fig 4 above shows, Slic3r often does things that are not always expected, so you do need to test various widths before deciding on a suitable fit for the model you are going to print.
Analysis of each Fig 4 - image -
0.6mm = Is almost ideal, but has a bigger gap between inner perimeters and outer, this can produce unconnected walls and a weaker part - this can sometimes also be fixed by changing the level of infill.
0.70mm = Inconsistent sections of infill and many travel / retraction moves, not ideal.
0.80mm = Jumps between gear teeth with travel moves and inconsistent infill, don't use.
0.82mm = Similar issues but now the infill is consistent and equally spaced.
0.84mm = Still has infill in the teeth and a jump across each tooth.
0.86mm = Perfect! - this has equally spaced infill and a single strong perimeter that will be fixed very well to the inner infill. Very few travel moves and almost no retraction.
0.88mm = Just 0.2mm more and we have inconsistent infill and gaps.
0.90mm = This will produce a tiny gap between the inner two and outer two perimeters and a weaker part than the 0.86mm.

The printed small gear using 0.86mm perimeter is strong, clean and will wear well in use.
Don't assume that selecting a bigger width is correct or will always improve things, often going smaller is also valid, especially for bigger parts.
I usually start tuning by selecting wider than default widths as they will reduce printing time, but if that's not working for your model, then go thinner.
As an example the matching larger herringbone gear (shown below) was perfect at the Slic3r Default (0.58mm) setting and also at a width of 0.90mm, everything in between was less than ideal.

Both 0.58mm and 0.9mm would print well. For a material like the Colorfabb Kevlar+PTFE composite that expands on extrusion, the 0.90mm was ideal because it's depositing material quicker with less movement and has solid circular infill.

I first printed (Fig 5 - above) to show how the unequally spaced infill shown in the 0.82mm image looks when printed - here you have a gap between inner and outer perimeters. The gear is considerably springy due both inner and outer perimeters not being joined. I'm sure there may be applications when you would actually want a springy gear, but not this time.

Next the printed plate of four large gears in PLA using the 0.58mm default.

Fig 6 - Shows a close-up (during half the print) of the 0.58mm print, showing three very neat and solid inner and outer perimeters joined well. This will give an ideal 3D Print for this object.
- Summary and general tips and tricks -
As a general guide for most prints I tend to use a 0.5mm or 0.6mm nozzle at 0.2mm layer height.
With low layer heights it is possible to make the width of a line smaller than the nozzle size, but that's not really always recommended.
It's more common to have a scale factor of around 1.5x the nozzle size for line width.
For example a 0.5mm nozzle will extrude correctly with a layer height between 0.1mm to 0.4mm layers. You can go for an even smaller layer height if desired, but balance that with time to print and final quality.
Some materials can be used with a ratio of almost 1:1 for nozzle width. For example PET materials like Taulman Tglase and Colorfabb_XT will benefit optically from thick layers that are not too squashed.
Some materials can be used with a ratio of almost 1:1 for nozzle width. For example PET materials like Taulman Tglase and Colorfabb_XT will benefit optically from thick layers that are not too squashed.
And for the maximum width, it's usually good to stick to under 2.2x the nozzle size.
It's always a good idea to look at the output Gcode that Slic3r generates, even if this is only once to see what sizes of line widths it has decided, if you leave the advanced settings as automatic (0)
As another example when generating spiral vase (single walled perimeter) prints I often see people leaving the default size for perimeter, that's fine but it often ends up with a delicate thin walled object, when really a fatter wall would be much more robust for handling the object after printing.
Instead of a 0.6mm perimeter you'll be amazed how well a 1.2mm or 1.4mm thick perimeter feels and looks to a finished 'spiral vase' object. It almost always makes the print more useful too.
I'm a big fan of bigger nozzles, I often print with a 0.8mm or even a 1.2mm nozzle especially with bigger objects. You can still get a lot of detail and a fine finish even with a bigger nozzle. Just make sure you have an extruder drive that can keep up with material flow demand, or slow down.
If you get a chance, do try this out where appropriate, tuning of width is still not yet an automatic feature in slicers so until we have more auto-intelligence, doing it by hand can give some very impressive results.
Slic3r Reference -
Slic3r is an open-source 3D model to Gcode converter (slicer), it's main author is Alessandro Ranellucci with contributions from the 3D Printing community. You can find out more about Slic3r and download it from Here.
Slic3r is licensed under the GNU Affero General Public License, version 3
The Slic3r icon was designed by Corey Daniels
I hope you found that of some use.
Did you read it all? - too long? complicated? not enough examples? or just right :)
Remember to give me some feedback, It's always good to know if this sort of post helps.
And a little late, but Happy New Year everyone - until next time.
Rich.