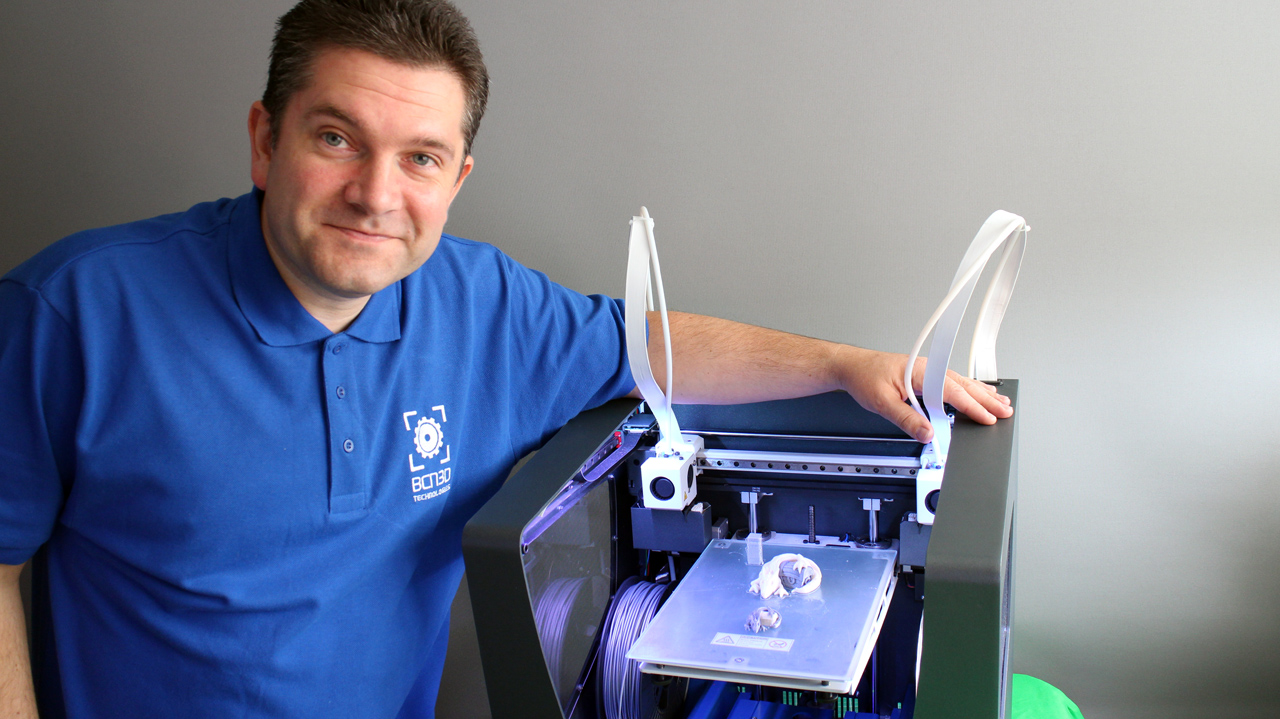
Testing out Scaffold - Soluble Support Material from E3D.
The team at E3D recently sent me some production reels of Scaffold, the soluble support material for desktop 3D Printing. It's now almost released and should be available soon on the E3D website
I'm testing it out and also seeing what's been changed from the Beta release earlier in the year.
Sanjay at E3D said it has had a few modifications to the viscosity and also compatibility with materials. It's tuned to work well with Edge (PET based) and Nylon materials, but will also work with PLA and ABS.
I proposed a scaffold challenge in the video below, and E3D responded. They have kindly offered some £40 discount vouchers for their webshop as a prize for the most interesting or challenging ideas.
If you have a 3D model that you believe would challenge Scaffold (it's mostly aimed as a dissoluble support material) but can also work well as peal-away support, then let me know in the comments below, over on YouTube or on Twitter @Richrap3d
Also feel free to tell me of your experience with using support material - either using the same material or as a dual extruder setup with a secondary material as support.
Give me some time and I will report back with success or failure and hopefully some print advice or tips for using Scaffold in different 3D Printers.
I'm going to also test it out with some models I have struggled to 3D Print over the years, I'll try to do that on a selection of printers, nozzles and extruders too.
A really good support material is still a major goal for desktop 3D Printers, so it's exciting when a new product becomes available, I'll be sure to let you know how I get on. Maybe this is the one?
I'm already seeing some really great suggestions, thank you for posting - One that really jumped out was a collection of Knots gathered up by Richard Caunt - Very Knotty can be found here.
My update on using the BCN3D Sigma 3D Printer for the last 6 or so months.
Do check out the video for a more visual feast into the madness of my modifications :)
You can also watch it in HD over on my YouTube channel here (and please subscribe, thank you) A few months back Last year (2015), I posted about my first few weeks using the BCN3D Sigma 3D Printer, here is an update on some of the changes and how I have been getting along with the machine.
As I said in my previous video and blog post, the BCN3D Sigma is a really great 3D Printer. It has many of the key features people are looking for in a machine they need to produce 3D Models.
Because the Sigma is a fully built and tooled up machine, it's not really aimed at the low-end or to compete with the kit build market. That said, it's excellent value for money with the bonus of having dual independent print heads, it's a great 'production quality' desktop machine.
I have just now, in early 2016 spent my own hard earned cash on buying a Sigma, not something I do lightly. And I could not afford a brand new one, so it's actually second hand. I was very lucky someone in the UK wanted to sell it. (thank you so much for driving it to me, you know who you are, I am highly grateful and now use this machine every single day).
That's probably the best and most genuine endorsement I can give a machine. Spending my own money on a printer, now, when I already have a few is significant.
The Sigma is still the best built production machine I have used (so far) - finally on-par with my own custom 3D Printers I have built and still use over the many years of doing this.
I have done all the usual things with Sigma, printing fast and 'draft quality' to slow and fine layer models to examine the details that can be produced. I'm not so concerned with ultimate quality when 3D printing. I would much rather a fast and accurate, strong print using a fat nozzle.
All these dual colour pots were using 0.6mm nozzles and a fast print profile with 0.2mm layers.
The print time was under 5 hours for each one. The quality is not 'perfect' but more than good enough for kids to use and for 'practical' applications.
In fact I have a 5 hour rule, if I can't print it in under 5 hours, then I use a bigger nozzle, or lower quality or wait until the weekend (and then it may not happen). So for me, 3D printing is more about getting something that's accurate and strong, not ultimate quality.
Sigma can do quality, but with a change of nozzle size and pushing the speed, it also does fast too.
Dual printing is where this machine really stands out from the other 'dual extruder / dual nozzle' systems available. This is an area where I am most excited for FDM, Having useful models, and an ability to 'actually print almost anything' is a fundamental goal for desktop 3D Printing.
Two ways to dual 3D print - Above bigger tool-change retractions and no purge tower.
Or use a tower and avoid jamming up the hot-ends because of long retraction <<< Do this method!
Above is the Nervous System dual treefrog - a tricky one to dual 3D print. It was the second thing I printed on the new machine, right after the test calibration pattern (above). Both at 0.4mm nozzles, and a 0.2mm layer height, set to print fast (65mm/sec) - not ultra-fine quality, but a solid and fast 3D print in under 4 hours.
Like everything that's designed or configured for you, it's possible you will want to change or tweak things to make it easier for you to use every day. That's exactly what this update is about - my changes to the machine and what I have been printing for a few months.
Firstly I need total flexibility for spool sizes and all different types of coiled plastic. We don't quite yet have a universal spool size standard, or any sort of agreement on the ideal diameter of filament coils.
I found I could not fit 1Kg reels of filament inside the Sigma, they almost fit, and I even printed new spool adapters. But everything was just a little too tight fitting, and not easy to change out.
After some considerations, as this is a fully built machine that can't be taken apart. I opted for an external filament rack and to re-mount the bowden extruders outside of the machine. Sounds quite drastic, but it's a simple re-routing of the motors.
The upgrades were obviously 3D printed on the Sigma - and to keep everything as light as possible a painted wooden frame was built to take two spools at the back.
The other change was to provide more options for materials and nozzle sizes. The Sigma comes with 0.4mm brass nozzles fitted. If you want to print in filled materials or abrasive carbon fiber or glow-in-the-dark then you really need a hardened nozzle.
Sigma on the left and E3D V6 on the right
I was also finding that the second print head was starting to be used more for support materials, rather than a different colour. Dual colour prints are nice, but the second head is great for using as a different support material. And I found that a 0.6mm nozzle allowed me to print support materials faster and with more success.
I can now swap out nozzles for almost any size or type. I leave a 0.6mm on the left and a 0.4mm on the right. This way I can print fast or fine or with dual materials - very complex models.
On the prototype machine I added a simple strip of Kapton to catch stray 'noodles' still a good thing to do to any Sigma.
On the new Sigma, you can fit these 3D Printed stiffening supports, this helps the silicone strip wipe off any excess plastic, and reduces the chances of noodles being pulled out and onto your build platform.
I'm really happy with the Sigma, and I can't wait to hack it some more.
BCN3D Technologies tell me that they are about to fully release the entire machine and even all it's manufacturing secret's as a complete open-source package. (I'll link here when that's announced).
Hi Everyone, I have been testing the new BCN3D Technologies Sigma 3D printer over the last few weeks. I thought you might like to hear my views about it. This is the 3D printer I have been waiting for this year, and I'm not disappointed at all. Most of my comments are in the video (below and on YouTube) - This is basically an introduction video to the BCN3D Technologies Sigma 3D Printer - Dual carriage extruder system, professional printing on the desktop - I take a look at dual colour and soluble support materials along with my overall thoughts on the Sigma 3D Printer, who it's aimed at and does it provide value for money (Yes, yes it does). I'll be posting more about my use of the Sigma, so if you have any questions, or want me to test something specific or just want more about any aspect of it, do let me know in the comments here or on YouTube, on G+ or on Twitter @RichRap3D
Above is my introduction video and review of the Sigma - if you are looking for a new or first (or second / 12th ) 3D printer it could be a very good use of 17mins, I hope you find it useful.
Full colour LCD touch screen, with simple to use controls.
Dual independent extruder carriages - allows for perfect dual colour printing, or the use of soluble support materials.
PVA soluble support material
Dual colour printing
In my eyes both the Sigma and BCN3D Technologies have a lot of credibility, they certainly deserve more global awareness on what they are doing and the machines they are manufacturing. The Sigma is a great 3D Printer. Value for money and robust. Like all 3D Printers it's not perfect, but for someone that wants 3D Printed parts and is not so interested in tinkering, the Sigma is my solid recommendation of where to spend your money and a company to support. They have a long-term view of 3D printing, Sigma is just the start, and what a machine to start with. The key message here is that most new users looking for a 3D printer now, will be interested in the 3D Printed parts it makes, not so much with the tinkering or constant upgrading. This is a 3D printer that prints, well and reliably. If you need a production machine, say for running a 3D printing Hub. Sigma is a very good choice indeed.
Thanks for watching and reading, See you again very soon for yet another 3D Printer review. Busy October! Cheers, Rich.
For Day 6 of 30 days of creativity ( #30DoC ) I'm having a rest from designing things, but I wanted to give my printer a challenging print while I worked.
A few weeks ago I did a quick test print of the Ball of StarsCreated by @Dizingof
I used basic support structure and low-grade PLA just to test it out.
I have been meaning to print another one, much bigger and with full support structure. Today I set it off to print while I worked. It would have been a 17+ hour print, but 9 hours into it, at about half way it shifted on the Y axis, probably due to the head catching on the massive structure with the rather high acceleration settings I use on MendelMax.
Some of the support removed.
You can see that about 40% into the build the Y axis shifted, so when I came home I stopped the print.
Before removing support - This is what it looked like after 9 hours of printing (the half a ball of stars is inside there somewhere!)
This was my first test print a few weeks back, I didn't clean all the support structure off, and it had some unsupported areas, this was sliced with Skeinforge V46 using external support structure at >60 degrees overhang giving me some sections that sagged when they printed in free space.
For the new print today, I made it 150mm wide and enabled support everywhere, as you can see from the above Visual Gcode (Repetier Host) it was a real monster! Skeinforge had to slice for almost 2 hours to output the Gcode for it.
In hindsight a little too ambitious and I should have slowed down the travel moves and enabled Z Lift (Hop) I think it would have printed OK if I had done that.
Doing the same model in Slic3r with support enabled only gives a support column in the centre of the model, so I could not use Slic3r for this print unfortunately, a real shame as it slices in just 8 mins.
It is fun watching these things print.
And it used a fair bit of PLA.
Removal of the support structure is quite easy, but takes a little time.
It needs a little more support removed, but I'm quite happy with how it came out, and it would have looked really good as a complete model and not for the Y Axis Shift.
My proposed new settings for a future print attempt -
I have sliced it again and this time enabled Z lift (Hop) and used Exterior Only support with a 45 Degree minimum support angle, this should give me some support on almost everything, but not cover the entire model.
These are my support settings shown above, if anyone can give any advice to improve these, do get in touch or leave a comment, I hardly ever use support, so could do with any pointers you have.
It still looks like a lot of material, but compare the Gcode image below with the failed print above -
Fingers crossed, it should print well next time, and have a lot less support material to remove.