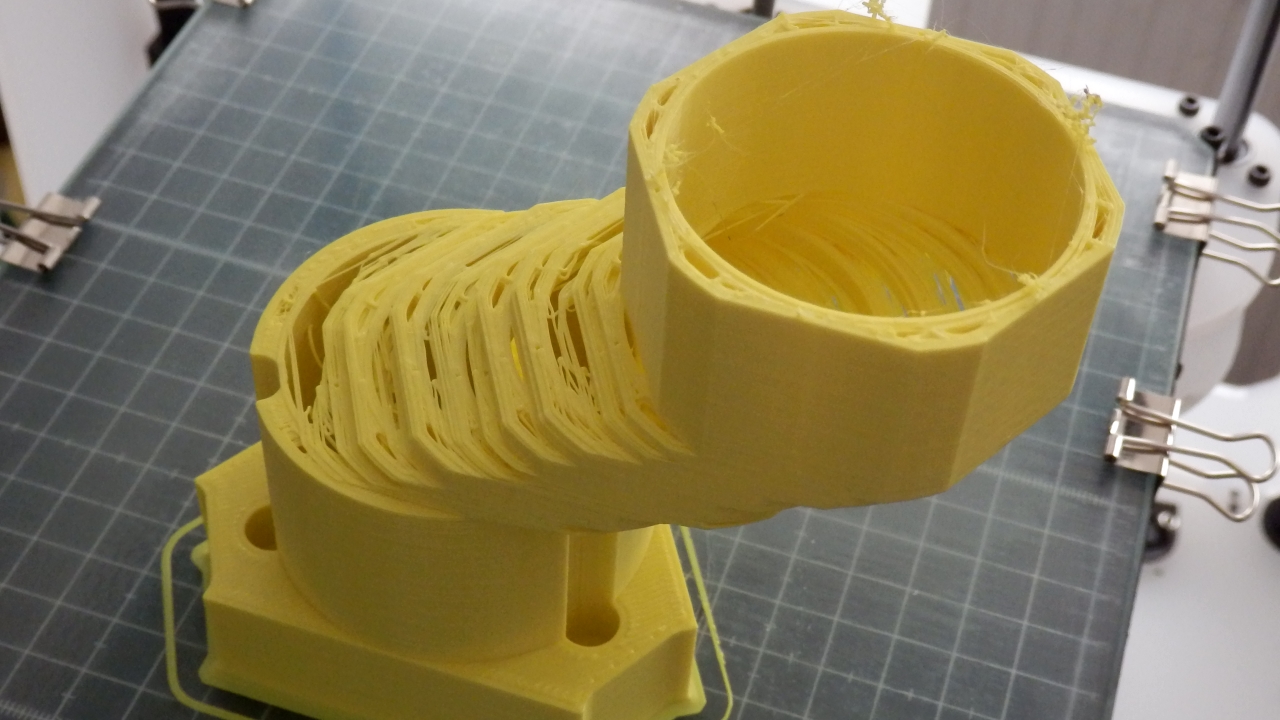
Testing out Scaffold - Soluble Support Material from E3D.
The team at E3D recently sent me some production reels of Scaffold, the soluble support material for desktop 3D Printing. It's now almost released and should be available soon on the E3D website
I'm testing it out and also seeing what's been changed from the Beta release earlier in the year.
Sanjay at E3D said it has had a few modifications to the viscosity and also compatibility with materials. It's tuned to work well with Edge (PET based) and Nylon materials, but will also work with PLA and ABS.
I proposed a scaffold challenge in the video below, and E3D responded. They have kindly offered some £40 discount vouchers for their webshop as a prize for the most interesting or challenging ideas.
If you have a 3D model that you believe would challenge Scaffold (it's mostly aimed as a dissoluble support material) but can also work well as peal-away support, then let me know in the comments below, over on YouTube or on Twitter @Richrap3d
Also feel free to tell me of your experience with using support material - either using the same material or as a dual extruder setup with a secondary material as support.
Give me some time and I will report back with success or failure and hopefully some print advice or tips for using Scaffold in different 3D Printers.
I'm going to also test it out with some models I have struggled to 3D Print over the years, I'll try to do that on a selection of printers, nozzles and extruders too.
A really good support material is still a major goal for desktop 3D Printers, so it's exciting when a new product becomes available, I'll be sure to let you know how I get on. Maybe this is the one?
I'm already seeing some really great suggestions, thank you for posting - One that really jumped out was a collection of Knots gathered up by Richard Caunt - Very Knotty can be found here.
This is part of a focus on 3D Printing materials series, I hope to cover as many materials as possible, from a wide range of manufacturers. From everyday to experimental filaments, print results and views on using them.
If you want to get involved, please feel free to contact me. (details at the bottom of this post).
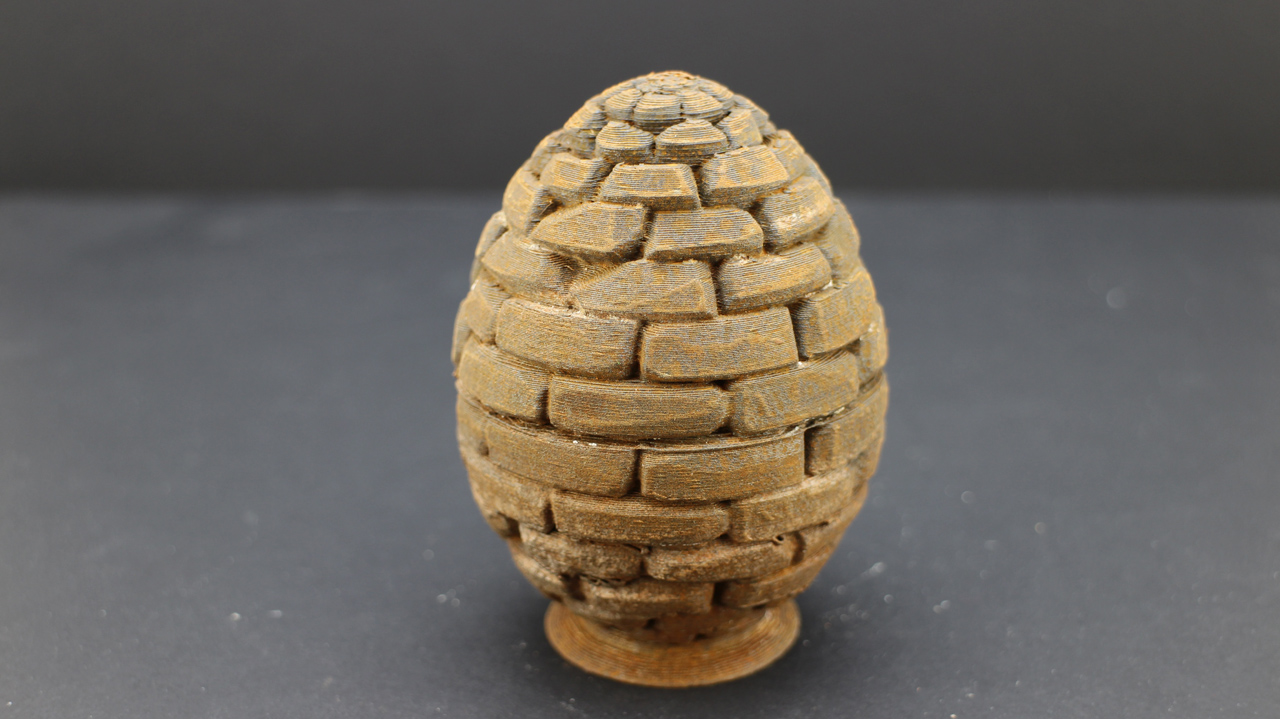
I will be discussing all the Proto-pasta materials, first up is a rather special one, and it's my favourite material from Proto-pasta - Magnetic Iron. Making rusting stuff very, very cool again.
I you decide to try any of the Proto-Pasta materials, I would strongly recommend this one, it's really nice to print with and is so much fun to post process by allowing the printed parts to rust.
You can view my video on printing and rusting Proto-pasta Magnetic Iron filament below, or in HD on Youtube Here
I have tried both 1.75mm filament and 3mm (2.85mm) in various machines and drive systems - bowden feed and direct / geared. All operated correctly with only minimal adjustments over printing with standard PLA. Normally a little more retraction and slightly lower temperature - then check your flow rates and adjust +/- 5%
I was sent a roll for testing and feedback, so here is what I did with it - And I also need to thank Ben from Hawk3DProto for sorting me out with another roll when I rather quickly ran out.
You can get 500g of material on a standard sized roll, that's only around 42m in length for the 3mm filament (around 129m for 1.75mm). At the time of writing Proto-Pasta have some special offers for their Iron filament, so now is a great time to pick some up and experiment.
They also sell 125g samples and large 12" 2Kg spools if you are feeling adventurous.
The exceptional thing that Proto-Pasta seems to achieve very well, is that their composite filaments are easy to use. Wherever possible they try to make them as similar to using 'normal' PLA as they can. You are really going to appreciate this fact. It means you will waste less material getting it tuned in and you can be confident to print something almost straight away.
For the Magnetic Iron I found that dropping the temperature by about 9 degrees C (from 205 Degrees, to 196) was about right.
The other change was with flow rate -
On one RepRap machine running with the 1.75mm filament - Into a wade style geared extruder and a hardened spur drive, I had to lower the extruder flow by -3% to get perfect results.
On the BCN3D Sigma (Bowden) machine running with 3mm material I had to increase the extruder flow by +8% for perfect filling.
For choice of hot-end, I used E3D V6, and I tried both standard brass nozzles (0.6mm - with the 1.75mm filament) and hardened versions (0.8mm - with the 3mm material). Both work fine and showed no significant sign of wear after 500g of filament was used in each machine (1Kg in total).
Obviously when you use exotic or more costly material that's designed to be on show, you want to use as little as possible on a print. Here are a few tips I would recommend for minimizing material use.
Check what minimum level of infill you can use. Rectilinear will tend to use the least, and still provide some support for overhang and slopes. I typically use 6% in complex metal prints and for many vases, statue figures or busts you can use 0% and just have a single perimeter outline.
Select a slightly bigger nozzle - and then only do one outline. Using a 0.6mm or 0.8mm will print quickly, still show up all the detail you usually need in a metal print -considering that you will most likely post-process.
Don't print the bottom layers - in almost every metal print I do, I always leave off the bottom, it's almost always not going to be seen and I like to fill the object after printing, so it makes that process easier too.
Using minimal material means you may get a small hole or two occasionally, that's not the end of a print or a failure. Just melt a section of filament with a lighter, and drip or wipe into the hole, sand and post-process and you won't be able to tell it ever had a hole or defect.
Fill with plaster for that added weight and feel.
With the Iron filament, you really want to be rusting it. It's not really possible to get a shine onto the Iron, so it's also not all that important to smooth or sand the object before rusting.
However if you do lightly sand or scrub areas of the print, then they will start to rust first, I have tried various methods of rusting, here are some good and bad options -
Don't fill your prints with cement or concrete! - That was the very first material I used and it done some serious damage to the structure and integrity of the printed model.
Plaster is not as aggressive and can be used as a filler for Magnetic Iron Filament (and other metal filled materials).
Expanding gap-filling polyurethane foam works very well, obviously not adding all that much weight, but great to help with strength - especially with 0% infill objects.
I have now settled on filling most hollow objects with dry sand and sealing with a plaster cap. This provided good weight and causes no damage to the Iron material.
You can use many different chemicals to generate rusting - ( just be careful and don't mix things if you don't understand what they will do together - Chemical reactions and gases can be very nasty )
Whatever rusting method you decide to try, I strongly recommend that you do not submerge the object or add substantial amount of fluid at any one time.
Below is what I used - I'm not recommending any particular method, do this at your own risk.
I originally wanted to make a gel type solution I could paint on, but after much experimentation with various gels and substances, I reverted back to a known method. I'll attempt the gel idea again at some point in the future.
I like using a 100% saturated salt solution - That's 500ml of water at room temperature with as much table salt dissolved as you can. Stop when salt crystals remain and won't dissolve.
Then I added 100ml of white vinegar.
And 20g of oxy-action laundry stain remover.
Mix all this up and put into a spray bottle. - If you can warm up the liquid and ideally the printed objects it will help with the rusting process.
Wear protective glasses and gloves, then in a ventilated area spray onto the Printed object, leave to stand, or for accelerated rusting put in a warm place, spray again as required - usually after 4-5 hours and again 10+ hours. You should end up with a nice level of rusting in any area that has been lightly sanded. If you continue to spray and keep the part lightly coated, you will get more and more rust.
Place in a plastic tray.
Lightly spray with rusting solution.
About 5+ hours later you should start to see rusting. Add more spray as you like.
Some salt crystals may form, these can be washed off after rusting.
I like to allow more rusting fluid to sit in pockets or gaps, then scrub, sand or polish off some of the other areas of rust, for a really nice old looking finish.
The longer you keep Magnetic Iron printed objects damp, rust will continue to form and grow.
Why would you not want a rusted old skull?. My only wish was that I printed it even bigger... Maybe next time.
Support structure works well with the Iron filament, it's strong and takes a little more effort to remove, but it breaks away cleanly.
I have much more to come in the materials series - (Continuing with Proto-Pasta, then looking at many other filaments - I'm also open to suggestion of whatever other materials you would like to see used and tested, just let me know.) -
Proto-Pasta Stainless steel filament requires a lot more work to get a pleasing shiny finish, I will take a look at that in the next blog post and video.
Proto-Pasta Carbon fibre (V1 and V2) material is strong and also really nice to use - look out for my thoughts on using that and where if can be a good option over other materials.
High temperature PLA (including the coffee material).
And finally I will be also looking at their conductive material (not tested yet). - And as a note on this - I have tested so many 'conductive' filaments in the past and still am yet to find a really good one.) < Yes, that's laying down a challenge to any filament manufacturer - We want real conductive, not just high-resistance / 'anti-static' and/or brittle carbon loaded materials that don't really work well as a conductor in an electronic circuit.
I will leave you with an extended collection of images and links to the 3D design files - from the Magnetic Iron printing and rusting experiments (October 2015 to March 2016).
Thanks again to all of the Proto-pasta team Over in the US. And Ben at Hawk3DProto in the UK.
Thanks for reading. Please leave a comment, subscribe to me on Youtube and if you want to get in contact -
In this post I will be looking at Re-filament Refil PET (Recycled plastic for 3D Printing)
In a subject I'm very keen to promote, this time we are looking at recycling of plastic into filaments for 3D Printing.
This won't be the only post on this subject. In recent months we have seen a number of companies setting up to address the issue of making recycled plastic filament for 3D printing, I'll do my best to report on how they are doing and what the various finished materials are like to print with.
And if you are a new company looking at recycled 3D printing filaments, do get in contact with me.
Recycling is not as easy as it sounds, and many companies have tried before, but now further refinement and focus into this area for 3D printing should anyone to start using recycled filament for their 3D printer. And before you dismiss, they are not 'bad', so read on and think about giving it a try.
Anyone that has tried to manufacture their own 3D printing filament on a small scale, will understand how tricky it is to get consistent results, even when using new plastic pellets.
Last year I was very lucky to be given a desktop filament maker, in need of a lot of repair and attention, and as it turned out a total re-design including a new drive motor and power supply.
This Filament extruder was kindly was donated to me by 3DFilaprint, it was a great repair project to work on, and one thing it taught me is that making quality filament is a very, very tricky job.
I have produced batches of high quality ABS for a local makerspace, and some reasonable PLA. I even tried to recycle some Polypropylene and PET, with limited success.
Certainly the most easy method was using ColorFabb PET, PLA and WoodFill Pellets. Making my own custom coloured WoodFill filament was fun, and unique.
Doing it professionally -
To take scrap plastic, sort into material type, clean it, process and extrude into accurately dimensioned feed-stock for a desktop 3D printers is not an easy task.
3DHubs recently ran a competition encouraging people to post failed 3D Prints, I sometimes have interesting fails on a 3D printer - usually when testing a new machine, experimental materials or settings.
I posted this image above of a failed print - the print failed due to a mechanical issue on the prototype machine being tested - it was not the fault of the filament or plastic extruder system used in the 3D printer.
I was rather delighted to win a roll of Refil Re-filament PET plastic. This contains up to 90% recycled plastic drinks bottles.
The team at Refil have been working on this problem for the last three years.
Now the thing with using recycled plastic for 3D printing is not so much about cost, but rather time and success rate.
Exactly the same requirements exist for new or recycled material that will be fed into a desktop 3D printer. No allowances can be made just because it's recycled.
If brand new or recycled filament causes print jams, inconsistent extrusion or poor quality prints, then it's not going to be a product any 3D printing operator will want to use or recommend.
I would not use 'bad' or inconsistent, poorly dimensioned filament even if it was free. The time and effort to produce 3D printed parts is not worth trying to use 'bad' materials with current 3D Printing extruder technologies.
Raw new plastic pellets are around ~$3 per Kg - the main reason why people pay 10x the cost or more for this to be produced into a dimensionally controlled filament coil is mostly about good quality.
Maybe if we ever have reliable pellet or recycled chip based extruders available for 3D printers, we can be a little more forgiving, but at this moment filament needs to be really good for people to use and get high quality finished results.
If plastic filament is made to the correct dimensions the 3D printing process should be reliable. There should be no reason why recycled plastic can't be as good as new.
Packaging -
As you would hope and expect, the packaging of Refilament is also recycled. The compressed cardboard spool works well, without any loose cardboard fibres to spoil or clog the delicate heated nozzles used in most desktop 3D printers.
The empty spool is also slightly lighter than an equivalent plastic spool, so you are paying less in transport too.
How much do you get -
750 grams of filament, whilst the total weight including packaging is around 900 grams.
What does it look like -
I had a complete roll of clear PET re-filament and a sample of the black ABS filament that is made from recycles car dashboards.
The overall look is something many people can be more flexible with, sometimes you just need the 3D print, so colour and shade, shiny or matt is something that can be allowed to deviate. Ideally it should be as consistent as possible.
The clear PET, is indeed very clear. In fact it's so clear and 'new' looking I was even slightly concerned that this was indeed new material and not recycled. I was expecting some bubbles and maybe even a few slight colour tints or a slightly opaque tone.
Plastic PET bottles and the (1 PET) recycling symbol
PET is not a specific description. PET (polyethylene terephthalate) Or 'Polyester' comes in many different types and formulations, PET-T, PET-G, PET-E and PET-P.
Dimensions and tolerance -
The most important aspect is a good tolerance and accuracy of dimensions. My roll was 1.75mm, and that's more demanding to keep in tolerance than the bigger 2.85mm filaments also used for 3D printing.
I measured around 50 points during the roll of filament usage, start, middle and end.
The filament feels consistent when you run it through your fingers, that's a good starting point.
The entire roll was 1.76mm - Virtually no deviation in size or roundness at all, nothing that would be of any concern for 3D printing.
The filament was round (you want to avoid oval shaped filament).
If you didn't know this was recycled PET, you would have no idea from looking at it, using it, or seeing the finished printed parts. It's some of the best tolerances on 3D Printing material I have used.
How does it print? -
I started at a normal PET temperature of 230 Degrees C and printed out a simple single walled vase for a test of optical clarity.
The classic Hobbleskirt 'Coke style' bottle. Designed by ShaAli - Model here
Printed life-sized - for a comparison - Left is Glass, middle is printed in PET and Right is White PLA
It was once a PET bottle, and now after recycling and 3D Printing it is yet again a PET bottle :)
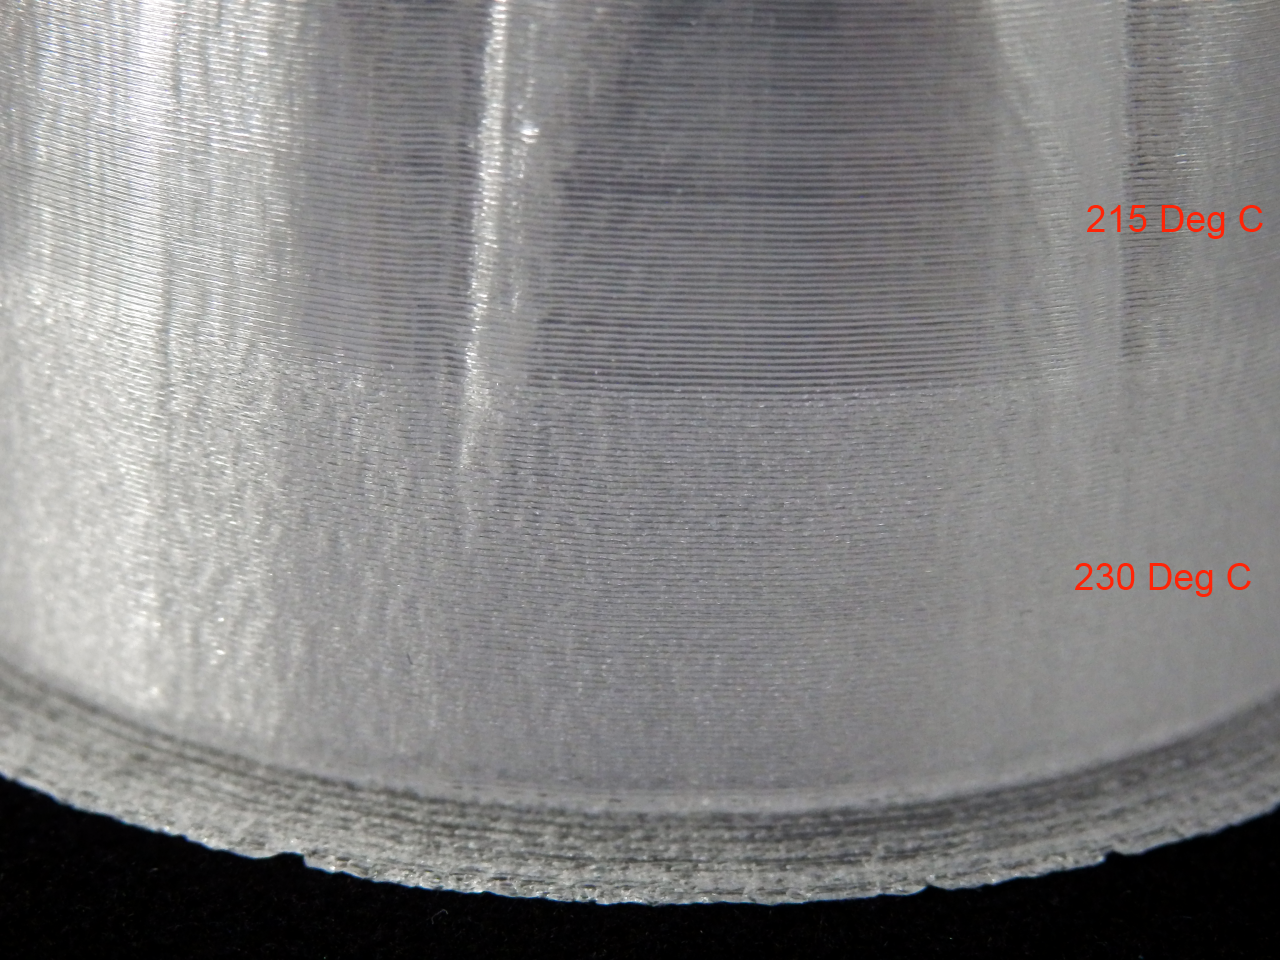
But that Print temperature of 230 was not good for this particular type of PET material -
If we look close at the bottom section of the bottle print, you can see where I adjusted the temperature. I spotted that we had bubbling in the filament - Lowering to 215 was a good temperature. I later found you can go down as low as 195 Degrees C.
As far as I can tell, the bubbling is not from moisture content. Lowering the print temperature fixed all 'frosting' issues with Refil.
You can't really ever get clear prints, even with clear PET, the 3D Print layering process causes a slightly translucent final print.
I really like PET of all types, I regularly use Taulman t-glase and ColorfabbXT. In the above image you can see the exact same print done with these different PET materials.
It's interesting to note that I print ColorFabb XT materials at 235 Degrees C - the one above is at 235.
Taulman t-glase is printed at 230 - Again interesting if you lower the t-glase temperature it tends to do the exact opposite of Refil and will fog with a lower temperature, t-glase has no problems at higher temperatures and you don't see the bubbling (frosting) seen on the Refil at 235 Deg C.
Whenever you get a new material (especially translucent types), it's important to test out and calibrate for the print temperature, at different print speeds and also remember to check fan cooling or when your printer automatically slows down towards the end of a print.
Refil was slightly more sensitive to temperature and also print speed. It's easier to see the difference in the image below -
Watch out for the effects of slow-down on a print, this can cause overheating in the material. It was really easy to check and tune Refil to a perfect 205 Degrees C - I printed everything else at that temperature without the need for any further adjustment.
The above and all prints in this article were printed at 55mm/Sec at 0.2mm layer height, using Slic3r.
When you get the correct print temperature for the speed you normally print, then print quality is exceptional. They have slightly different physical properties, but for print quality they are very similar, and light transmission (see below) is all excellent.
If you compare this to PET filaments based on new materials from other suppliers, the Refil material performs like 'new'.
Colorfabb XT Co-Polyester (manufactured with Amphora by Eastman chemical company)
Taulman T-glase is a PETT based formulation.
Printing things -
As it was the build-up to Halloween, we naturally had to print a lot of pumpkins. And we wanted some to light up the path to the house - Refil PET came in very handy. (My kids love them).
We have around 25 different sized Refil PET pumpkins now in residence at our house, looking forward to Halloween :)
LED's and PET were made for each-other.
Not just pumpkins -
You can print whatever you like with PET, although single walled prints do look fantastic especially with some LED lighting and they make your plastic filament go a very long way.
Another great model design by David Mussaffi - The Geosphere Vase 25, This is a more tricky print, especially when small, cooling is essential, but the results are very good and you can feel the strength of PET with models like this.
I'll be printing even more with PET, it's starting to be the material of choice, even over PLA for some users. It will be interesting to see is the fact it's now finding a recycling route into 3D Printing will help further promote it's use.
I would personally like to see more filled PET materials. Maybe we will also start to see recycled PET colours and natural fibre filled mixes available soon.
You can see the Refil story in this video - Perpetual plastic.
I hope that was both interesting and encouraging you to think about trying out recycled plastic? If you do, please let me know how you get on.
Due to frequent requests I'm planning to do a lot more review's on 3D Printing plastic filament. If you have any specific makes or types you want me to talk about and print with, do let me know.
Thanks for reading and please do comment / get in contact. - Comments below, Catch me on Twitter @RichRap3D or over on G+ here