Showing posts with label Polyalchemy. Show all posts

Saturday, 23 December 2017

Christmas Advent 3D Printing #Day 22 using Polyalchemy Elixir snow white Filament

December advent calendar - modular Christmas tree
3D Printing advice #Day 22

For the background and introduction - Day #1 Post click here

Christmas Advent 2017 Download on Thingiverse here - designed by Tom Van den Bon  With some help for each day by the South African Makers team.


It's time for Day #22

Day 22 gift is designed by Shaun Nadan-  It's a Christmas Scene.

Christmas scene is printed in Polyalchemy Elixir Natural (snow white).

I was really happy with the print quality, 0.15mm layers, normal PLA settings

This is a very small model, so the details really came out well.

I was originally intending to print this snow scene in Laybrick (By Kai Parthy) filament. But my roll of Laybrick is around 4 or so years old now, and it has become brittle and unusable :(

My Laybrick filament is no longer usable (around 4 years old).

Laybrick is about the closest to 'snow' look, and even texture, you are likely to get in a filament. It has powdered chalk as the filler. Prints like sandstone, cold and oddly both smooth and rough at the same time to the touch. It's a little like using plaster or clay.

I will get another roll of Laybrick and show you what it can do at some point in 2018. Until then I have used the wonderful Polyalchemy Elixir, for a shining version of this Christmas snow scene.


I was going to tell you all about Laybrick, but I'll save that for a future post. Just one quick thing to note if you try any Laybrick materials. Do be careful what print surface you use. It can bond quite strongly to PEI, Tufnol and even coated glass. I have damaged a few heated bed / coatings using Laybrick, take care.


Days 1 to 22 of the Advent Christmas Tree. 

Day #22 is completed. We are in to the final countdown very shortly. 

The story, or maybe the moral of the story today is to use materials as soon as you can. Many filament's can become brittle or unusable over considerable time. My Laybrick was a casualty of not remembering, that I still had a roll at the very bottom of the filament storage box.

Join me next time for Day #23 - I'm also going to update you on the status of the Olsson Ruby nozzles. I plan to remove them, and inspect how they are holding up. Join me next time to find out.

Thanks for reading.

Rich.

Please join me on Twitter @RichRap3D

My profile and posts over on Google+

Files and designs shared on YouMagine

Files and designs shared on GitHub

Files and designs shared on Repables 

My Youtube channel is here, all 3D Printing and Hi-Def video content.

Monday, 18 December 2017

Christmas Advent 3D Printing #Day 17 Advice for making reference test prints using a Polyalchemy Elixir sample pack

December advent calendar - modular Christmas tree
3D Printing advice #Day 17

For the background and introduction - Day #1 Post click here

Christmas Advent 2017 Download on Thingiverse here - designed by Tom Van den Bon  With some help for each day by the South African Makers team.


Day 17 gift is designed by Shaun Nadan -  It's a Christmas Poo Emoji.


I really didn't want to print this in a brown coloured material. I contemplated gold, but I don't have any, so I turned the Christmas Poo, into a Christmas 'Unicorn Poo' Emoji instead.

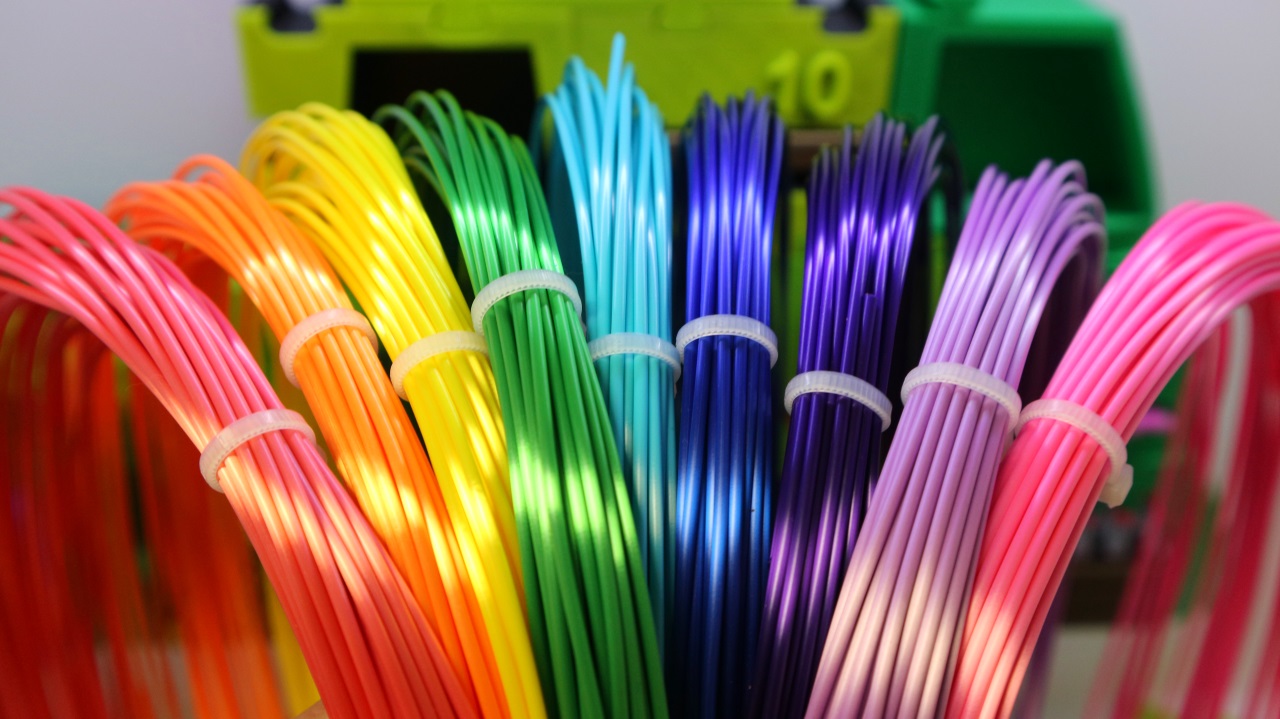
This is what a Polyalchemy Elixir sample kit could look like. (not all colours available)

As I recently discussed the need for material samples in Day 15, I decided this poop emoji was a good advent gift to demonstrate the sort of thing a user could do with a sample materials / colour pack from a filament manufacturer. Also look at Day 4 Lollipop - that was a Faberdashery sample pack.

What could you make with a sample kit like this?

I'm delighted to say I have already had some messages and questions from manufacturers about the need for samples packs. Some have now decided to start introducing them in early 2018. Keep an eye out.

If you are a 3D printing filament manufacturer, why not offer sample packs for sale? And how about a competition for anyone using a sample pack in an interesting or innovative way... over to you.

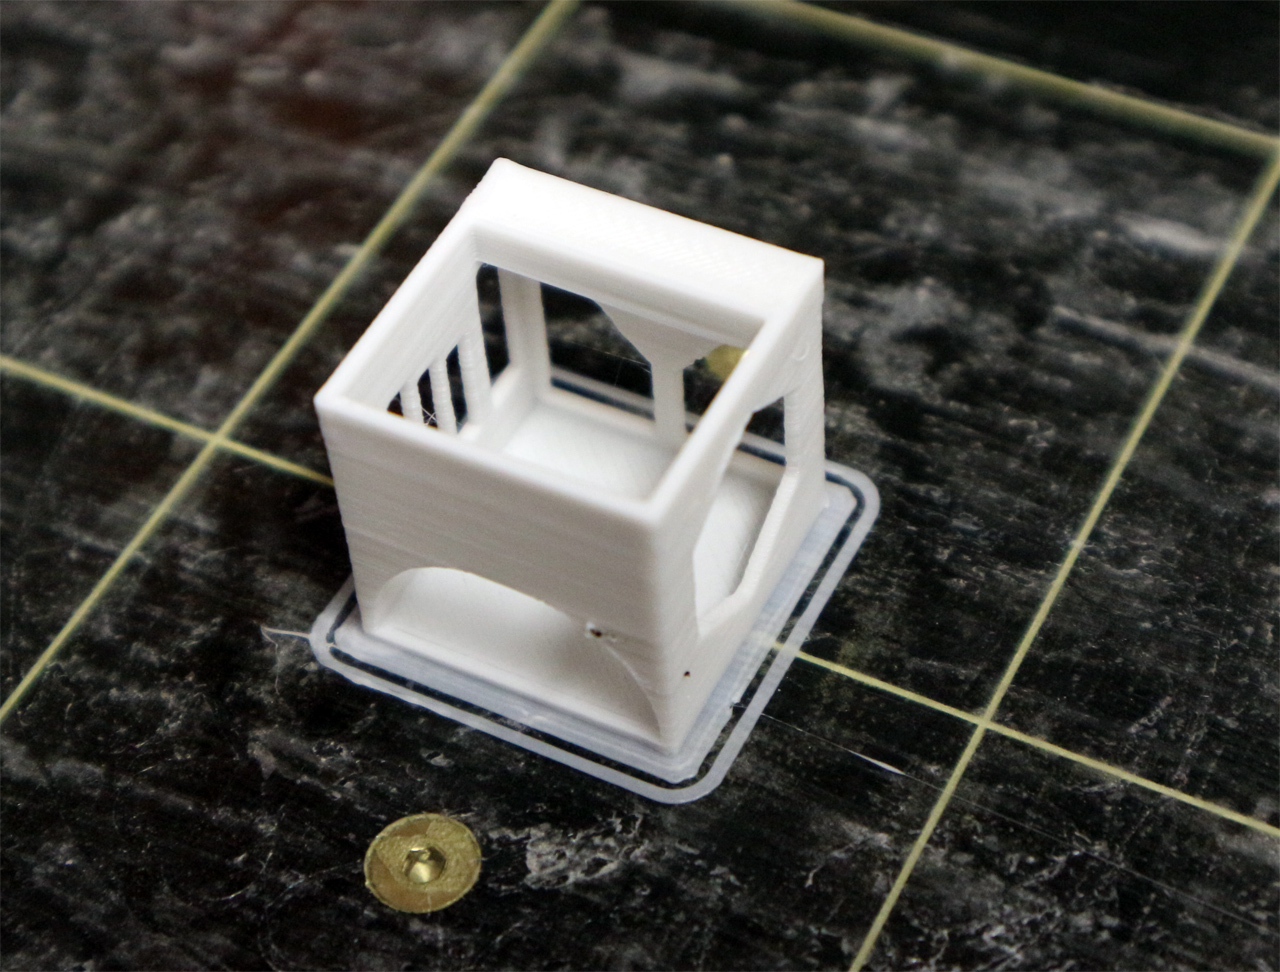
My calibration 'chip'

I'm also going to take advantage of this post to talk about printing out sample test objects. Printing a sample object in a new material, or different colour can be a useful way to check what a material looks like, and also how it performs. 

Cubes and small complex objects are often used to check a 3D printer.

Above is my test set for checking, warp, de-lamination, flex, break and twist of a 3D print material.

The 3D Benchy designed by Swedish designer Daniel NorĂ©e @DanielNoree ,
is often used by people to test out a new material, or as a way to check a 3D printer is operating well.

I have only ever printed out around two or three 3D Benchy's. I really don't have the room to keep a whole fleet of them, and I don't find it completely useful as a material sample. It's great at testing a new printer / nozzle / hot-end / extruder setup.

The test 'chips' above allow you to see opacity, and various fine features of a material print.

I have made my own 'materials test chip' to print out, store and use as a reference for material and machine / setup capability. You can get the test object, along with some other useful test parts from My Youmagine page here.

Being able to check a mechanical part can fit, is useful.

I also designed the 'chip' to allow a short section of Filament (both 1.75 and 2.85mm) to be inserted and stored with the test print. 

Back to the Poop...
Bringing this right back around to 'unicorn poo', I guess a multi-coloured poop emoji is a valid way to demonstrate a materials range, and keep as a reference print. It's at least a good talking point.
I'm just using the M600 Gcode command to switch filaments at regular Z height intervals.

Day 17 completed - with added googly eyes.

Print advice - (What makes a good material test sample)

Why can't I just use a 3D Benchy? - You can if you like. But I like to be able to check opacity, colour, fine details, and surface finish. I also need to be able to store them in an easy way.

Why print test objects anyway? - Well you have to test something when you get a new material. It usually takes a few goes to dial in the correct slicing, temperature and flow settings. A good test object should help you do that.

How can you test the strength of a material with a print sample? - The easy way is to first check the raw filament strength. Do this by bending first slowly, and then a quick snap. You should also be able to feel, the sort of plastic it is, hard, 'chewy' soft, stretchy.

Bending filament will only give you a first insight into the material. The material may also change state from amorphous to a crystalline structure after heating. A filament can go into your hot-end 'chewy' and come out like glass.

I also print off a number of 'dog bones' see images above, to allow me to test each sample in a home made jig. I can twist, snap, bend, impact and pull these samples apart, to gain a better indication of strength after printing.

Any other advice?- Yes, try out different test objects. Over the years all manner of test objects have become useful for all sorts of things. One really great object is the Hollow calibration pyramid found here. this object was one of the first things I used to setup and tune early 3D printer developments. If you can print this object well in every material you have, congratulations you are getting somewhere.


Days 1 to 17 of the Advent Christmas Tree.

Day #17 is completed. We had family star-wars day today, the last Jedi is really a rather good film.

Today's story can be about shiny unicorn poop? or maybe the importance of a good test object...

Join me next time for Day #18

Thanks for reading.

Rich.

Please join me on Twitter @RichRap3D

My profile and posts over on Google+

Files and designs shared on YouMagine

Files and designs shared on GitHub

Files and designs shared on Repables 

My Youtube channel is here, all 3D Printing and Hi-Def video content.

Wednesday, 6 December 2017

Christmas Advent 3D Printing 2017 Day #5 Polyalchemy Elixir PLA

December advent calendar - modular Christmas tree
3D Printing advice #Day 5.

For the background and introduction - Day #1 Post click here

Christmas Advent 2017 Download on Thingiverse here - designed by Tom Van den Bon  With some help for each day by the South African Makers team.


Wow, Day #5 of the calendar already, and today the gift is designed by Lelanie Smuts- It's a Christmas Robot.


Since we have a multi-part Robot print. It would have been obvious to use any ‘Silver’ material. I did consider stainless steel, but maybe we will use that later in the series.

Because it has a few different parts and they happen to be the exact colours I have in Polyalchemy Elixir PLA, I decided that the little robot would look amazing printed in this unique material. After all, every robot wants to be nice and shiny

Polyalchemy Elixir PLA Blend's are a little bit special. They are without doubt, the shiniest materials available right now. Models using Elixir have a ‘silk like’ appearance in most lighting conditions.


This PLA material blend does contain modifiers to get the silk-shiny appearance. You will not find ‘natural’ PLA exhibiting this type of shimmer and shine without some sort of additive.

I'm also using Polyalchemy Elixir Emerald City Green for some of the Christmas Tree sections.

I'm breaking my own rule above by printing two parts at the same time, if you look really closely you may see a few tiny imperfections on the left print. These small defects are where the nozzle has travelled back in free-air a long way from the part on the right.

The modifiers do add a lot of strength to the plastic. It’s one of the best flowing and smooth PLA style materials, I have every used.

Just take a look at the first few layers of any Elixir print (below). They always look stunningly perfect.

Elixir Emerald City - Very smooth layers, tight filament bonding and great inter-layer adhesion.


These Elixir colours will be used for our Robot.

Smooth printing.

Little Red hat.

The Robot in parts, ready for assembly - googly eyes not 3D printed :)

Done!

Printing advice -

The main thing you need to watch out for is oozing, stop-start ‘blobs’ (poor extruder control) or a lack of extruder retraction v temperature. This will spoil the surface finish. Elixir needs a well tuned 3D printer to get the best out of it. If you have a badly tuned machine, it can look awful.

Printing one object at a time can assist in the surface finish quality on many machines. This is because the perimeter is less likely to be contaminated by wisps’ or blobs from travelling back and forth to multiple object layers. If you can keep the nozzle inside the object – ‘avoid crossing perimeters’ it’s also a good thing for surface quality and finish.

Temperature can play a part in the shiny appearance as will layer height, so experiment with various settings. Spend some time tuning your inner-to-outer perimeter settings, so the join and so surface finish, is perfect.

I would love to see some translucent Polyalchemy Elixr materials one day, but I’m not sure it’s possible with the formulation and modifiers being used? If anyone can do it, surely an Alchemist can?


What settings did you use? - Polyalchemy Elixir PLA tends to like it a little hotter than normal PLA. I do experiment with new colours when I can buy them, but start at 200 Degrees C for a standard 50mm/sec print speed. Expect to go all the way up to 222 Degrees C for higher speed and chunky layers.

I used 215 Degrees C for all the above prints.

Print speed - it's good from 20-120mm/sec. Works fine in Direct drive or Bowden extruders.

Why use it? - Just look at it! It's the most shiny material ever. It's almost impossible to get how shiny it is in any photo. But seriously if you need a stunning bust, vase, or Robot :) then this is a great choice.

Is it strong? - Yes, this is stronger than normal PLA, it has higher impact resistance and the filament will not snap, you will have to cut it.

Is it easy to use/print - Yes. It as long as you have a well tuned, and calibrated machine. You need to measure the diameter of the filament and accurately add this into your slicer (always do this with any filament, but here it's even more important). Elixir will not get as runny as normal PLA at high temperatures, I have had it over 240 degrees C in ultra-high-speed testing systems.

Do you have to dry it before/after use? - No. this material seems very happy being in ambient conditions. But the best advice is always to keep it sealed, dry and away from strong light for maximum shelf life. I have had rolls sat on a shelf open for 6+ months without any problems at all. It does not seem to be affected by Light - not had any brittle models after 1+ year of using this material.

Do i need a 'special' nozzle? - No, it's not abrasive, I have used it with all different sizes of nozzle from 0.25 to 1.6mm - It will work fine with Stainless, Hardened steel, Copper, Ruby or Brass nozzles.

I really recommend not using very big nozzles, or high layer heights. Elixir is most happy and will give the best visual results, at lower layer heights (under 0.25mm max) and with a 0.4mm nozzle or smaller.

Beard (Left) printed with a 0.6mm nozzle - Robot body (Right) was a 0.4mm nozzle

As an example the white (natural) Elixir beard above (left) was printed on the TAZ at 0.25mm layers and a 0.6mm Ruby nozzle, all other parts were printed with a 0.4mm nozzle and 0.2mm layer heights.

Does it smell when printing? - No, no smell at all.

Does it come on a eco friendly spool? - No, It's a clear plastic spool, not marked with recycle triangle and not stating what material it's made of :( It is in a Cardboard box. Some 1Kg spools are still stocked at various places around the world, but it's usually a 750g roll + around 250g of plastic spool.

Conclusion for Polyalchemy Elixir PLA blend  - I do really like using this material. I have still only tried out a few of the colours. I'm keen to get hold of some Black Abyss. I can see myself using that for a lot of projects. I would love to see a Gold Elixir and also some translucent Elixir materials one day, but I’m not sure it’s possible with the formulation and modifiers being used? If anyone can do it, surely an Alchemist can?


Starting to get some height now. Days 1-5.

Day #5 Is Completed. This is a very happy Robot, just what he wanted for Christmas, a shiny suit and hat.

The Robot has a story to tell, all about how he became so smooth and shiny.

Join me next time for Day #6 - I wonder what it's gong to be?

Thanks for reading.

Rich.

Please join me on Twitter @RichRap3D

My profile and posts over on Google+

Files and designs shared on YouMagine

Files and designs shared on GitHub

Files and designs shared on Repables 

My Youtube channel is here, all 3D Printing and Hi-Def video content.


Friday, 16 September 2016

BigBox Duet Wifi Upgrade and Polyalchemy Elixir PLA filament testing

BigBox Duet Wifi Upgrade

During the summer I decided it would be good to upgrade the electronics in my E3D BigBox. I had already made some modifications adding extruder expansion to the RUMBA and experimenting with a over-complex automatic tool-changer system... more on that soon.

I was about to order a new electronics set, when the Think3D-Print3D team contacted me to see if I would be interested in looking at a beta version of their new Duet Wifi 32bit ARM RepRap electronics.


Obviously I was thrilled to take a look and I had an ideal machine in the BigBox to test it out.
Not only that but I also got the chance to try out the full colour 7" touch-screen for the DuetWifi too.


7" Full colour Touch screen interface - with it's own microcontroller, so you don't get any slow-down or drop in performance of the electronics by using it.


You can also watch this video over on YouTube in HD - you can subscribe to my channel too :)


At the same time I was contacted by Polyalchemy to see if I could try out a new type of 'modified' PLA called Elixir. That was also good timing as setting up any new electronics, firmware and mechanical system will use plenty of material in calibration and tuning for quality and speed.


Quality packaging, well sealed and Made in China.


Standard Spool size with 1Kg of filament (1.75 or 2.85mm)


I get asked to look at 'new' filaments and materials all the time. If it really is something new or different I'm happy to take a look and feedback print results and compatibility etc. The one thing that I find disappointing is when I work out the filament is just re-branded from an existing supplier or labelled up as a 'new', 'special' or 'eco-friendly' product when it's just the same as already on the market. There is nothing really wrong with this, apart from when people don't tell me - after I directly ask. I do try to look out for materials that have had some of their own development or innovation - or just people who genuinely want to make something good for the 3D printing industry and not just to cash in. Polyalchemy were looking to make something a little different - and for it to be very silky.

I was sent various test-sample grades and colours of the Polyalchemy Elixir filament over the summer, testing and feedback allowed some final tweaking and they have now released the first of their filaments for sale - natural white, you can get it here. 

Just to make it clear - I have no connection to Polyalchemy, I just found the material to be interesting and different from the everyday colours and finish of normal PLA. I tested it out on every machine, and had no problems with any of the different extruder systems or hot-ends from various manufacturers. It prints like normal PLA - I found a little extra heat would improve extrusion speed -I normally print PLA at 195 Degrees C. I ended up using Polyalchemy Elixir at around 208 to 215 Degrees C.


Some 'experimental' colours - very nice to print with.


If you need something with a very smooth and silky finish then this may be a good material for you to try out. I can genuinely say that many of the parts I have printed in this material now have prime locations all around my house. It's been one of the only filaments that my entire family have all wanted to be on display. They look less like plastic prints and more like artwork or quality made products, for that alone I am delighted.


I'm going to keep an eye on what Elixir colours are released next. As you will see below and in the video I have tried out a few, some are nicer to look at than others, but the natural white is a very good starting point for beautiful looking and artistic 3D Printed models.

Back to the BigBox Duet Wifi upgrade - 

My first task was to get the BigBox into a similar condition to my Steampunk BigBox - this involved a new heated bed, various modifications to the print carriage - now using my quick-fit version.


I only had an old style E3D Volcano heater block, so a quick modification to drill a new hole - added support for the new temperature sensing cartridges (therm / PT100 etc.)


Some other changes included a change to 400step motors on all axis and some hand-modification of E3D Volcano heater-blocks to hold the new style thermocouple cartridges.

Wiring needed to be modified for the Duet Wifi electronics, but most of the changes were to remove the RUMBA and replace.


The Duet Wifi board has been a joint development with Think3DPrint3D and also Escher3D - David Crocker at Escher3D also designed and manufacturers the Infra-red bed sensor's used on the BigBox Printer. David has also designed the PanelDue LCD touch-panel screen for the Duet board. I found this LCD screen was a very nice upgrade indeed!


I'm going to order another set of DuetWifi electronics. The firmware is soon to get dual independent extruder control so I'm very tempted to replace the BCN3D Sigma electronics with the DuetWifi system.

This is one where it's good to watch the video, so please let me know what you think and I'll share more about the BigBox Duet Wifi Upgrade if anyone is interested.

Thanks for reading, let me knwo what you think and if you are interested in also usign the Duet Wifi or testing out Polyalchemy Elixir PLA?

Until next time, thanks for reading.

Richard.