Showing posts with label training. Show all posts

Monday, 28 May 2018

HangPrinter Workshop with Torbjørn Ludvigsen and RepRap 10th Birthday party at E3D in Oxford

RepRap Hangprinter Workshop @ E3D with Torbjørn

In this blog post and video I'm going over how we got on at the recent HangPrinter workshop at E3D in Oxford (UK).


The HangPrinter workshop video can be seen below, or over on YouTube in Full HD on my channel here - 


I'm lucky to be only around 90 minutes away from E3D, they now have a new and dedicated unit in the breathtaking Oxford countryside. 

This is a typical view on the drive over to visit E3D - if you ever get the chance - take them up on the offer!

Their previous setup consisted of five separate workshops. A company motorised golf cart shuttled various components and completed assemblies from one to the other most days. (no joke).


Now with everything under one roof, E3D is an even more well oiled machine of innovation, development, manufacturing and thousands of orders being shipped all over the world.

I arrived at E3D a few days early before the workshop started. Torbjørn already had his Hangprinter attached to the roof of the E3D workshop. It's around 7 meters up and was a stunning sight.

I was utterly taken back with this 3D Printer, now the size of E3D's workshop and printing out a wonderful HangPrinter chair... 

Hollow chair form and HangPrinter chair (at the back) - was printing well until I 'tested' the disaster recovery feature ;)

That was until I stepped on and tripped over the lines and stopped it printing - all about 10 minutes after I first arrived! - I made a significant entrance :)

The printer tried to compensate for my unintentional 'test' but it did not manage to keep the lines from getting tangled around the spool - it was my fault, but it also highlighted a bug that Torbjørn had seen a few times before. It was the first time that day we got out the BIG ladder to sort out the spool line. It would not be the last, but we did have less crashes of people into lines as the weekend progressed.

A day later Torbjørn discovered the Mechaduino firmware had a nasty rounding error, so that bug would be tracked down and removed before the workshop even started. The V3 design is now significantly more robust at disaster recovery with that very nasty bug now gone.

The magic sensor - *Mechaduino*

The Open Source Mechaduino by Tropical Labs is a very neat little magnetic encoder board.


It's perfect for a project like Hangprinter as it has no endstops, bed probe or way to know if the print head has become knocked out of alignment.

We assembled up these onto the backs of NEMA17 motors for the Hangprinters being built in the workshop weekend. They are a far better, neater and lower cost solution to most other encoder systems available.


The Mechaduino uses a simple round magnet on the end of the NEMA17 motor shaft. That magnet (you should superglue it to the shaft) will then rotate each micro-step of the motor's movement. A multi-pole magnetic encoder will detect the exact orientation and know if a motor has skipped steps or if force is being applied (torque mode).


Once the mechaduino is assembled, the internal firmware (running on a 32bit ARM cpu) calibrates the rotation of each motor individually. This is required as the magnet may be aligned slightly differently, or the distance from the sensor may be variable. After calibration, you can mark up each motor with an Axis and also give them a unique address. This is so the modified Hangprinter Marlin firmware can communicate to each one connected to the bus.

Preparation for the workshop - 


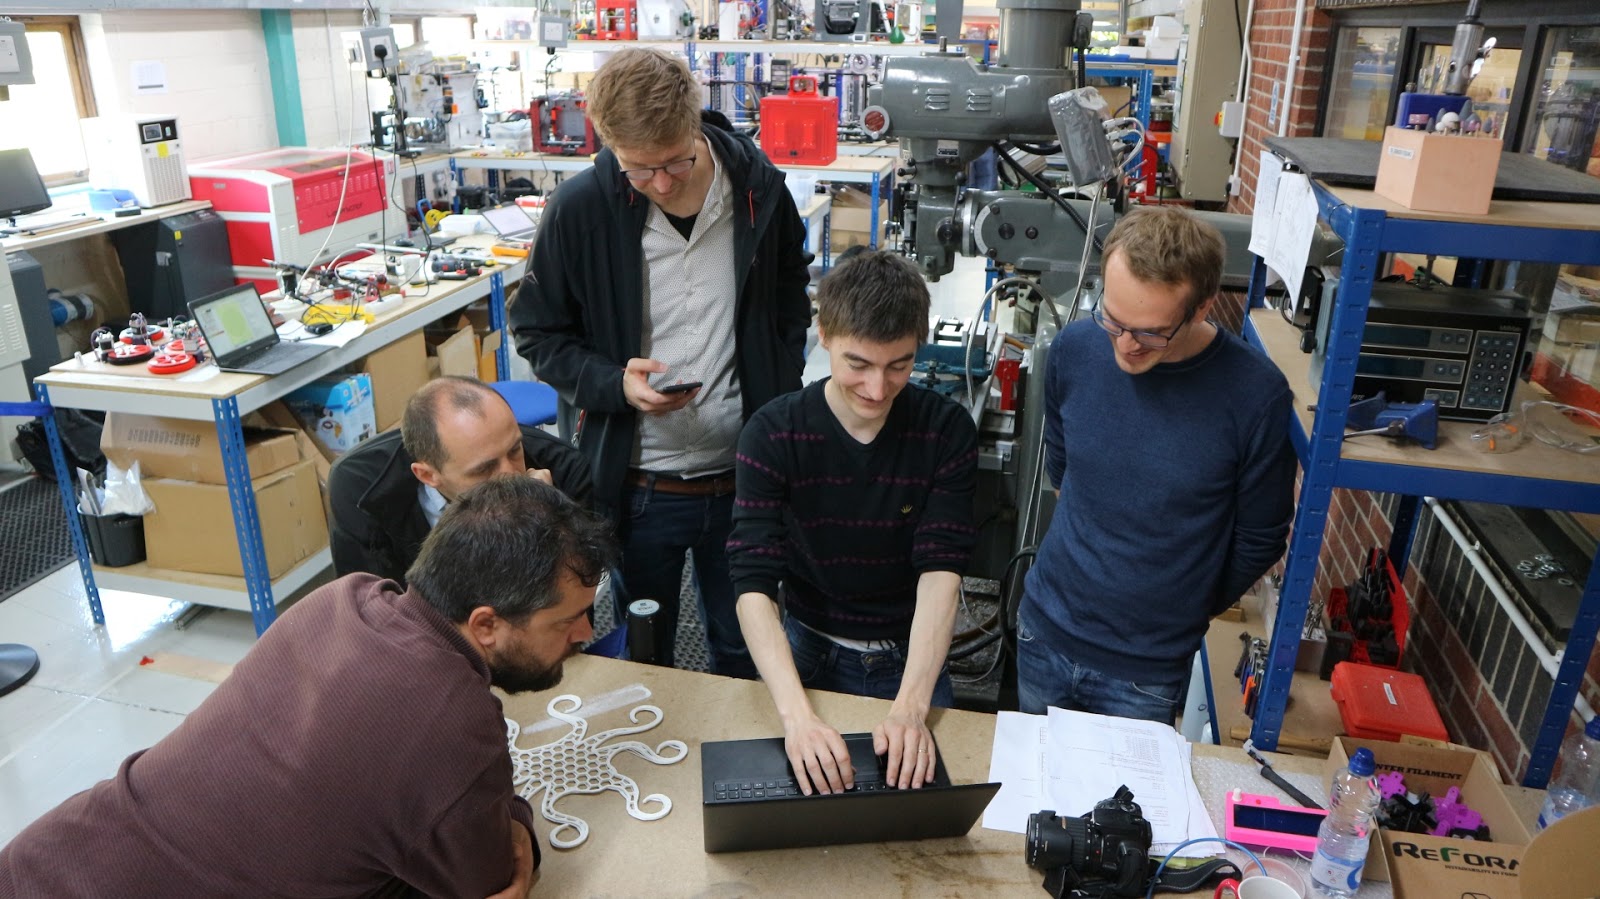
We had plenty to do before the workshop participants arrived the next day, Torbjørn and I set about with as much pre-assembly as possible to make it a more straightforward build schedule.


Basic assembly done, we left all the interesting build assembly steps to the participants.

That included, firmware, software and application setup on their laptops.

Measuring and wrapping lines around the HangPrinter pully gears.

Assembly, soldering and wiring up.


Wiring was the most time consuming, we could have saved around four hours if a pre-made wiring loom was available for the Hangprinter system - that's one for next time or anyone else that's thinking about running a 3D Printer workshop.

After some final assembly and a pre-flight check that everything worked. It was on to the calibration of the Hangprinter.
Auto-calibration of the build space is one of the most impressive aspects of HangPrinter - and only possible by the Mechaduino drivers and encoders.

You basically turn on 'Torque mode' and walk the print effector around the build volume - a script takes data points and maps out a calibration of the build volume. 


You can check the calibration - shown above it was millimetre perfect!

You finally then just set the print nozzle onto the build platform and register a zero Z position, switch out of torque mode and can shortly start a print. Above Sanjay from E3D is checking out the test print from the SuperVolcano hot-end and 1.2 mm nozzle.

The lines were tightened and print quality significantly improved. This turned out to be a very nice print.


During the workshop, I setup the HangPrinter portable frame - still a very large print area, but tiny when compared to the ceiling mounted V3.

The 'portable' uses a slightly smaller configuration for the motor plate, and three arms to form the frame.

These are all still 3D Printed parts for the frame sections to join. The top mounts are hinged for even more portability. (it all fitted into my car as an example).

The extruder mount fits onto the effector, I have made various mounting plates, above for the Bondtech extruder, and another for the E3D Titan Aero.

A short while later, I manages to string the machine and get it all set up for it's first 3D print.


I did not calibrate the portable Hangprinter. All the calculations for the firmware setup were made from the cad drawing of the built machine. This proved to be good enough for a first print, but some real-world calibration was

Amazingly it all worked the very first print. It was over-extruding, and the lines were a little loose, Z height calibration was not correct (my fault in the cad file - not allowing for a lower build platform).

But not a bad first print.

The lines you can see on the build platform were used to get a centre point (by hanging the effector on the D lines) and also to align up the A, B and C lines to the A frame mounting points.


We all then stopped for a special RepRap Birthday celebration - 10 years of Replication!


Special guests.


Lots of 3D Printing talk and ideas :)

And you can't have a party without a cake !


Happy Birthday RepRap !

Adrian Bowyer checking out the test Octopus print on the Hangprinter V3 installed at E3D - Image by Sally Bowyer of RepRap Ltd. CC BY-SA 4.0 Original image on Instagram here


The workshop was a wrap, we had a lot of fun and now even more HangPrinters are ready for printing.


Thanks Torbjørn - we had a great and successful 3D Printing workshop. I hope more people run them and the HangPrinter becomes even more popular.

Torbjørn continues with the Hangprinter project, and I'll be also setting up my machine for further experimentation and development. Stay tuned for future updates.


Almost all the parts (including many spares) for the Hangprinters were printed on my newly built Prusa i3 MK3 - A few were also printed on the MK2 as a comparison of quality, speed and accuracy.

A build video (with my daughter) and thoughts on the MK3 machine will be coming up in a future video and blog post.

HangPrinter Portable - 
If you have an interest in the 'HangPrinter Portable' I made for the workshop, leave me a message of ask me about it over on Twitter. I'm planning to make a few changes to the top mounts to be more solid, but then I would be very happy to post the design files, firmware configurations and 3D Printed components for this version if anyone is interested?


Thank you ! -


I had a great time working with Torbjørn, we were also very lucky to have access to the brand new E3D workshop - tools, components and lots of help from everyone! - Our thanks to everyone involved and the entire team at E3D for helping to make the workshop weekend a really great success.

If you want to find out more about the amazing HangPrinter project, please visit - http://www.hangprinter.org/

Version 3 HangPrinter Forum thread is here - http://forums.reprap.org/read.php?1,792937

GitHub Source for HangPrinter is here - https://github.com/tobbelobb/hangprinter


Thanks for reading, see you next time.

Rich.


Please join me on Twitter @RichRap3D

My profile and posts over on Google+

Files and designs shared on YouMagine

Files and designs shared on Thingiverse

Files and designs shared on GitHub

Files and designs shared on Repables 

My Youtube channel is here, all 3D Printing in Hi-Def video content.

Wednesday, 14 September 2016

Training - Mastering Desktop 3D Printing with Simplify3D - O'Reilly Media

Hello everyone, and many thanks for reading.

I had a short break from blogging and YouTube over the summer months, but I was still very busy with all things 3D Printing - Lots to update you with over the coming weeks, but first -  

I had a rather busy summer planning and recording a training series about 3D Printing for O'Reilly Media - Safari Books Online & Infinite Skills.


The first series of screen-cast training about using Simplify3D has now been released here.


Screen-cast training is essentially using and performing a step by step tutorial of the software package or activity. With this I had to cover both the software and physical aspect of making objects with a 3D printer.


You can also watch this in HD over on Youtube - YouTube Channel RichRap

If you have ever wanted to support me and my ongoing adventures with 3D Printing, then using this training course is a really great way, you may learn something new and any feedback you can give me will help with future content for this and my Blogs & YouTube. 

I don't enable any advertising in any of my 3D Printing blog, YouTube content or file sharing sites, so if you ever feel the desire to support my efforts, using media like this O'Reilly series will allow me to invest more time and effort into all my 3D Printing content and ongoing developments. Thank you.

This was the first time I had adventured into screen-cast training, and it's really quite a challenging but powerful way to demonstrate learning and provide real-world advice about a subject or application.

Okay, I know this is a self-promotional sales pitch, thanks for following my ongoing 3D Printing adventures and I hope this training is useful to you. 

O'Reilly asked me to write and record a 3D Printing training program for their Infinite Skills website. They had very little content on the many processes of 3D Printing. Plenty are already available on 3D modelling, but as we know a 3D model is not always suitable to be 3D Printed.

I decided to first focus on one of the most significant and challenging aspects of successful 3D Printing, and that's the Slicer and it's many settings. After much thought and a a realization that covering all the different open and closed source slicers would be almost impossible, I decided to focus on using Simplify3D. This has been my slicing program of choice for the last year+ and I have been really delighted with the control you get and support the Simplify3D team provide, to both their users and the wider 3D Printing and maker community.

If anyone has seen a screen-cast either live or recorded on YouTube you will often get frustrated watching someone mumble, make mistakes and generally jump around the program interface. That's not what the O'Reilly Infinite skills team expects - they have a very high standard of professional presenting. It was a lot of work, really good fun learning how to plan, script and produce an on-screen training series.

Okay, one last sales pitch + a chance to win a Simplify3D license

You can get my complete 3+ hour Simplify3D training package here - I can tell you this was a lot of work to put together so I hope it is useful and provides some good advice for both using the slicer and with improving your 3D Printing results.

If you want to check out my training style first, then do look at the introduction and setup sections where you can see if this course may help you.

This video should give you a taste of the training style, to see if if may benefit you. I go from a basic understanding to quite a high level of tricks and tips in later lessons

The entire table of contents is shown below, feel free to ask me any questions about it.

  1. Introduction
    1. Welcome To The Course 01m  26s 
    2. About The Author 01m  40s 
    3. How To Access Your Working Files01m  15s 
  2. Setup And Configuration
    1. Setup And Orientation For Simplify3D 08m  05s 
    2. Using The Configuration Assistant 05m  17s 
    3. Setting Machine Size And 3D Printer Profile04m  49s 
    4. Setting The Machine Firmware Type05m  49s 
    5. Machine Control Panel Interface05m  08s 
  3. Importing And Preparing 3D Models For Printing
    1. Importing 3D Models, Positioning, Scaling, And Rotation05m  48s 
    2. 3D Model Errors And Types Of Model Repair05m  00s 
    3. Rotating Parts For Strength, Mirroring, And Infill Levels06m  29s 
    4. Models Imports For Dual Extrusion 3D Printing06m  10s 
  4. Configuration Of Essential Print Process Settings
    1. Manufacturing Process Settings06m  13s 
    2. Setup Of The Extruder And 3D Printing Tool Head12m  20s 
    3. Layer Heights, Perimeters, And First Layer08m  25s 
    4. Additions And Settings05m  23s 
    5. Infill And Settings06m  03s 
    6. Support - Using Support Material06m  39s 
  5. Configuration Of Further Print Process Settings
    1. Temperature And Settings05m  29s 
    2. Cooling And Settings07m  17s 
    3. G-code And Machine Configuration Settings04m  06s 
    4. Script Settings And Examples04m  54s 
    5. Other Settings09m  22s 
    6. Advanced Settings07m  02s 
  6. Dual Extruder Machine Settings
    1. Setting Up Dual Extruders - Multiple Material 3D Printing04m  47s 
    2. Additions And Infill08m  09s 
    3. Support Material Settings04m  33s 
    4. Temperature And Tool Change04m  13s 
    5. Advanced Settings05m  08s 
  7. Generating 3D Print Files, Verification, And 3D Printing
    1. Generating G-code For Single Extruder04m  02s 
    2. Generating G-code For Dual Extruder02m  03s 
    3. Support Structures For Single And Dual Extruder Printing05m  05s 
    4. Viewing The Tool Path And Various Print Features02m  59s 
    5. Using The Machine Control Panel Interface For 3D Printing09m  43s 
  8. Thank You
    1. Wrap Up01m  30s


While this training does focus on using Simplify3D as an application, it covers many aspects of setting up your 3D Printer, what to watch out for before, during and after printing. Improving settings and using different materials for both single and dual 3D Printing. Even if you don't currently use Simplify3D you can still get a lot of useful advice and information to improve your 3D printing skills, whatever slicing package you currently use.

If you are not interested in the training, you can also donate directly to me via my paypal.me, if you would like. I really appreciate any support you can give, even if that's just reading the blog and being happy enough to come back for more next time.

Win a Simplify3D License - 

The wonderful people at Simplify3D are also providing some software license giveaways - This is in conjunction with E3D. All you need to do is Follow E3D and Also Simplify3D on Twitter and then send out a tweet to both of them saying what you want to do with 3D Printing, or what project you are working on that involves 3D printing. That's it and you may win a Simplify3D License.

While I remember - Daniel Noree - is having a competition - if you miss out, then check back with me for more chances to win a Simplify3D license.

Until next time (and that won't be long) Thank you all.

Richard.


Thursday, 20 June 2013

Work in Progress and RepRap Community Hub event - September 2013

Hello Everyone,

A lack of updates from me for a while, but I have been working very hard on many things including my new RepRap Delta Printer (3DR) -


More on 3DR shortly - an Intro Video is up on Youtube here if you want to get a head-start

So far it's been a summer of festivals and exciting 3D printer developments, lots of new machines announced and more people than ever, openly working to make technology for this great industry.

Lots of other things to also report on as soon as I get a chance - here is a taster of things to come - 
  • 3DR - A 3D printed RepRap Delta printer, much more on this shortly - (see above)
Experimentation with Laybrick -' it's a bit like printing with stale chewing gum' but a very interesting material (and also finally Laywood too) 

Better mixing of multiple materials and many more colours - (method show above is using a base colour, in this case white and many feeds of colour, mixing in a single nozzle)
  • Trials with PVA. (using some exciting new printers)
Nylon 645 Printing
  • Taulman Nylon 645 (both colour and natural printing - it's a more clear material so very nice for light pipes!)

  • Stainless steel hot-end experiments - more updates soon.

And here's the Really BIG News! 


A rather exciting RepRap community announcement - 

If you remember last year - I reported on the TCT show looking through 'makers' eyes, upset a few people, (not the intention) but it also helped make a lot more positive progress with all the the others and even the Show organisers.

I also reported on the show in 2011, if you want to see how things are starting to evolve.

After last year, the TCT Show asked me to get more involved with trying to make this an event for both the established additive manufacturing suppliers and the wider maker, developer, designer community. 


I will be doing a RepRap focused presentation at this year's show and here's the really exciting bit - 


In association with the RepRap Magazine I'm pleased to announce that in partnership with the TCT Magazine and Personalize we have organised a very exciting opportunity for the whole RepRap community.

In September this year the TCT magazine has its annual Additive manufacturing and 3D printing show at the NEC in Birmingham (UK) The TCTShow is in its 18th year and attracts big names from the industry, businesses and individual makers from all over the world.

The Show has an exciting exhibitor list and in recent years has embraced the Maker and RepRap communities with the Personalize sections of the show and the fantastic bright minds initiative. This attracted many maker based companies including Ultimaker, Makerbot, Leapfrog, Electrobloom and MiiCraft along with many other open source and proprietary developers to last year’s event.


This year the TCT Show and Personalize have further collaborated with the RepRap and maker community, providing a significant and dedicated space for the two days of the exhibition.


This space will be a dedicated RepRap community hub, where makers, designers and developers from all over the world can come and talk about RepRap and all the many aspects of 3D Printing. We can share our passions and developments, 3D printing experiences and ideas with each other and visitors to the show.

I'm even more excited to announce that joining the RepRap Magazine on this RepRap community hub will be the Inventor and father of all things RepRap, Dr Adrian Bowyer. I'm still rather stunned this is happening, and I hope you are just as excited. Joining Adrian on our stand will be the RepRapPro Ltd. Team, they plan to have a complete RepRap production facility to fully demonstrate the self-replicating nature of this great project.

The RepRapPro Ltd. team are all highly accomplished developers and designers in the RepRap community and will be showcasing their unique Tricolour Mendel and Huxley printers along with offering advice and discussion about RepRap and 3D printing for the whole community.

And, yes there's more... Also set-up on our community hub will be the ever amazing Faberdashery Team, who will also be expertly on hand to offer advice about materials, 3D printing and all things colourful and Maker related.


We have a considerable space for use at the show - RepRap Hub Stand G54 - please see the master floorplan for the entire show space.


This is a globally recognised event and a great opportunity to get involved and spread the RepRap mission. And on that note here is where we need your help -


I'm attempting to coordinate efforts in the UK and need to hear from anyone that wishes to sponsor or contribute in making this a really fantastic hub for the RepRap community.

We have a lot to do and are looking for, individuals and companies who want to help make this a great resource for the RepRap community.


And if you can operate a 3D printer, or would like to print some awesome things for the event, please get in contact at the e-mail address below.


This will be what you help make it, so please do get in contact for more information and if you can assist or even just to let us know you are going to visit the show, we want to hear from you – let’s make this a RepRap meeting event to remember.


For further information about the show, please go to the TCT Show website


If you would like to help out in any way with the event, or just want to show support, please e-mail us - and I will get back in contact - tctshow@reprapmagazine.com


You can come and visit the show for free, but you must pre register - Registration is free and open now, click here


Please do also take a look at the great work being done for the Bright minds program, a really great part of the two day show designed to get children into 3D printing, design and innovation. The fact that the TCT show are backing this Bright minds program is one of the main reasons I'm giving my time to help make this show something good for the community I hope you will want to do the same.

Do get in contact, and we all hope to see and talk to lots of you at the show.

And right about.... now - Issue 2 of the RepRap Magazine should be released- take a read, it's rather good.

Rich.


In other news -  

Makerbot got sold to Stratasys today - So much has already been written about this today, I don't want to add to the noise, but I can highly recommend reading this by Joris Peels and Al Dean's spot-on take of events here.

:)