December advent calendar - modular Christmas tree
3D Printing advice #Day 6.
For the background and introduction - Day #1 Post click here
Yesterday - Day #5 Post (Christmas Robot) was printed in Polyalchemy Elixir PLA blend colours.
Christmas Advent 2017 Download on Thingiverse here - designed by Tom Van den Bon @geekc0der With some help for each day by the South African Makers team.
Day #6 is here, and today the gift is designed by Candice Howe - It's a Christmas Stocking.

For Day 6 I also needed to print some new tree sections in another shade of Green. I'm a little behind on doing these so in an attempt to catch up I started printing Days 6 and 7 of the tree in Filamentive Recycled RPLA Apple Green. Unfortunately in my rush I used a partial coil and had not noticed a tangle in the filament, that caused the printing failure (above) around 2 hours into the print.


This is a time sensitive series of projects, we only have one night every day to print, write and post everything. Oh no.

Do I scrap the print and start again. No, that would be a waste of filament. I'm going to take this failure as an opportunity to show you how to restart a print even after a filament feed failure.
This failure had nothing to do with the filament brand/type. I have printed over 650g of this recycled PLA filament roll, without any problems I can remember. It was a tangle (filament end wrapped under multiple coils) - I should have spotted before loading the filament into the printer, but the next failure was not the same, read below for more info.
I was using Magigoo on the build surface, this is good because even when the bed is now cold, power is off and it's hours later. The parts are still well bonded to the surface. I can re-heat and continue the print - with a little Gcode editing first... (read below on how, and what to do).
First thing is to do is take a measurement of the print height, so you know where to re-start printing from.
Then you need to edit the Gcode file you were using for the model.
First find the Z height position you measured. Do this by searching for the nearest round number to the height you measured. In my case the measurement was 10.86 so I'm searching for G1 Z10.800
Now search for the last time in the file G1 Z10.800 is used before it jumps back to an earlier point. This step is important if you have Z-hop enabled, you may find the jump height rather than the extrusion height.
See below in Green, we have our restart point in the Gcode file.
Almost everything above is going to be removed from the file (delete it, from the top to the green line)
> Lots more Gcode above this point - it will also be deleted <
G1 X51.543 Y74.216 F7800.000
G1 Z10.800 F7800.000
G1 E0.80000 F2100.00000
M204 S2000
G1 F3600
G1 X55.432 Y70.327 E0.18615
G1 X59.544 Y70.327 E0.13919
G1 X51.543 Y78.328 E0.38300
M204 S1000
G1 F6240
G1 X53.224 Y76.647 E-0.76000
G1 E-0.04000 F2100.00000
G1 Z10.950 F7800.000
G1 X51.543 Y115.337 F7800.000
G1 Z10.800 F7800.000
G1 E0.80000 F2100.00000
M204 S2000
G1 F3600
G1 X52.060 Y114.821 E0.02472
G1 X52.210 Y114.897 E0.00571
G1 X52.698 Y115.085 E0.01767
G1 X53.202 Y115.220 E0.01767
G1 X53.718 Y115.301 E0.01768
G1 X54.239 Y115.329 E0.01767
G1 X54.761 Y115.301 E0.01767
G1 X55.277 Y115.220 E0.01768
G1 X55.781 Y115.085 E0.01767
G1 X55.988 Y115.005 E0.00751
G1 X51.543 Y119.449 E0.21275
M204 S1000
G1 F6240
G1 X53.224 Y117.769 E-0.76000
G1 E-0.04000 F2100.00000
G1 Z10.950 F7800.000
The last thing you need to do to the Gcode file is add a way for the Z axis to be reset back to the correct height (home, without any bed leveling enabled)
So make sure you add a section like this (below in red) to the top of the Gcode - just before the start point in Green above.
M83 ; extruder relative mode
M104 S210 ; set extruder temp
M140 S58 ; set bed temp
M190 S58 ; wait for bed temp
M109 S210 ; wait for extruder temp
G28 W ; home all without mesh bed level
This will ensure you are at the correct print temperature and perform a simple bed probe check on the top corner - hopefully this will out of the way of any partial print on the build plate. If you have a very big, or tall partial print, then this method is not going to work. It is great to save smaller prints or low height failures.
Now save this modified Gcode and print on your machine with the failed print still attached to the print bed. It should continue where it failed...

Great! we are printing again, exactly where it failed. No wasted plastic here...
Bam! Failed again...
Just as I thought it was going well, another failure. Now I'm wondering if there is a material problem... This time the final few solid layers have failed to print. the filament is jammed in the extruder and it's not a feed problem.


This is the very end of this spool, so I'm going to do the same process again above for the final few solid layers, and hope I have enough material on the roll to complete.

* In some older style hot-ends I may have been concerned that heat was creeping back up into the thermal break / heatsink causing a softening of filament. This can cause a plug like shown above. But this is just PLA at 195 Degrees C with an E3D V6 hot-end. So I know for sure the thermal capacity and cooling ability is not the problem here. *
After removal of the blockage, you can clearly see the filament has an out of tolerance bulge (measured at 2.08mm diameter - see above) and it's wedged at the stainless steel thermal break point in the hot-end. That's not good.

If you look close you can even see a force line where the extruder drive has tried very hard to push it into the stainless steel nozzle entrance, then when things stopped the extruder gear started munching through the filament and material extrusion stopped.


This was the very end of an old RPLA filamentive roll I have had for over 12 months. I'm going to chalk this one down to very bad luck, I have not had this problem before with RPLA, so maybe it's a one off. Let's hope so, I don't want to be doing that frequently.
You should always analyse your failures, it's good to know it was not because you did something wrong. When a material is +out of tolerance it causes more trouble than almost anything else.


Good, we need to get back to Day 6 - Christmas Stocking printing.
For today's Gift I have decided that Christmas stockings need to be strong (to keep all the presents safe). I have just the material -
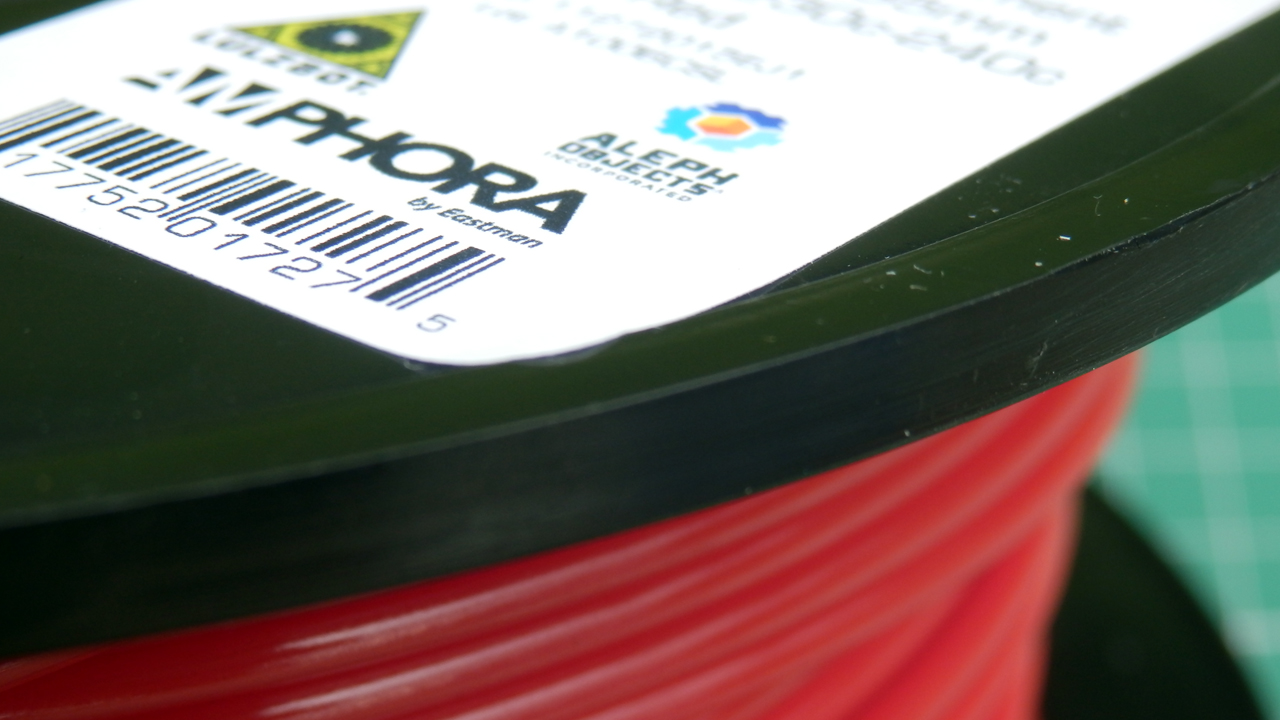
 A nice deep Christmas Red Chroma Strand Labs INOVA-1800 Co-Polyester. << I have linked to Lulzbot page as the Chromastrandlabs website is currently being updated.

This material uses Eastman Amphora co-polyester and it's really nice to 3D print with. It is a little tricky to get hold of (Unless you are in the USA, then LulzBot brands and stocks it ) - I would encourage anyone to try it out, it's well worth being in your filament range.
Don't print directly onto a glass surface (any glass type) Co-polyester materials can rip chunks out of a glass build plate. Ideally print onto a PEI surface covered in a thin layer of gluestick or Magigoo.

I would have liked to do the highlight detail on the stocking in a white piping, but I don't have any white INOVA-1800 material. INOVA-1800 does not like being bonded to other plastic's in my experience, (I have tried PETG / PET types) so we have a single colour print this time.

After a few problems, Day 6 is finally finished.
Disaster strikes - (twice!)
For Day 6 I also needed to print some new tree sections in another shade of Green. I'm a little behind on doing these so in an attempt to catch up I started printing Days 6 and 7 of the tree in Filamentive Recycled RPLA Apple Green. Unfortunately in my rush I used a partial coil and had not noticed a tangle in the filament, that caused the printing failure (above) around 2 hours into the print.

Recycled RPLA filament from Filamentive.

Filament coils became tangled causing print failure, escape from spool holder and abundant unwinding (all over the floor).
This is a time sensitive series of projects, we only have one night every day to print, write and post everything. Oh no.

Measure the height of a failed print to enable a restart of printing - explained below.
Do I scrap the print and start again. No, that would be a waste of filament. I'm going to take this failure as an opportunity to show you how to restart a print even after a filament feed failure.
This failure had nothing to do with the filament brand/type. I have printed over 650g of this recycled PLA filament roll, without any problems I can remember. It was a tangle (filament end wrapped under multiple coils) - I should have spotted before loading the filament into the printer, but the next failure was not the same, read below for more info.
I was using Magigoo on the build surface, this is good because even when the bed is now cold, power is off and it's hours later. The parts are still well bonded to the surface. I can re-heat and continue the print - with a little Gcode editing first... (read below on how, and what to do).
First thing is to do is take a measurement of the print height, so you know where to re-start printing from.
Then you need to edit the Gcode file you were using for the model.
First find the Z height position you measured. Do this by searching for the nearest round number to the height you measured. In my case the measurement was 10.86 so I'm searching for G1 Z10.800
Now search for the last time in the file G1 Z10.800 is used before it jumps back to an earlier point. This step is important if you have Z-hop enabled, you may find the jump height rather than the extrusion height.
See below in Green, we have our restart point in the Gcode file.
Almost everything above is going to be removed from the file (delete it, from the top to the green line)
> Lots more Gcode above this point - it will also be deleted <
G1 X51.543 Y74.216 F7800.000
G1 Z10.800 F7800.000
G1 E0.80000 F2100.00000
M204 S2000
G1 F3600
G1 X55.432 Y70.327 E0.18615
G1 X59.544 Y70.327 E0.13919
G1 X51.543 Y78.328 E0.38300
M204 S1000
G1 F6240
G1 X53.224 Y76.647 E-0.76000
G1 E-0.04000 F2100.00000
G1 Z10.950 F7800.000
G1 X51.543 Y115.337 F7800.000
G1 Z10.800 F7800.000
G1 E0.80000 F2100.00000
M204 S2000
G1 F3600
G1 X52.060 Y114.821 E0.02472
G1 X52.210 Y114.897 E0.00571
G1 X52.698 Y115.085 E0.01767
G1 X53.202 Y115.220 E0.01767
G1 X53.718 Y115.301 E0.01768
G1 X54.239 Y115.329 E0.01767
G1 X54.761 Y115.301 E0.01767
G1 X55.277 Y115.220 E0.01768
G1 X55.781 Y115.085 E0.01767
G1 X55.988 Y115.005 E0.00751
G1 X51.543 Y119.449 E0.21275
M204 S1000
G1 F6240
G1 X53.224 Y117.769 E-0.76000
G1 E-0.04000 F2100.00000
G1 Z10.950 F7800.000
The last thing you need to do to the Gcode file is add a way for the Z axis to be reset back to the correct height (home, without any bed leveling enabled)
So make sure you add a section like this (below in red) to the top of the Gcode - just before the start point in Green above.
M83 ; extruder relative mode
M104 S210 ; set extruder temp
M140 S58 ; set bed temp
M190 S58 ; wait for bed temp
M109 S210 ; wait for extruder temp
G28 W ; home all without mesh bed level
Now save this modified Gcode and print on your machine with the failed print still attached to the print bed. It should continue where it failed...

Restarting from a extrusion failure can save a print, time and material. Do try it.
Great! we are printing again, exactly where it failed. No wasted plastic here...
Bam! Failed again...
Just as I thought it was going well, another failure. Now I'm wondering if there is a material problem... This time the final few solid layers have failed to print. the filament is jammed in the extruder and it's not a feed problem.

Second failure - this time it's a filament tolerance problem causing a jam in the hot-end. see below.

Spool almost finished, just enough material to complete these prints (I hope).

This filament section had a bump of over 2.0mm* and that's just going to block in the stainless steel heat-break of a V6 hot-end.
After removal of the blockage, you can clearly see the filament has an out of tolerance bulge (measured at 2.08mm diameter - see above) and it's wedged at the stainless steel thermal break point in the hot-end. That's not good.

If you look close you can even see a force line where the extruder drive has tried very hard to push it into the stainless steel nozzle entrance, then when things stopped the extruder gear started munching through the filament and material extrusion stopped.

E3D V6 cross section - also showing the correct Fan mounting for heatsink cooling.
If you have a
good/adequate thermal cooling system for your hot-end, then you will
not get significant heat past the glass transition point, creeping up
the filament, past the thermal break causing filament to deform or
jam.
On an all metal hot-end
the heatsink should be cool to the touch (all the time) it should
never feel warm or hot. If you do have a heatsink that’s warm, then
do make sure to check the heatsink cooling fan is connected correctly
(to the correct voltage for the fan 12v/24v) and that you are using a
minimum 30mm sized fan. Ideally one that came with your original V6
E3D Hot-end. Also make sure it is well mounted and cooling the
heatsink fins.

You can see from the
above highlighted drawing above (Original drawing by E3D) the design of the
thermal stainless steel V6 heat-break has a maximum 2mm diameter
clearance.

Remember to clean out all the debris in the extruder drive gear - it will be blocked after a failure like this. It will not work correctly if you leave the teeth blocked.

Cleaned and ready to go again.
You should always analyse your failures, it's good to know it was not because you did something wrong. When a material is +out of tolerance it causes more trouble than almost anything else.

My trusty Die to check 1.75mm filament is not going to block my hot-ends...
With every new material
I buy or new manufacturer I use, I always run around 20m of the
filament through my home made die. This
is a section of brass with a hole drilled with a 5/64″ bit — to
give a metric 1.97mm hole. Experience has shown that this dimension
is the very maximum size I can use with an E3D V6 1.75mm hot-end,
without causing jamming, skipping or excess nozzle pressure.

Finally done. Not perfect, but good enough, and no wasted material at all.
For today's Gift I have decided that Christmas stockings need to be strong (to keep all the presents safe). I have just the material -


This material uses Eastman Amphora co-polyester and it's really nice to 3D print with. It is a little tricky to get hold of (Unless you are in the USA, then LulzBot brands and stocks it ) - I would encourage anyone to try it out, it's well worth being in your filament range.
Don't print directly onto a glass surface (any glass type) Co-polyester materials can rip chunks out of a glass build plate. Ideally print onto a PEI surface covered in a thin layer of gluestick or Magigoo.

We got there in the end.
I would have liked to do the highlight detail on the stocking in a white piping, but I don't have any white INOVA-1800 material. INOVA-1800 does not like being bonded to other plastic's in my experience, (I have tried PETG / PET types) so we have a single colour print this time.
Printing advice - (INOVA-1800 Co-polyester)
What settings did you use? - Use a PEI print surface for INOVA-1800, lightly coated with Gluestick or Magigoo. I use 235 Degrees C, but 240/245 is also good and will provide an even better layer bond.
Print speed - Seems to like a moderate speed around 20 to 55mm/sec. It's not so great at bridging or spanning gaps, so slow down, use some fan and give a 120% extrusion rate for bridges.
Getting a good first layer is critical for INOVA-1800 if it's not going down well, check your distance from the bed, too close and it'll be a disaster. too far and you will suffer warping or lifting. Really, this is the key setting.
Getting a good first layer is critical for INOVA-1800 if it's not going down well, check your distance from the bed, too close and it'll be a disaster. too far and you will suffer warping or lifting. Really, this is the key setting.
Why use it? - This is a strong and impact resistant co-polyester, it's good for anything that will be used in daily life - Brackets, machine parts, 3D printer parts and many practical objects
Warping is minimal even for objects over 120mm+ wide.
Warping is minimal even for objects over 120mm+ wide.
Is it strong? - Yes, It's a strong plastic. It has a higher glass transition temperature than PLA, but note it will shrink a little (~10%) if you apply 100 Degrees C water. I have used this trick to get a water tight seal on jar lids and pots. You can generally make INOVA-1800 objects even stronger by post-stressing them in boiling water after printing and cooling.
Is it easy to use/print - Yes - as long as you get a good first layer height and flow. Tune the bridge and spanning, then everything else is really quite standard. You don't need a lot of extruder retraction, the same setting you use for PLA should be fine.
Do you have to dry it before/after use? - No. I have not needed to dry this filament at all. It always seems ready to use, even when being stored out of any packaging - But as per the normal advice, try to keep it sealed in a bag with desiccant if possible.
Do i need a 'special' nozzle? - No, it's not abrasive, I have used it with all different sizes of nozzle from 0.25 to 1.6mm - It will work fine with Stainless, Hardened steel, Copper, Ruby or Brass nozzles. It works very well with big nozzles (0.8mm / 1.0mm) and can produce strong parts quickly.
Does it smell when printing? - No. I can't detect any smell at all using it at any temperature from 230 to 260 Degrees C.
Does it come on a eco friendly spool? - No, :( It's on a generic virgin plastic reel type (CARRIS REELS). It has a recycle logo, and is made of ABS. Packaged in a colour printed cardboard box.
Conclusion for Chroma Strands INOVA-1800 - It's not a low-cost material, but it is worth paying for. You get a very strong and straightforward to use filament. I use it for anything that needs to hold up weight, or clamp/hold things together.
Day #6 Is Completed. With failures and also the opportunity to save on plastic waste, Day 6 turned out okay in the end, but I'm annoyed about the out-of-tolerance filament bulge causing the second blockage failure.
Chroma Strand Labs Co-polyester is a great material when you require very strong finished objects, with high impact resistance. We now have a virtually indestructible Christmas stocking.
The story for today is all about turning failure into an opportunity both to learn, and always succeed.
Chroma Strand Labs Co-polyester is a great material when you require very strong finished objects, with high impact resistance. We now have a virtually indestructible Christmas stocking.
The story for today is all about turning failure into an opportunity both to learn, and always succeed.
Join me next time for Day #7 (I now also have the tree section for #7, so less of a panic tomorrow.)
Final note on Filament tolerance -
A few years back (2014)
I wrote a blog post for 3D Printing Industry about what to look out
for when testing a new filament / supplier. If you want even more
background on the importance of 3D printing filament quality control,
(even dust management) then take a look here –
https://3dprintingindustry.com/news/richrap-reviews-spectrum-filament-3d-printing-24446/
There is also a great
guide for care, guidance and troubleshooting of your all metal
hot-end (E3D V6) on the E3D dozuki website -
https://e3d-online.dozuki.com/Wiki/V6_Troubleshooting
It’s well worth a read.
Thanks for reading.
Rich.
Please join me on Twitter @RichRap3D
My profile and posts over on Google+
Files and designs shared on YouMagine
Files and designs shared on GitHub
Files and designs shared on Repables