Showing posts with label Formfutura. Show all posts

Sunday, 3 December 2017

Christmas Advent 3D Printing 2017 Day #2 - Brassfill & ReForm rPLA

December advent calendar - modular Christmas tree
3D Printing advice #Day 2.

For the background and introduction - Day #1 Post click here

Christmas Advent 2017 Download on Thingiverse heredesigned by Tom Van den Bon  With some help for each day by the South African Makers team.

The original advent calendar from 2012 is on Thingiverse - designed by from Peter Leppik.

I'm on Day #2 of the calendar, and today the gift is designed by Tom Van den Bon. It's a mini spool of 3D Printing filament :)

Day #2 of Advent 2017.

The mini-spool is designed to be printed in three parts, the coils are going to be made using Colorfabb Brassfill. Read below, this is a tricky material!

There was only really one choice for the spool, it had to be made from recycled plastic, so I'm using ReForm rPLA filament from Formfutura. This filament also comes as standard on a cardboard spool, and cardboard box. It's really easy to use and provides great results.


Formfutura sell rPLA, rPET and rTitan materials all recycled plastic and on cardboard tubes. I have been using these for months and currently it's my top pick of sustainable #3DPrinting consumables.

Formfutura Recycled rPLA - printed on the LulzBot TAZ6

I'm also testing out other recycled materials (and very interested in any others...), so do check back for more materials and to see what suppliers are promoting both recycled materials and sustainable packaging.

Mini-spool (outer) printed in Formfutura ReForm rPLA.

Mini-spool (Inner coils) printed in ColorFabb Brassfill (1.75mm).

If you manage to get a completed and finished 3D Print - Congratulations! That really is great and 99% of the work. But next you will probably want to polish / shine the Brass object (My Precious!).


You have lots of choice for metal polishing - you can tumble the part, sand it, use some industrial polishing compound, or an off-the-shelf metal polish.

I mostly use a combination of Autosol to start, then some Brasso and some brass/copper polish to finish.

Next you need some polishing devices / brushes, pads, sandpaper or other lightly abrasive things like steel-wire wool or a scouring pad.


I almost always use a shoe cleaning brush (brass/suede type) Shown above from Clarks.


A selection of other brass / nylon (even a toothbrush) brushes are a good idea.

A micro-fibre cloth is really essential too.

You can decide to sand the part first, but I often jump straight into brushing / polishing.


Add some Autosol polish and brush with the Clarks shoe brush - brass side - brush along the layers, not across them.


After a few minutes you should have the following buffed-up with the brush and polish.

Now you need to do more brushing, and ideally use an abrasive pad (dish-washing- scouring pads are ideal).

Remember to also use the micro-fibre cloth and a little Brasso to get the shine back. When things look smooth enough for you (you may not want completely smooth) - I like to still see the 3D printed texture on my parts.

You could carry on, and end up with an even more gold like finish. I stopped here because I wanted some texture to remain.

There we have it. Day #2. Done.


Printing advice - 

I will focus the advice below on Brassfill as it's quite tricky to use...

Before deciding to use Brassfill, be aware it's still listed as an experimental (beta) material by Colorfabb. It's more delicate and tricky to use than both Bronzefill and Copperfill.

But it does look great, feels heavy (quality) and can be polished to a gold-brass finish.

What settings did you use? - 210 Degrees C and a 60 Degrees C heated bed.
0.2mm layer height is fine, but you can go lower. Use a 0.4mm nozzle or larger - don't use really tiny nozzles under 0.4mm, they will clog.
Use a higher number of top/bottom solid layers (I use 5 @ 0.2mm) to give a good finish.
Print speed - it's good from 10mm/sec to around 60mm/sec - Don's be too aggressive on your extruder feed and retraction - I usually turn down retraction speed to 15mm/sec (normal is 32mm/sec).

Also use a lower travel speed, just to stop sudden movements breaking the filament being fed into the extruder. I use 100mm/sec Travel rather than the normal 185mm/sec

Add around 20% to your extrusion multiplier (120% total) for Brassfill.

Don't print more than one object at once - you will have more success with just one object in the middle on the build platform.

16% infill and two perimeters for this model.

Why use it? - It's still the only true Brass filament (I believe?) and it can have amazing & unique results.

Is it strong? - Not really - In filament form (especially 1.75mm) it's really delicate to handle, and gets more brittle over time sat on the reel. You need to be very careful when feeding it into your machine. The filament coils do not want to be forced out of their existing bend radius. It's also not good to use it in a bowden tube configuration.When printed it has very good layer bonding, with a matt slightly rough finish. Polished parts feel strong and high-quality because it's such a heavy material. 

Small printed features will snap off models, small parts are quite brittle even when printed. It's best used for a bust, or solid model with surface features you want to show off / polish, rather than spindly 'tree-like' objects.

Is it easy to use/print - It's straightforward in terms of settings, but handling the material and choice of extruder is quite hit-and-miss for many users. Make sure your extruder is not clamped too tightly onto the filament (it will bend/break/buckle/grind, jam) - Use 200-210 Deg C settings to start with, then tune print speed for ability of the extruder - My advice would be not to print unattended because the filament may/will break and require you to re-insert etc. It snapped three times during this model print. Pause, remove filament end, re-insert coil and continue.

Do you have to dry it before/after use? - No (but keep reading) - Keep it dry and sealed in the bag. My top-tip for Brassfill is if you notice the coils are becoming brittle, dry and also warm up the filament on the reel (in a low temp oven). I have found this tends to make it easier to handle, it becomes less brittle and also prints more smoothly. 

Do i need a 'special' nozzle? - Yes, it's 'soft', but still abrasive. Use a 0.4mm or bigger nozzle. It will work fine with Stainless, Hardened steel, or Ruby nozzles. If you manage to use an entire reel, you may see some slight nozzle enlargement with Brass nozzles.

Does it smell when printing? - No

Does it come on a eco friendly spool? - No, it's the normal ColorFabb (PC) Polycarbonate Spool, but we hope to see Colorfabb introduce Eco-friendly BioFoam PLA spools in 2018. Stay tuned for more info.

Conclusion for ColorFabb Brassfill - Great when you get skilled in using it on your machine, (warning expensive failures!) - It can produce a fantastic, unique and stunning finish. You just need to handle it carefully. Also be aware you do not get quite as much volume on a spool, it's a heavy, quite costly material, but so worth the effort. 

Final note - Always (without fail) clean the nozzle after using this filament! Do not let it sit in the nozzle at print temperature for any length of time when not actively printing. You have been warned, it's not a friendly to use filament it can cause you days of pain and hassle if you are not careful...


Day #2 Completed. That's another object I want to both keep, and have on show this Christmas - and it also has a story to tell about how it became so shiny...

Join me next time for Day #3

Thanks for reading.

Rich.

Please join me on Twitter @RichRap3D

My profile and posts over on Google+

Files and designs shared on YouMagine

Files and designs shared on GitHub

Files and designs shared on Repables 


My Youtube channel is here, all 3D Printing and Hi-Def video content.

Friday, 9 June 2017

3D Printing Adventures Summer 2017 update

Summer is coming up fast, so here is an update on my current and future 3D Printing adventures.

Firstly the 3D Printing for Dummies book has now been issued as a revised and updated Second Edition, I was surprised to receive the author copies as I was not expecting it to be published until mid-late summer.


But here it is, and thank you to everyone who contributed to it's updates and revisions. Also a big thank you to my co-author Kirk and the great team at Wiley for making this update happen.


Some really great projects, printers and material updates have been added to the book, along with a lot of updated topic's and sectors where 3D printing is growing.


I can only find a USA link for the new version, but worldwide stocks should be available soon if you wish to buy a copy. And if you do, thank you.


I go over a lot of updates in the video below, and here is also a quick-jump index if there is something specific you want to hear about -

Quick jump index -
00:50 - 3D Printing for Dummies (2nd Edition)
02:10 - The Olsson RUBY Nozzle
02:26 - The Sorceress - printed with the Ruby
02:40 - Pongo PLA - interesting translucent white
03:20 - PEI Print bet 3M sheet from AndOrNot
03:50 - Fuel3D Scanner is no longer for sale :(
05:15 - Polymaker Polysher & Polysmooth Kickstarter
06:08 - Glitter machine...
08:27 - Sigma R17 Noodle catcher upgrade
09:25 - Learning SharkCAD3D V10
10:00 - 100% Recycled Filament by ReFlow

You can also find this and more on my YouTube channel in HD over here


Olsson Ruby nozzle - 

I was very excited to receive an Olsson Ruby nozzle for testing, this is an upgrade I have been fascinated about for some time. I'll be doing a lot more testing, but the initial results are very smooth and it's printing really well on the Prusa i3 MK2.


The construction is quite simple, but exceptionally engineered. This has a real ruby embedded inside the tip of the hot-end with a 0.4mm nozzle hole.


The back is plugged and then drilled out to allow a 1.75mm or 2.85mm filament path.


They are E3D and Ultimaker Olsson block compatible.


It's easy to fit - as always, be careful with fitting, and I would certainly advise to lock the heater block and thermal break down on to the nozzle, rather than trying to screw the nozzle tight into the heater block directly. 
When fitting any E3D nozzle I always leave a small gap with the nozzle because for the E3D V6 the stainless steel thermal break is designed to lock flat to the nozzle, not for the nozzle to seal against the heater block.


This image does not do justice to the great model by Louise Driggers (The Sorceress) you can get it from Pinshape here  but I wanted to show a print from the Olsson nozzle - this is printed at 0.2mm layers in Fillamentum  PLA Rapunzel Silver

The finished print quality looks like you would expect from a 0.15mm layer height. But I will do a lot more testing with the Ruby nozzle - especially with filled and composite filaments.


Many thanks to Pongo for the 'water clear PLA' filament sample. We had a discussion over on Twitter about this material - I'm looking for translucent white (not clear, but also not opaque) filaments to use as Optical LED light guides. This looks very promising, I'll update you on the results.


Andrew from AndOrNot sent me over a new sample (Test) bed material (3M sticky-backed PEI Sheer) - It's going to be fitted to the Sigma R17 glass bed so I can print PETG without damaging the glass build surface.


Polymaker Polysher (Kickstarter)

I'll have a dedicated post all about the Polysher and Polysmooth materials, I have done a lot with the machine and am impressed with the results, here is a quick overview example below -


The Polysher and Polysmooth materials are now becoming available around the world. For an overview and feedback from early users, do take a look at the Kickstarter here.


Don't print at these high (210 - 230) temperatures! - Really it's way too high - I'm printing around 190 for 55mm/sec print speeds and that produces great results without micro-bubbles or angel-hair.


I'll talk more about temperature and print settings for Polysmooth in the next blog post and video, but do take a look at the simple temperature test above - and as it's a constant speed spirial vase, no retractions or pauses were experienced, so it's a good test for material temperature stability.

Before (Top) and After smoothing (Bottom) - This was a 'draft mode ' print made quickly at 0.2mm layers - it's quite small and detailed, but the Polysmooth helped make it a really great finish.

Voronoi D Tower 
Math Art by Dizingof


Testing out the transparent Polysmooth - Above shows both Clear and white - they both become flat smooth, but the internal layer lines remain for the clear material, the surface feels smooth for both.


Another example above - white, natural and clear, smoothed in IPA for around 35 minutes. Make sure you watch out for fluff and dust because it'll stick and bond into the surface finish (see lower left above).

Designed by  Mark Durbin (MakeALot)

For Sigma R17 and TAZ6 updates, do check out the video above. I'll have a lot more on these machines, projects and developments over the summer.

SharkCAD3D V10 - 

I have also been learning a new 3D CAD package (SharkCAD 3D V10) From Punchcad )


So far I'm really impressed with this package, It's amazingly powerful and has a lot of great 3D printing features for both design and model processing. I'll be posting a lot more about this package as I learn how to use it over the following months (and years) - This is going to be my new CAD software for all existing and future developments from this point on.

If anyone is interested in me posting some training video's or anything specific about this software, and it's capabilities, do let me know. It'll help me learn, and after doing a lot of screen-casting last summer I would like to do more.

Punchcad also have ViaCAD 2D/3D and many other SharkCAD packages at very low to high price points, so something for every maker or 3D design professional. I would encourage you to check them out, if for no other reason than the fact I accidentally stumbled over them, and was amazed I didn't already know they existed.

It's still early days for me learning the tools and user interface, but I'm quite sure you will be pleasantly surprised if you decide to try out the trial software or buy a version (Mac and PC available).


Quad Extruder printing? - 

I also hope to receive my Quad extruder upgrade for the Prusa i3 MK2 at some point in the next month. The Prusa team have quite a big backlog of orders and I didn't place my order until October, so the September shipments are going out first. I'll keep you updated on the progress with that, but I'm excited to get hold of it and experiment with multi-materials and colours.

ReForm Recycled filaments - 

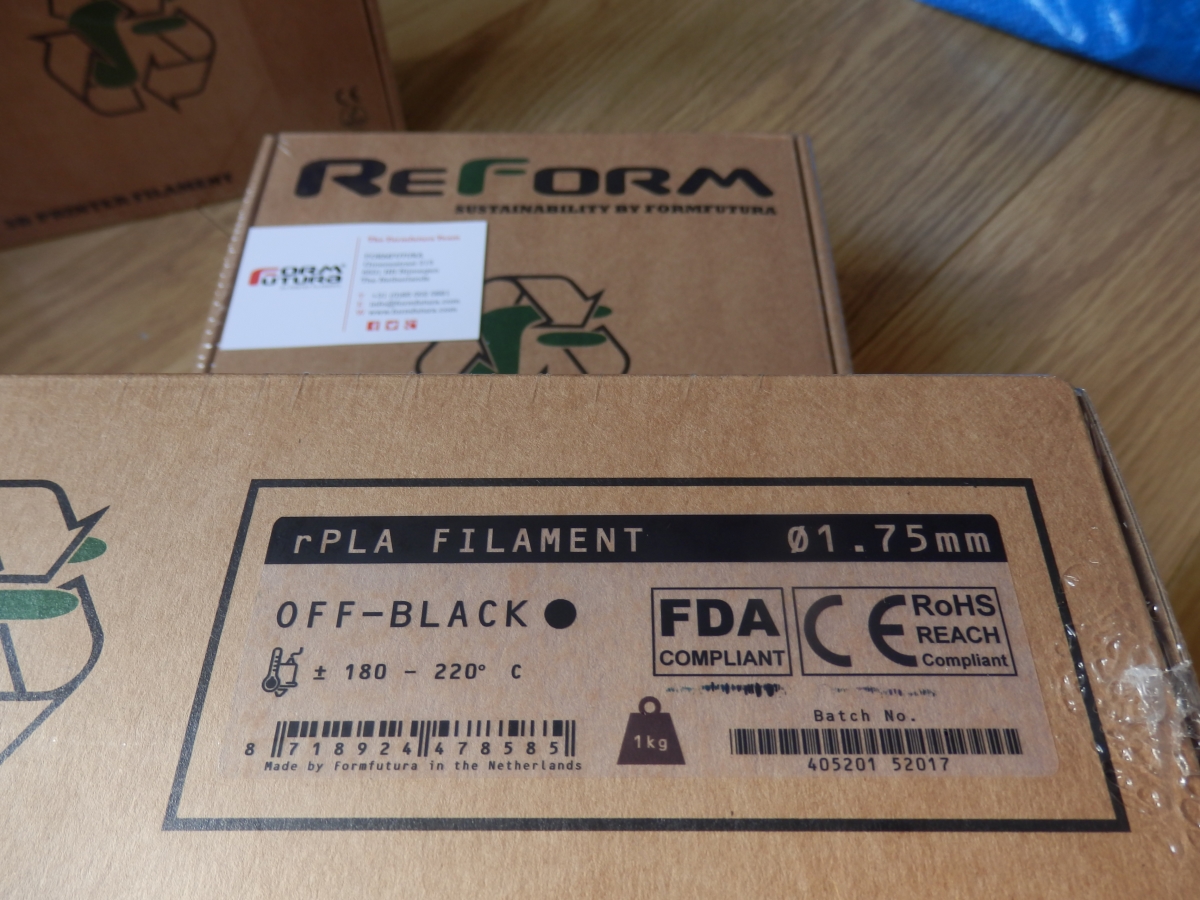
And just as I was editing this video and blog post, I received some really nice 100% fully recycled 3D Printing filaments - You can find out more here - > ReForm by Formfutura


Cardboard spools, 100% recycled rPET, rPLA and rTitan materials. It's exactly what I have been asking suppliers to make for many years now.


I'm really impressed that Formfutura have managed to manufacture these materials, I hope they print well and I also hope more manufacturers will also think about sustainable materials and packaging for 3D printing filament consumables.


I'll let you know very soon how I get on with these materials, spools and how they perform in various 3D printers.

I hope that was a useful update, lots more to come from me this summer -  do comment and please subscribe to my YouTube channel for more 3D printing adventures soon.

Thanks for reading and watching.

Rich.

Please join me on Twitter @RichRap3D   -  https://twitter.com/RichRap3D

Files and designs shared on YouMagine - https://www.youmagine.com/users/richrap

Files and designs shared on GitHub – https://github.com/RichRap

Files and designs shared on Repables - http://repables.com/u/richrap/

My Youtube channel is here, all 3D Printing and Hi-Def video content.