It's fair to say that 2020 has been a difficult year for everyone. I almost didn't write this blog post, but I wanted to finish off 2020, looking forward to a better 2021.
With the global virus pandemic causing troubles and uncertainty we all have less time to do the things we enjoy. This year has certainly been a strong reminder to us all, to try and enjoy as much of life as possible.
I have kept 3D Printing during all of 2020, but have not managed to share as much as I would have liked.
I started off 2020 firmly intending to do a lot more 3D Printing development, life and the global virus somewhat got in the way of many plans. We had a lot of 3D printing events cancelled and social meet-ups have been impossible.
Here is a little summary of a few things I have designed and printed and a some general thoughts on the 3D Printing market, open source projects and interesting things that have happened in 2020. And finally a look to 2021.
Retro inspired concept computer -
Some of you will know that along with a strong passion for 3D printing, I have a love of retro computers and 'old' game systems, it's an ongoing interest that pre-dates 3D printing and something that I still enjoy and do to this day. One of my early 2020 projects was a reimagining of a 3D Printed classic computer, loosely based on the Amiga and C64 range of the 80's and 90's.
The 'C=Next' concept computer (using a real Amiga A500+ Keyboard) Yes, it is 24 Inches wide!
This was a large multi-part print, three large sections for the main keyboard and some end caps for the I/O on each side of the computer.
I had an old A500+ computer that died a death from an internal leaking battery (I know, it's tragic this was not better stored or should have had the Varta battery removed long ago) - But it did allow a donor keyboard for the new machine.
Yes, the logo is colour changing :)
This has further evolved over the year, it probably deserves a blog post of it's own, if you want to see more on this project and the evolution of the internal electronics inside, let me know.
3D printed electronics and enclosures -
Ok, so it's not '3d printed electronics' but I have printed out around 15 different PCB models to help verify they can mechanically fit, and assist with the design of many electronics enclosures this year.
Even basic enclosures can be simple to 3D print and give a 'finished' look to a prototype.
I can highly recommend using brass threaded inserts when designing any sort of enclosure you intend to open up or fit together accurately. A temperature controlled soldering iron can assist with inserting into a pre-printed post as shown above.
3D printed test and programming fixtures are now a common design for any new prototype electronics or product developments. They are simple to print and build and can easily save you thousands in the cost of getting something 'professionally' made. I have made up a lot of different 3D printed rigs and jigs this year.
Brackets, mounts and almost anything that needs a place to accurately fir into a system or development - I loose count of all the mounting plates, adapters and holders I have printed this year. pre-production runs of 3D printed parts is now a common aspect of product design and development.
3D printed pond filter system -
During the UK summer lockdown I decided to upgrade the pond filter system. I could not get out to any shops and I didn't want to order a system online, so I decided to try and make a pond filter system from a plastic box, some unused pond filter sponges and some 3D printed parts.
I decided to add a little shelf so the clean filtered pond water could exit the box as a waterfall.
I already had a good working pond pump, so this entry (above) was the dirty water inlet.
Some sponge filters I had from an old pond filter that died many years back.
Filters cut to size and inserted into the enclosure along with some gravel for added weight.
The pond filter has been working really well all of the year.
Lots of practical 3D printing this year -
I could probably bore you all to death with all the practical 3D printing I have done this year. It's been sometimes a necessity because other options didn't exist, or an opportunity to use 3D printing to solve a problem quickly.
Replaced some fence posts and I didn't like any of the fence post toppers, so I designed and printed my own.
This shelf had no end caps or iron-on strips, so a quick bit of 3D cad and a few hours of printing later - with wonderfully colour-matched recycled grey PLA, it was finished off nicely.
Even a simple end-cap for an unused plastic plumbing waste pipe - this was quicker to design and 3D print than a trip to the hardware store.
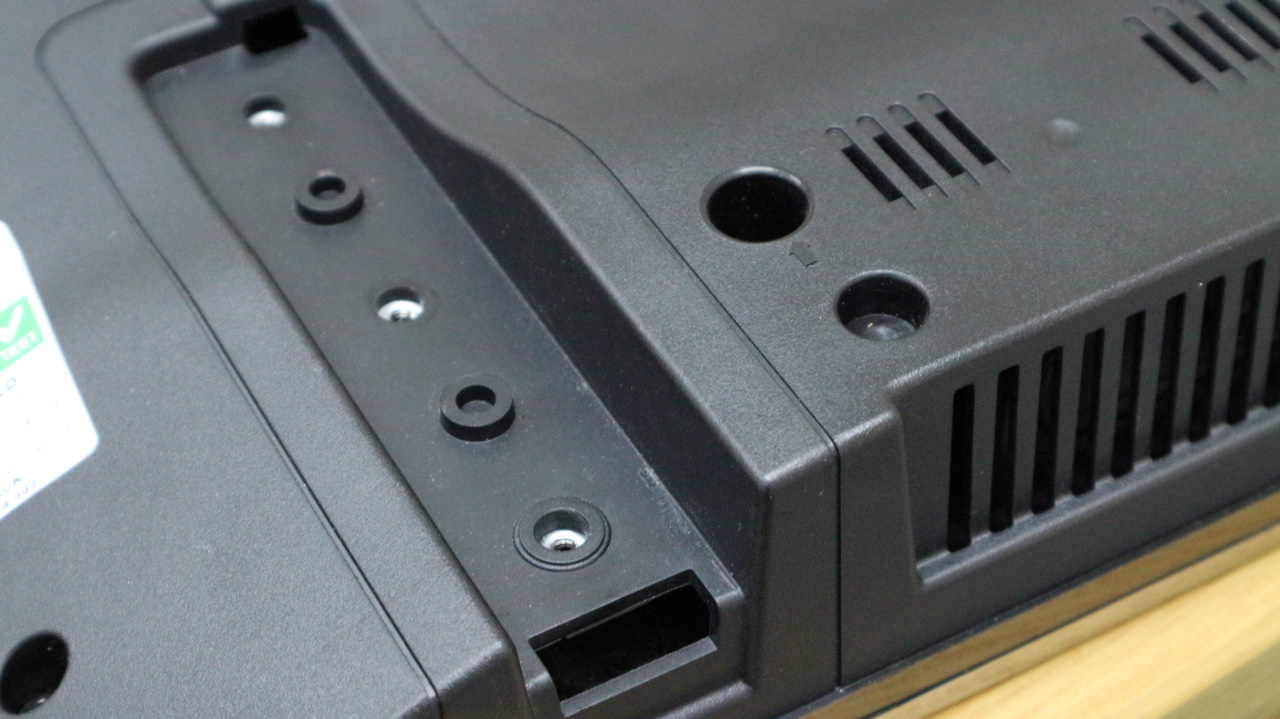
I had a wall mounted TV that needed to be desk mounted again, but the original feet were missing.
A quick (and solid) design and 3D print later, we had two new desk mounting clamps for the TV.
Mounted and fixed to the desk, it's going nowhere.
I could go on with more practical 3D prints this year, but you get the idea - a lot of things were fixed, repaired and produced with 3D printing this year. I doubt more than a day went past when I was not 3D printing something for someone or for myself.
The end of 2020...
The 3D printed Advent calendar's come out every year, they still are a great talking point both for 3D printing and the vast selection of different materials used.
Many of my past projects and experiments are still active in one way or another today, people continue to innovate and evolve ideas. Even as we enter 2021, 3D printing is still in it's 'early stages' of being useful to the 'average person'. When you start using 3D printing to solve every day problems, and turn design ideas into practical printing solutions it's a wonderful tool.
We have seen some really great OpenSource and OpenInnovation 3D printing projects this year. I plan to cover these in 2021 and also get further involved with as many as possible.
Things I would like to see more of and help with in 2021 - Please reach out to me if you are doing or planning any of these, I will try to help if I can. (Most of the links below are to my past blog posts doing similar things).
The continued increase and use of sustainable (multi-use) filament spools / Cardboard and MasterSpool filament coils.
More recycled plastic content in 3D Printing - both as recycled filament materials and as re-used print waste. Recycling filament plastic (2015)
More tool-changing systems - additive and subtractive - manufacturing systems, continuous printing (belt-printers) and automatic build platform change systems.
I would still like to see many more light weight extruder+hot-end systems, ideally around 200g total weight. I see a lot of bowden based extruder systems that could/should benefit from a good quality, light and strong direct-drive-geared extruder and hot-end combination. Especially on machine using IDEX, they could be greatly improved with a move away from bowden to a light weight direct extrusion system, maybe 2021 will bring more to market.
I'm always looking for interesting 3D Printing filament materials, especially engineering grade or ones that that are matched to classic computer colours. A few have popped up during 2020 Printed Solid over on Twitter has a range of Retro computer filament colours
I'm still incredibly interested in paste extrusion, coupled with a tool-change system and some FDM printing it could offer a lot of good options for manufacturing and making.
See you next time, and if you have a new and interesting 3D printing project, development or material you want me to take a look at, do get in contact.
I hope you all had a safe and happy holiday season, and Happy New Year for 2021
Rich.
P.S - If you haven't yet found the joys of Podcast's, do consider giving them a go. I can strongly say that without Podcasts in my life, 2020 would have been 10x harder to 'experience'.
Please join me on Twitter @RichRap3Dif you want to discuss more about 3D printing (or retro computing).
My Youtube channel is here, all 3D Printing and Hi-Def video content, I do hope to get back to publishing new video content in 2021.
In this post I investigate the use of 3D printing to help bring back a favourite chocolate bar - a taste of nostalgia from the 80's.
I did all this back in early December 2015 - just in time for Christmas!
* STOP PRESS *
In some rather great timing - literally as I was typing up this post and editing the video - United biscuits (the parent of Jacobs) Today 9th Feb 2016 - confirmed that they will actually bring back the TRIO! - I'm excited as they will be back in the supermarkets in only 1 month.
I was rather surprised and delighted by this news - but at least I got to experience my Trio! before anyone else, and I can soon compare to the real thing once again - read on to see how 3D printing can help bring back a favourite snack.
* STOP PRESS *
Trio!, Trio!...
I want a Trio! and I want one NOW!
Back in the 80's as a ~10 year old, one of the best things you could find in your lunch box was a chocolate bar. Maybe also some ridiculous 'Hedgehog Crisps'
Chocolate bar's of the 80's were so much more exciting than now. Many companies experimented with new ingredients and combinations, there was a big battle for the next big chocolate snack. Some were good, some were awful and were banished from the shelves very fast indeed. And don't get me started on the Marathon > 'Snickers' name change.
One Chocolate bar that was a fond favourite for me was the Jacob's Trio!
If you remember the Trio! or the memorable advert's - With a girl called Suzy that had a habit of shouting that she wanted a Trio! now! - Watch at your own risk on Youtube here
Trio's are now a thing of the past, they finally died somewhere in the mid to late 90's and unfortunately because Jacob's biscuits has been acquired by another company, they now only really focus on crackers. That's crackers in my opinion as the 30-year cycle of childhood memories is well upon us for this fantastic chocolate snack.
Another Trio! fan made a valiant attempt to bring back the bar many years back, this was a 2' long 9.5Kg heart-attack inducing monster of a 'snack'. It was not enough to bring it back or interest Jacobs, he even got into the national newspapers. You can see his glorious effort over on pimpthatsnack
Now the only option we have is to attempt to re-create the long lost bar - and that's where a little 3D printing can help.
Please read on below for details of how you can make your own, and you can watch me getting excited about the Trio! chocolate bar in the video below or over on Youtube in HD. -
Project Trio!
At the point of deciding to do this project, I was also reading a really great book called the Great British Tuck Shop by Steve Berry and Phil Norman. I can totally recommend if it you have an interest or memory for snacks of the 70's and 80's past. They mention the Trio, only briefly.
For the mold making - I'm using a great food safe silicone, you mix equal quality of Part A and B.
But first you need to design and 3D print your chocolate bar, I'm using Sketchup above to produce both negative molds and also positive chocolate bars.
After 3D Printing the end result is a set of positive molds that we can make silicone negative molds
Mix up the silicone, trying hard not to get too many bubbles, using a cutting action helps.
Pour and settle - bang it a few times down on the desktop to remove bubbles.
5-6 hours later - after removing the bars you will have a mold ready to use - after a wash and dry first.
For the ingredients, I don't have exact quantities, I was winging it for this experiment.
You need milk chocolate - I used Cadbury Dairy Milk. (or chocolate of your choice).
One Caramac bar to help make the 'toffee' layer.
I used 1 table spoon of salted caramel sauce - because my tastes have changed slightly since I was 10 years old :) - (in the US that's probably about 1/24th of a 'Cup' - I'm guessing).
By some total accident I found that Scottish Walkers Pure Butter shortcake biscuits are exactly the dimensions we need for a Trio! - and they taste great too.
When melting the chocolate and caramac for making the toffee I recommend using a water bath (Bain-Marie) - this helps gently melt things so you don't cook the chocolate or split the toffee.
A thermometer or other temperature measuring device is a good idea for keeping track of the melting process. If you want to also temper the chocolate before using it, then maybe practice the art of melting at a higher temperature - around 42 Degrees C and lowering the temperature to around 31 Degrees C before using in the mold.
Another directly printed mold in FilaFlex for the Caramel sections of the Trio!
Firstly you want to cast the toffee sections, melt mix and pour into the mold. They will not set hard, as you want a gooey toffee layer in the bar. I put them in the freezer to go hard so they were easy to remove from the mold.
When pouring the chocolate, just focus on getting some in the molds first.
And then give them a tap on the table, that will settle, level and release most of the bubbles.
You will see that on my Trio! bars I had a few bubbles remaining around the Trio text, so make sure you give them a really good tapping.
Add the toffee pieces and a little more chocolate, try to make sure the toffee does not move around too much.
Then you want to add the shortcake. Depending on how much chocolate you have used, you may need to reduce the height of the shortcake.
Finally cover in more chocolate and level off with a blade or spatula.
Leave to set in the fridge...
Then eat them all with a nice cup of tea.
Food / Body Safety of 3D Printed Materials -
This is sometimes a confusing area. Some materials for 3D printing are being advertised as 'FDA approved' Food and medical 'safe'. That may or not be true in their manufacturing process to make the filament. But please remember that when used in a 3D printer, being melted in a hot-end that may have many other contaminated materials. Along with a brass nozzle that probably contains lead. It's worth keeping in mind that the FDM printing process is not a 'safe' method of producing objects that come into contact with foods or your body.
3D Printing out a cookie cutter or even a cup or spork to use once, maybe okay. But remember that 3D parts are made of layers of plastic, with lots of indentations, grooves and micro-holes where bacteria can grow or contamination can collect.
You also can't just put most 3D printed objects in the dishwasher, they usually melt, deform or discolor.
I was and still am investigating the use of TPU - thermoplastic elastomer (polyurethane rubber) for foods and mold making.
I know I had some colour leak out of a bright green FilaFlex mold when I was doing soap and candle making. (that was at higher working temperatures of around 80 Degrees C) This indicates that it may not be such a great idea to use it directly for food based products.
I did make a Filaflex Trio! bar mold (shown above on the right), in clear material, but decided to not to use it directly. And as you see above I also used white PLA printed Trio! bars to cast a food-safe mold. I feel happy with PLA as it's only in contact for a short time while the mold sets (5-6 hours) and the mold can be fully washed out with warm soapy water before and after use.
Other flexible materials are also available, Ninjaflex, Semiflex and plasticized (soft) PLA.
You can buy FilaFlex from Recreus. This material is flexible enough to allow easy removal, but also holds it's shape well. It's also ideal for temperatures of melted soap, candle-wax etc.
As ever, be aware and make up your own mind before using 3D printing for food or body based projects.
3D Model files - You can find all the source and model files for this project over on my Youmagine page here.
Thanks again for reading, please share and feedback on this project or anything else I'm doing.
If you would like to see more of these experiments / tutorials or examples of practical/fun uses for 3D printing - do get in contact and leave a comment below -
Until next time, I have three more Trio! bars to eat, and no you can't have one.
And remember to look out for REAL Trio! bars back in the UK shops in March 2016 - Can't wait!