In this post I investigate the use of 3D printing to help bring back a favourite chocolate bar - a taste of nostalgia from the 80's.
I did all this back in early December 2015 - just in time for Christmas!
* STOP PRESS *
In some rather great timing - literally as I was typing up this post and editing the video - United biscuits (the parent of Jacobs) Today 9th Feb 2016 - confirmed that they will actually bring back the TRIO! - I'm excited as they will be back in the supermarkets in only 1 month.
I was rather surprised and delighted by this news - but at least I got to experience my Trio! before anyone else, and I can soon compare to the real thing once again - read on to see how 3D printing can help bring back a favourite snack.
* STOP PRESS *
Trio!, Trio!...
I want a Trio! and I want one NOW!
Back in the 80's as a ~10 year old, one of the best things you could find in your lunch box was a chocolate bar. Maybe also some ridiculous 'Hedgehog Crisps'
Chocolate bar's of the 80's were so much more exciting than now. Many companies experimented with new ingredients and combinations, there was a big battle for the next big chocolate snack. Some were good, some were awful and were banished from the shelves very fast indeed. And don't get me started on the Marathon > 'Snickers' name change.
One Chocolate bar that was a fond favourite for me was the Jacob's Trio!
If you remember the Trio! or the memorable advert's - With a girl called Suzy that had a habit of shouting that she wanted a Trio! now! - Watch at your own risk on Youtube here
Trio's are now a thing of the past, they finally died somewhere in the mid to late 90's and unfortunately because Jacob's biscuits has been acquired by another company, they now only really focus on crackers. That's crackers in my opinion as the 30-year cycle of childhood memories is well upon us for this fantastic chocolate snack.
Another Trio! fan made a valiant attempt to bring back the bar many years back, this was a 2' long 9.5Kg heart-attack inducing monster of a 'snack'. It was not enough to bring it back or interest Jacobs, he even got into the national newspapers. You can see his glorious effort over on pimpthatsnack
Now the only option we have is to attempt to re-create the long lost bar - and that's where a little 3D printing can help.
Please read on below for details of how you can make your own, and you can watch me getting excited about the Trio! chocolate bar in the video below or over on Youtube in HD. -
Project Trio!
At the point of deciding to do this project, I was also reading a really great book called the Great British Tuck Shop by Steve Berry and Phil Norman. I can totally recommend if it you have an interest or memory for snacks of the 70's and 80's past. They mention the Trio, only briefly.
For the mold making - I'm using a great food safe silicone, you mix equal quality of Part A and B.
But first you need to design and 3D print your chocolate bar, I'm using Sketchup above to produce both negative molds and also positive chocolate bars.
After 3D Printing the end result is a set of positive molds that we can make silicone negative molds
Mix up the silicone, trying hard not to get too many bubbles, using a cutting action helps.
Pour and settle - bang it a few times down on the desktop to remove bubbles.
5-6 hours later - after removing the bars you will have a mold ready to use - after a wash and dry first.
For the ingredients, I don't have exact quantities, I was winging it for this experiment.
You need milk chocolate - I used Cadbury Dairy Milk. (or chocolate of your choice).
One Caramac bar to help make the 'toffee' layer.
I used 1 table spoon of salted caramel sauce - because my tastes have changed slightly since I was 10 years old :) - (in the US that's probably about 1/24th of a 'Cup' - I'm guessing).
By some total accident I found that Scottish Walkers Pure Butter shortcake biscuits are exactly the dimensions we need for a Trio! - and they taste great too.
When melting the chocolate and caramac for making the toffee I recommend using a water bath (Bain-Marie) - this helps gently melt things so you don't cook the chocolate or split the toffee.
A thermometer or other temperature measuring device is a good idea for keeping track of the melting process. If you want to also temper the chocolate before using it, then maybe practice the art of melting at a higher temperature - around 42 Degrees C and lowering the temperature to around 31 Degrees C before using in the mold.
Another directly printed mold in FilaFlex for the Caramel sections of the Trio!
Firstly you want to cast the toffee sections, melt mix and pour into the mold. They will not set hard, as you want a gooey toffee layer in the bar. I put them in the freezer to go hard so they were easy to remove from the mold.
When pouring the chocolate, just focus on getting some in the molds first.
And then give them a tap on the table, that will settle, level and release most of the bubbles.
You will see that on my Trio! bars I had a few bubbles remaining around the Trio text, so make sure you give them a really good tapping.
Add the toffee pieces and a little more chocolate, try to make sure the toffee does not move around too much.
Then you want to add the shortcake. Depending on how much chocolate you have used, you may need to reduce the height of the shortcake.
Finally cover in more chocolate and level off with a blade or spatula.
Leave to set in the fridge...
Then eat them all with a nice cup of tea.
Food / Body Safety of 3D Printed Materials -
This is sometimes a confusing area. Some materials for 3D printing are being advertised as 'FDA approved' Food and medical 'safe'. That may or not be true in their manufacturing process to make the filament. But please remember that when used in a 3D printer, being melted in a hot-end that may have many other contaminated materials. Along with a brass nozzle that probably contains lead. It's worth keeping in mind that the FDM printing process is not a 'safe' method of producing objects that come into contact with foods or your body.
3D Printing out a cookie cutter or even a cup or spork to use once, maybe okay. But remember that 3D parts are made of layers of plastic, with lots of indentations, grooves and micro-holes where bacteria can grow or contamination can collect.
You also can't just put most 3D printed objects in the dishwasher, they usually melt, deform or discolor.
I was and still am investigating the use of TPU - thermoplastic elastomer (polyurethane rubber) for foods and mold making.
I know I had some colour leak out of a bright green FilaFlex mold when I was doing soap and candle making. (that was at higher working temperatures of around 80 Degrees C) This indicates that it may not be such a great idea to use it directly for food based products.
I did make a Filaflex Trio! bar mold (shown above on the right), in clear material, but decided to not to use it directly. And as you see above I also used white PLA printed Trio! bars to cast a food-safe mold. I feel happy with PLA as it's only in contact for a short time while the mold sets (5-6 hours) and the mold can be fully washed out with warm soapy water before and after use.
Other flexible materials are also available, Ninjaflex, Semiflex and plasticized (soft) PLA.
You can buy FilaFlex from Recreus. This material is flexible enough to allow easy removal, but also holds it's shape well. It's also ideal for temperatures of melted soap, candle-wax etc.
As ever, be aware and make up your own mind before using 3D printing for food or body based projects.
3D Model files - You can find all the source and model files for this project over on my Youmagine page here.
Thanks again for reading, please share and feedback on this project or anything else I'm doing.
If you would like to see more of these experiments / tutorials or examples of practical/fun uses for 3D printing - do get in contact and leave a comment below -
Until next time, I have three more Trio! bars to eat, and no you can't have one.
And remember to look out for REAL Trio! bars back in the UK shops in March 2016 - Can't wait!
Happy Easter Everyone, I'm a little late with this post, it's been a very busy month.
This particular 3D printing adventure started last August (2011) after seeing a few news reports on 3D Chocolate printing, it had always been on my list of things to try, after reading the reports and looking at the rather over marketed video of a machine doing essentially nothing... I was really frustrated that the technology didn't seem that accessible or even that revolutionary considering they described it as the "worlds first Chocolate printer"
It looked like the University of Exeter had decided not to show any videos of the printer actually doing anything to do with the printing process. - See the PR page and video Here. It does make a reasonable point about the end user specifying the custom design for themselves, much as we already see with 3D printing.
So they were giving no clues to how fast they had it running, or how long they cooled between layers etc. Just what you can see in the pictures. I decided not to go down that route of molten chambers of chocolate being pumped to a nozzle, it seemed overly complicated and limiting of what foods you could print with. It could be fine for industrial scale custom manufacture or a more adventurous Chocolate shop, but not that great for people with 3D printers to experiment with - and that was my angle.
Various paste extruders existed for RepRap, Makerbot and Fab@Home and both peristaltic pumps and moineau pumps were being experimented for paste extrusions, I looked at some of these, but went a different route.
I was quite aware that paste printing and especially Real molten Chocolate was a very difficult material to print with and I also didn't want to have to use a Air compressor or other types of valves to achieve my food printing.
I decided on two development paths, both of which I'm still working on for different reasons you will see below.
1) - The Universal Paste Extruder
Chocolate was not the only Goal, I really wanted to be able to experiment with lots of pastes, foods and especially Ceramic materials.
So I designed this mechanical paste extruder, it is designed to fit on any RepRap or most 3D printers, you only need a normal Extruder motor connection, that's all ( I know I have other wires in this Photo, that's for part 2 - the heated paste extruder)
It uses my Quick-Fit X carriage mounting, so can be swapped over in seconds, you can also fit it to a normal Greg/Prusa style X carriage and most other designs.
It's geared and uses a driven belt to press down on the Syringe. The main reason for this arrangement is to keep the height to a minimum and as the carriage goes higher the syringe goes lower so you get maximum build height.
Slightly out of data photo, but here are all the printed parts.
It uses normal 10ml Syringes - Either Luer lock or centre depending on what nozzle size you want.
The motor is a normal NEMA17 type and small drive gear.
The Large gear is secured by using a modified M4 PCB stand-off to lock to the M4 threaded bar.
You can also fix it with an M4 Wingnut.
A standard 16tooth T5 metal gear is used to drive the belt.
Trapped M3 nuts for the idler, 608 bearing.
Middle gear, fit this last.
The middle gear M4 shaft also clamps the end of the T5 belt in one of it's groves, it will be a tight fit.
The other end of the belt gets fed under the metal gear and is compressed by the idler bearing.
The Syringe is supported well around the flange, and is deliberately loose, you can fit a strip of card, plastic, PTFE or some other material if needed, the M4 bolt and pressure block can also be used if you want to clamp in the Syringe, but it does not really need it.
Insert a loaded syringe, fit the Cap with bearing and extrude until tight.
At this point you need to have a sensible figure in your firmware for the Estep value, you can calibrate steps per mm in the same way as you would with a plastic extruder, see here for help on that.
It's also possible to leave it the same value as your normal extruder and then just alter the packing density / extrusion multiplier in your slicer.
I'm using Slic3r V0.7 and using 570 for the Esteps (8x microsteps) or 1140 for 16x Microsteps.
Slic3r profiles for various materials are up on the thingiverse page
Below are my initial efforts over one weekend with as many materials I had on hand, the kids really enjoyed helping me with this experiment.
I'm hooked on Ceramic printing now, so I'll be doing a lot more of that along with more chocolate experiments. Some of the chocolate things didn't exist long enough for a photo.
I highly recommend using a centre syringe with a big nozzle for first testing and also using a sugar paste as the first material to experiment with. This nozzle is 2.4mm.
I'm printing on mirror-glass (Not heated) but you could warm it up to help things dry out (Apart from Ceramic, don't use any heat at all, any time printing with Ceramic before or after printing.
(See below for more on Ceramic printing)
This was my first print result, not bad, not good, too fast and the paste was a little runny, you are looking for about the consistency of cream cheese or Nutella (chocolate spread).
Second print , slower, need to adjust the fill and maybe use lift.
After a while I found really nice print settings for Slicer ( I put them up on thingiverse too)
I did quite a bit of Sugar printing, but as it's slow to dry most of them were wiped off and put back into the Syringe, so it's the ideal first paste material to experiment with in that respect.
If you use the other type of Syringe (Luer lock) you can fit removable needles of different sizes (Blunt or cut-down) to give very fine printing, this picture above is sugar paste with a 0.6mm needle (pink).
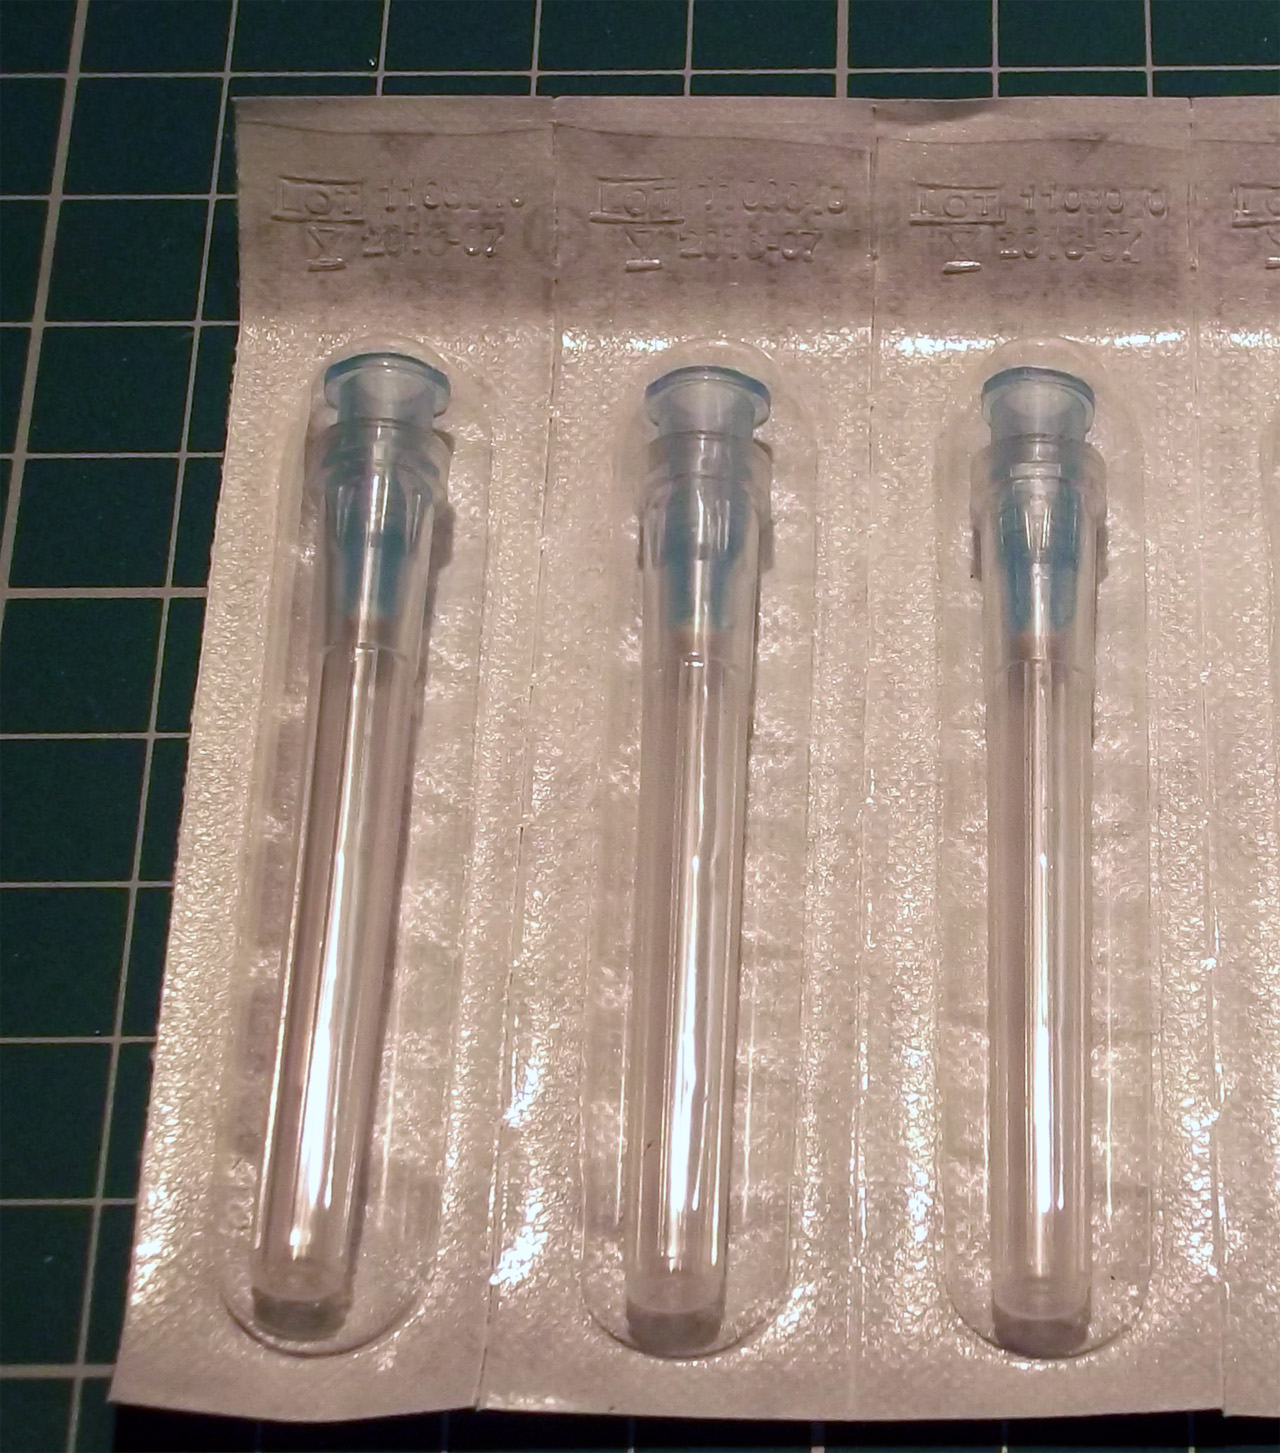
They have different gauges and colours as a guide - There are many more available than listed below -
Amber = Gauge 15 = 1.36mm internal nozzle
Pink= Gauge 20 = 0.61mm internal nozzle
Blue = Gauge 22 = 0.41mm internal nozzle
Red= Gauge 25 = 0.25mm internal nozzle
Yellow= Gauge 32 = 0.1mm internal nozzle
TopTip - It's a good idea to cut-down the length of the needles, even the blunt ended ones -
I used Pink and Blue and snipped the needle with cutters and then filed down and sanded the end until it was nice and round, see in the above photo how much I cut it down from the normal length, you could go even shorter and would need too for the really smaller sized needles.
Normal length needles.
Printing with melted Chocolate, Yum, Yum...
Printing with Chocolate and Muffin Mix video is shown here and also on my YouTube page in HD here
Chocolate is a tricky material, quality dark Chocolate is harder to print with than white Chocolate, I didn't try milk Chocolate yet.
65% Dark Chocolate
The easiest way to melt it is in a Microwave for 30 seconds, then stir it and let it melt, don't heat again unless it won't all melt after many minutes.
Mix it all really well and check the temperature, don't go over 35 degrees C.
Most dark chocolates stay very runny at around 33-35 degrees C
You want to be loading your syringes (Suck it up) at about 30-33 degrees C
White Chocolate is usually a thicker consistency at these temperatures, making it slightly easier to print with.
You can load white Chocolate at 31 - 36 degrees C
You should have plenty of printing time ~ 15+ minutes and you can always put the loaded syringe in a cup of warm water to keep it at a stable temperature.
I'm using Luer lock without needle as the hole is slightly smaller (2.1mm), a normal centre syringe is (2.4mm)
Dark chocolate outline, with a poured white chocolate inside.
White Chocolate - printed a little too cool in this picture.
Chocolate printing would benefit from a cold-bed to help freeze the layers quickly, so a future idea will be to use some Thermoelectric cooler (peltier) modules and Aluminium plate for the chocolate bed.
Printing with Masa (Corn chips), Crunch, Crunch, Crunch...
I'm using porcelain clay for this experiment, slightly watered down to form the consistency of toothpaste.
And I'm thinking that it needs to be slightly thicker next time around.
Clay sticks to most things, but unless you can remove it, your part will be stuck to your print table.
If you leave a printed ceramic object on the bed it will warp as it dries and usually break up.
Do NOT be tempted to use the heated bed to dry the clay, it will ruin the print.
The best way I found to print clay objects is on a piece of aluminium foil taped down, this can be removed and the part dries slowly.
If you use anything with an absorbing surface (like paper, card or baking paper) the part will warp.
I have tried both Blue and pink nozzles (0.6mm and 0.4mm) with a 0.2mm one to try next time.
The easiest way to load the clay is to push it down the syringe with a small spatula or spoon, if you keep on pushing it down any air gaps should be forced out.
Put the plunger in and the clay can sit in there for many hours just fine.
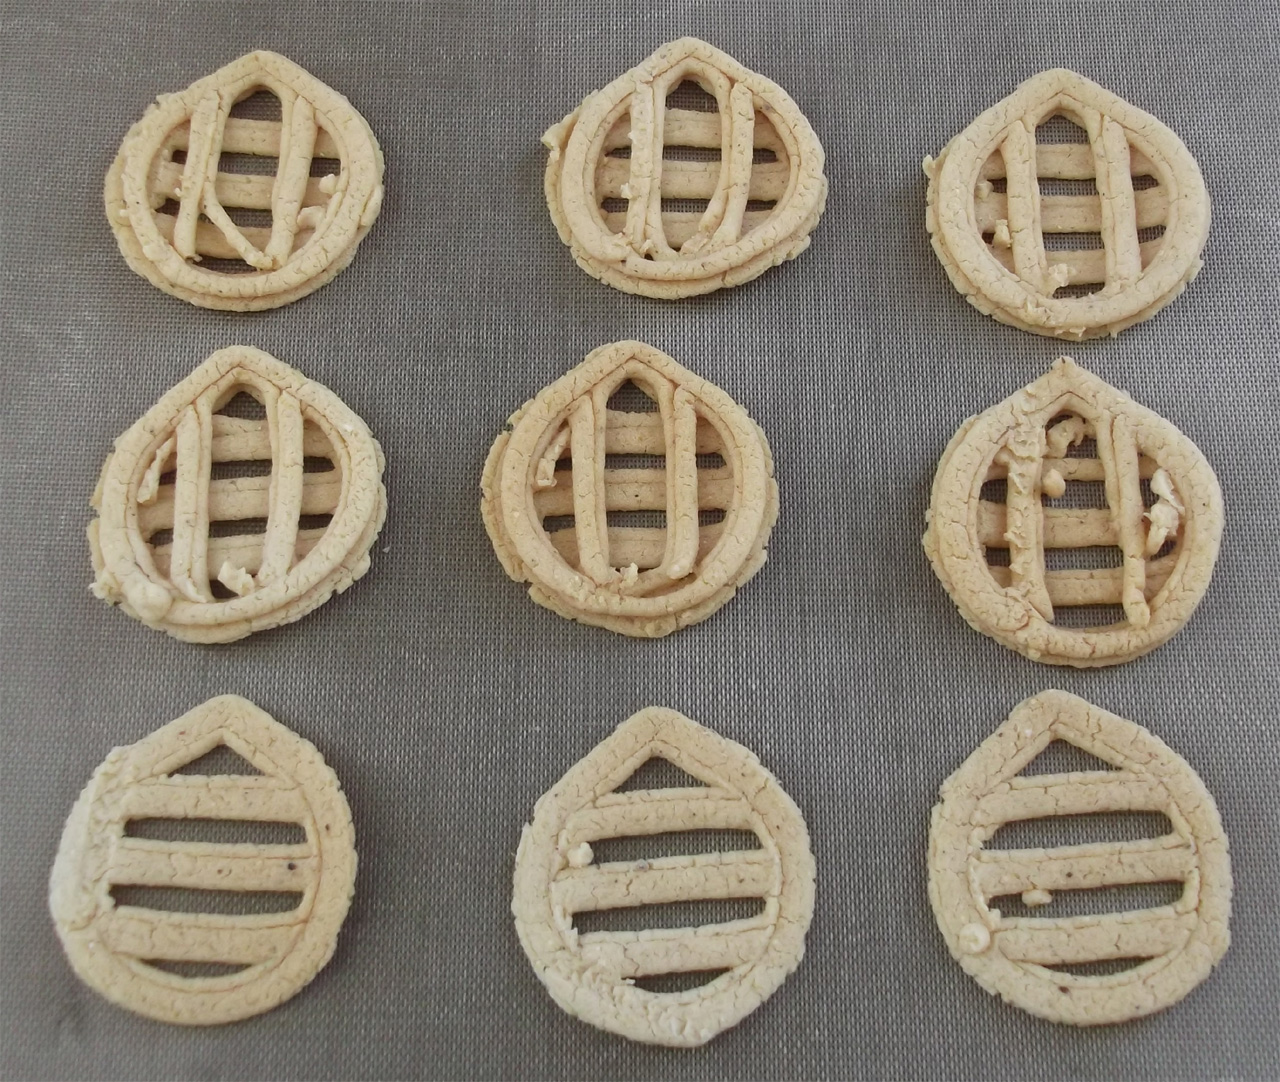
You get a 0.65mm bead out a pink nozzle.
This was the first print (on glass directly, just to get the flow correct)
I needed to tweak the Slic3r settings a little to get correct infill, I'm making them just slightly overstuffed as you get a little shrinking when the clay dries and this seems to help keep the objects together.
Single wall, it's quite amazing to see it build up, don't touch it, they are extremely fragile while wet.
This pot is quite tiny, only about 18mm across
Same pot, scaled up, builds well.
Close-up of the first layer - (frog)
Second layer - tiny frog print.
Check out the video, it gives a much better feel for the print than pictures alone.
Printing a small bunny.
Bonus points if you guess which version of the bunny this it?
Yes I stopped it just before the ears, the clay was too wet to attempt them.
I printed a few more bunnies, pots and frogs, they dry nicely on the aluminium foil, leave them in a cool place to dry out. I hope to get some first fired next week to see how they hold up at high temperature.
I had a few accidents where the pots flopped over as I was taking them off the bed, you need to be gentle in handling wet clay, after just a few hours they are quite firm.
I will be doing a lot more experimentation with clays, this was one of the most exciting tests for the universal paste extruder so far.
Just after I had my universal paste extruder running, a rather interesting Chocolate extruder also popped up on thingiverse, Created by ttsalo I have yet to try it as it needs warm air to keep the chocolate molten, but I'm going to try this out at some point. I can imagine a dedicated DIY Chocolate printer based around a design like this.
2) - The 'Heated' Universal Paste Extruder
My goals here were to be able to use other materials that required melting, a driving factor was as support structures for 3D printing that could be dissolved away (Like Sugar or Sealing Wax)
Chocolate was also on the list here.
The design is based around simple off-the-shelf plumbing parts and a PTFE nozzle, I used Nichrome wire for the element as I'm heating a round block of Brass and that seemed the easiest way.
This uses a standard 15mm to 10mm compression fitting and two sections of PTFE rod (16mm and 10mm)
The heating wire (30cm) is wrapped around the middle section.
Along with a Thermistor then wrapped in Kapton and covered in Fire Cement.
Nozzle is 0.8mm and the inside is stepped from 6mm down.
The intention for this design is to fit into the same universal paste extruder body as above, but I actually did this design before doing the paste extruder design above, so here below are a few ways (NOT) to design an extruder!
This was fun, but mechanically didn't work very well at all. (the hot/warm end worked fine).
It proved the point that a heated extruder can work with things other than plastic.
For my design I needed round cast Chocolate sticks, this makes it very easy to calibrate your extruder and volume for slicing models in much the same way you use 3mm or 1.75mm plastic feedstock.
I didn't find any easy sources of 8mm chocolate sticks so I cast some in PFTE tubes, the same size as I had used on the extruder.
Melt and pour into the tubes, tap down to remove air bubbles and set in freezer.
We have some Chocolate feedstock !
I decided to cast them in a two part tray next time, it was actually quite difficult to get them out of the PTFE tubes.
Chocolate stick loaded, the motor pulls the stick down into the 'warm-end'
I was attempting to keep the overall height down by using this arrangement, this eventually led me to try a direct drive design (see below) - that was a little bonkers looking back on it, but by this point I was getting much better at 3D modeling! so that was a plus point. And that led me onto the universal paste extruder design.
Chocolate melts at whatever temperature if feels like, but 'officially' it should be at around 34 degrees C.
For my first manual test I set the heater to 31 degrees and after warm-up fed in a stick by hand, then using the Nema14 motor.
It works! I experimented lowering the temperature, ideally I wanted a just melted, but not runny stream out the end of my nozzle.
The next problem was to check if the chocolate melts back up the stick, that would get messy and one of the reasons I had a fan on the extruder. I also had a backup plan to add a Thermoelectric cooler (peltier) if needed, I didn't need it.
Failed design idea - direct drive
Direct drive of cast chocolate sticks - don't do it this way!
Casting block in PLA
The casting worked, but it's too much hassle to do it this way - it was abandoned.
It would have been nice to have a direct drive heated chocolate extruder, you could have fed in stick after stick, but in reality it's just not going to work well.
These designs also allow you to pause the machine and load more 'food' reset the motor drive to the top and carry on extruding, or even mix ingredients (Sugar first, then Chocolate, then Sugar again?)
I'm not sure yet if dried soft sugar would work or if I would need to cast a more solid 8mm rod (more like sticks of rock)
One of my big questions is if PLA or ABS will stick to extruded sugar, for the use as a support material in 3D plastic printing.
Having Sugar as a Support structure for printing would be very great indeed, and it's super easy to dissolve away and non toxic. I'll let you know how I get on with that.
Experiment #3 - Wax (Sealing wax)
I also still want to see if you can print with sealing wax - for some time now you have been able to buy sealing wax as sticks for low-temperature glue-guns, I order a small pack and as they are also 8mm, they should fit perfectly into my heated adapter for the universal paste extruder.
Temperature is lower than sugar, but should work in the same way.
You could print some very interesting things for loss-wax casting or as moulds for things, but like the chocolate it's going to need cooling and a slower extrusion rate if you don't want to end up in a big waxy mess.
So what do you think? completely mad, or interesting?
I had a lot of fun doing this, if you want to experiment with paste, you can print yourself a set from the Thingiverse files I posted here -
The Slic3r configurations are also posted, use them as a starting point. And don't forget to change your Esteps in your firmware.
I have printed a few sets of these extruder parts in Faberdashery PLA and also built up some of these experimental extruder's, if you fancy buying one, I will have them up on the eMaker shop in the next few days, all proceeds of sales will go towards more RepRap experiments and some well deserved beer :)
If anyone is interested I can also put up just the set of printed plastic's Syringes and needles as a kit if you want to source the other parts yourself.
* - While I was uploading the video's to YouTube, one of the first comments was from films4you suggesting that it could also be used for solder paste, I have no idea why I didn't think of that! - Thanks, another one to try at some point soon I think.
Thanks for looking - Have a great Easter break or holiday and let me know what you think.