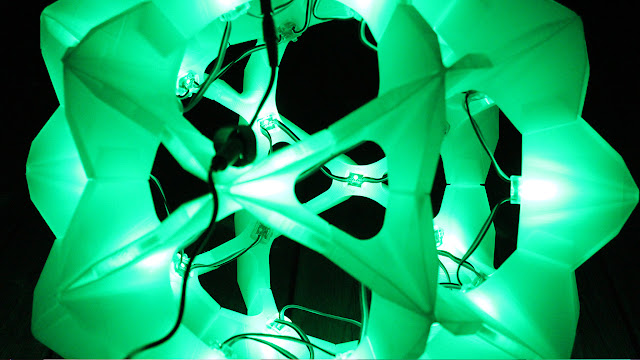
* Project Snowflake *
This project started Christmas 2015. Whilst searching with my daughter's for some nice models to print out during the Christmas break, we found the great Electra modular origami by Auntdaisy. That seemed like a good challenge.
Below is a video about Project Snowflake, you can also watch on YouTube in HD and subscribe to my channel if you like.
For some background this project started because of a great modular Origami system called Electra. Designed by AuntDaisy - Link > Electra Modular Origami by AuntDaisy
Below is an extract from the Thingiverse page for Electra - For further information about Electra or more models by AuntDaisy, follow the link above -
MakerHome blog showing how this model was created - see - http://makerhome.blogspot.co.uk/2014/07/day-327-saturday-guest-auntdaisy-and.html
For more information on David Mitchell's origami design, seehttp://freespace.virgin.net/dave.mitchell/galleriesmodulardesigns.htm or his latest "Paper Crystals" book, http://www.amazon.co.uk/dp/0953477495 (with lots of other exciting models.)
_______________________________________________________________________________
For this project we used a string of waterproof WS2811 LED's from China for under $20US
You can cut the chain or add more. Each led has a Red, Green and Blue led, along with a driver and shift register - that also does clock reshaping, so in theory the number and length can be rather a lot of LED's. In reality I would stick to under 200 per chain as the current needed to drive them an the length starts causing issues.
If you need more, just use two strings and control the sequence on the Arduino.
And it's very simple to drive these LED strings with just one Digital output from any microcontroller (5v I/O recommended) - see the adafruit library or use my daughter's example code as a starting point (it's based on the adafruit examples).
The adafruit Uberguide to Neopixels is really all you need to get going with these great little LED's
Many different displays are based on these great LED's - Just search eBay for WS2811 or WS2812 for lots and lots of options.
Wiring is straightforward -
You need an Arduino compatible board - The adafruit flora or gemma is great for experimenting with Neopixel's and if even has one already fitted to the board.
Neopixels like a 5V digital I/O signal, so a good option is the Arduino Nano.
The Arduino micro can also be used but you will need to also add a 5V regulator -
If your voltage regulator has a tuned output, then make sure you set it to 5V before connecting it up to the Arduino mini (or any other Arduino without an on-board regulator) - or you will fry it.
The LED string we used runs on +12V so with the Nano we can connect the +12v directly into the power input.
The Nano can be bought in 3.3v and 5v versions, do check you buy the 5v model.
The Nano is a great little board, even with an onboard USB connector for programming.
Also make sure your power supply is +12V at around 2Amps or more.
Also it's a very good idea to add a 100uF capacitor (rated at +16V or higher) to the Power supply Output, then you can connect that to the power input on the Arduino Nano.
The only other component we need is a 220Ohm to 560Ohm resistor (the one above is a 510Ohm)
You can accidentally damage some Neopixel style WS8211/12 LED's if you don't fit a resistor in series with the first LED. It needs to be connected to the output pin (here we are using Digital 8) and then into the Input of the WS8211 LED string.
The string of LED's run one after the other, Blue is ground, Red is +12V and the input and output is White. Make sure you connect the output of your Arduino Digital 5V I/O pin (D8) into the Input (shown on the left in the image above).
Then you can fit each LED into the 3D printed modules, if they are a little tight, heat the plastic slightly with a hairdryer - they should click in and stay firmly fitted.
It's best to route them in a spiral, you can only really do it one way making sure all 30 holes are fitted.
Leave as many other LED's as you like in the chain, they would look cool hanging down or up if you are going to hang the sculpture from a rope for example.
We had a chain of 35.
This was a great learning project for and with my Daughter (10 years old).
Last year she assembled a RepRap Fisher Delta 3D printer, so this was an natural progression, Doing the 3D model design in Freecad.
Then building up the electronics and wiring the modules.
And finally programming with the Arduino IDE.
She really enjoyed it, and is already doing more projects, and investigating more uses for 'Neopixel' style LED's.
That's it!
All the files are over on Youmagine here, along with the model file to 3D print and example code for the Arduino nano to drive the LED's and some other files to experiment with the adafruit Flora.
I almost forgot to mention, I found a really great plastic filament from Excelvan for using LED's - Light piping and diffusion - it's really nice to use and perfect for any sort of LED based projects.
Please watch the video if you want to see it in action, and if you have any questions just leave a comment, or ask me on Twitter / G+ or YouTube.
Twitter - @Richrap3d
Google+ - RichardHorne_RichRap3D
YouTube Channel RichRap
Until next time, happy printing.
And if you decide to print out Project Snowflake, please let me know.
Rich.


