Showing posts with label work-in-progress. Show all posts

Tuesday, 23 December 2014

No more filament? - Quest for a Universal Pellet Extruder for 3D Printing

Pellets - Let's shake things up!

A few months back I asked the question on G+, Would anyone like to discuss Pellet / Granular extruders? I ask because I have been working on various designs for quite some time with success and also plenty of failures , it's not easy, it needs collaboration and I would like to see it stay open-source and accessible to all at a very low (no) cost. 


Directly using pellets or granules of many different types will be another very big game-changer in 3D printing.

Using all sorts of different materials for 3D printing is good news, it helps people find more uses for the technology and further's the progress of design, manufacturing and innovation.

Since designing various Universal Paste Extruders, it's been a real pleasure to see so many people use, re-design and further extend paste and food printing in so many different ways.

Using pellets and other granular materials for 3D printing are a next evolutionary step in both simplicity and flexibility.

It has plenty of challenges...


I have been working on and off for a while to design and test other types of extruders for granular materials for 3D printing, my focus was initially using Sugar with great success but this year I have also moved onto plastic pellets (resin's) that are normally used for injection molding or to make the 'standard' filament's we already use in home 3D printers.


This whole area needs more development and a focus from the open-source RepRap community, makers and developers to refine a system to use all sorts of different granules and materials for 3D printing.

This Blog post is an introduction / development update of where I'm at, and at least a way to form some prior art statements about ideas and directions for this sort of extruder development in 3D printing.


The point of this blog post it launch this as an open-source community project. The files have been uploaded to Youmagine here, if enough people take an interest and can assist with further development it could be a good idea to have a section on the RepRap Forum or Google+ Group for Pellet extrusion development.

I started out with a focus on sugar - the main idea being to use it as a support material as it can be washed away. PLA sticks really well to sugar (and sugar like materials)

Isomalt is a really nice sugar often used for sugar-craft and as a sugar substitute, it has a nice advantage of being less likely to burn or go brown than normal cane sugar.

It worked surprisingly well when you get a good temperature (around ~155 Degrees C) you can get a flow of Isomalt sugar from the nozzle.

- First, lets get back to building one for yourself. - 

Lots of info below, or if you like, you can watch my video about the project here first - 


It's also in HD over on YouTube.

If you have been with me for a while, you know I like to use as many off-the-shelf parts as possible, so it's as easy for people all around the world to build and enjoy 3D printing. Without the need for custom machining, or expensive equipment.

That does not mean you should not make refined custom / machined versions of my work, I know may people do exactly that, and make a successful business out of them. That's great ! - just remember me when you become rich and famous :) and please do try to contribute back into Open-Source developments and Open-Innovation in whatever way you can. * end of philosophical rant  *


Because I decided to use a 'standard' J-Head Hot-end for experiments with this project, I had to base the dimensions around the 6.35mm hole normally used for a PTFE liner


J-heads now come from a LOT of different sources, for reference all the ones here are from the original designer (Reifsnyder Precision Works) over on hotends.com

I tried a number of different 200mm long x 6mm wood Auger bits from DeWalt and Black & Decker, most were almost identical and operated the same.

A 6mm wood Auger bit fitted perfectly and with only a slight modification I had the basic outline of a granular extruder without using any custom parts other than being 3D printed.


A little bit of cutting and polish and you have a granular feed system.


I found it better to cut off the end of the drill, but position in the J-head does need to be quite specific, you will need to experiment for the best melt and flow.

I drilled out the end nozzle to be 0.65mm. No other modifications to the J-head are required.

J-head MK3 - with Aluminium tape to help with cooling.

Different J-head's can work, I experimented with both MK4 and MK3 - The MK3 worked better.


While experimenting with different materials and plastic pellets I designed two different Motor drive systems - One (Above) using a normal NEMA17 motor and Herringbone gear system - just like a 'normal' extruder.


The second design used a NEMA17 with a Planetary gear box fitted. This can generate a lot more force but requires a very large number of motor steps (20,000/mm) so bear that in mind.

Rotational speed and torque are both important, so I would recommend starting and experimenting with the Non-Planetary version first.

3D Print the parts - I printed all of them in ABS. (and also experimented with metal coatings - more on that later)


Most of the fittings are M4, they should be easy to understand from the models and images here, but you need to assemble in the correct sequence for everything to be tightly clamped together.


Bearings are standard 606 style for the Gear and Drill bit.


M3 fixings for the motor and gears.


The mounting method uses my standard universal quick-fit carriage mount.

Quick-Fit carriage - Many versions available for different machines - allows the use of many different extruder types - all my designs use this method.


Auger should be fixed firmly and be straight down the middle of the j-head - make sure your bearings are fitted tightly - they should be a tight fit and may require some pressure and slight heating of the plastic to get a firm fit.


You will need to experiment with the placement of the Auger depending on the style / type of your J-head.

Make sure to secure the J-head well and remember you will need to cool the J-head body with a fan just in the same way you would when using PLA filament.

Important bit - The design of this pellet/granular trap (shown above) is really important for good operation. I experimented with many different versions / designs and I'm sure it can still be greatly improved.

You should end up with something like the above that you can experiment with. Note all the different colour parts, I had quite a few versions of the design before this one.


Then you need some pellets or granular materials to melt. is a typical selection above and below. Some are round, some sharp shards and most are in cut round pellet form.


I finally managed to source a lot of different materials, but at the start I cut up normal filament into small pellets - crazy I know, but at least it allowed some testing as I could not find many places last year that would sell me small batches of different plastic pellets.

Top shows Woodfill pellets and right shows PET

A friend kindly send me a large selection of recycled material for testing, but as can be seen above (left) they are quite large and irregular sized shards, so as much as I want to use recycled plastic, for this extruder it's not going to be possible because of the screw size. I will be using them for other interesting things - more on that soon :)


By far the easiest way is to now buy pellets from ColorFabb here. I purchased a selection.


And if you look closely at the above image you will see 1.75mm and 2.85mm pellets, so I'm reasonably sure these are actually from filament cut up - maybe a good way to recycle any out of tolerance spools, but regardless it's good to know they are small pellets - ideal for this type of extruder.


The ColorFabb PLA pellets are not the same, they are 'pearls', and unfortunately don't quite work in this size of extruder. I bought a lot of these not knowing the size, so check before buying pellets from wherever you manage to source them. - I will find use for them :)


You can even get Woodfill - but, have not tested it yet.


Fill hopper, make sure you have a fan on constantly cooling the thermal break on the J-head and lower half of the extruder body. Experiment with temperature and speed of stepper motor drive.

You can use the standard extruder retraction to stop or limit the flow ! but you may need to slow it down to under 15mm/sec.

Experiment and play, and please let me know how you get on.

One really important thing - Make sure you run the Auger motor in reverse! - that's anti-clockwise as you want to push down the pellets into the hot-end and not drill them out.


I ran out of time with this project in the summer (2014) due to other projects and shows, so the files being released still need work and refinement to get to a working solution that can process many different types of material in pellet form. I have still yet to try the Colorfabb Woodfill pellets as I didn't want to block the second extruder after already blocking the first one with 'A-PET' material.

This is a very exciting project, do let me know what you think about it, all and any feedback is good. And if you decide to make one or want to evolve the design, please feel free and spread the word.

Thanks for reading, have fun, experiment and play. Also please do let me know how you get on.

Until next time, and have a Happy Christmas / New-Year Holiday / Seasons greetings.

Rich.


- A little notice - 
My 3D Printing work (and video's) are released under Creative Commons CC-BY-SA License.

But - All my images, photographs and words published anywhere are covered under International Copyright law, so please do ask me for permission and remember to state where they came from - me, Richard Horne. - (AKA RichRap)

Sorry to have to put this up, but I see a lot of my images and words being used without my permission for commercial activity, by people who want to make money, that's fine but do ask my permission first and be open about what you want to do with them. I'm cool about most things.

Tuesday, 8 July 2014

3D Printers - Big printers, Small printers, Wide printers, Tall printers

Big, Small, Wide, Tall, You have brains in your head. You have tools you can use, you can design a 3D printer any way you choose :) - thanks for the positive thinking Dr Seuss.


This is a summary post, going over some of the machines I have been working on over the last 6 months. Much more information, design details and files are on the way, just fighting for time at the moment.

Back in Feburary (13th) I posted an update of my adventures, and a picture of me for support of the open-hand project, in the background you can see my machines in their early development stages, not many people spotted them, a few did, you know who you are and get 10,000 bonus points, well done :)

And a brightness warning ! - I always let my kids decide on the colour scheme for all my 3D printer prototypes, so watch out below - some of them are very bright and bold !

Recent Development History - 

3DR was my attempt to try and keep Delta printers using 3D printed parts, and take more of a RepRap approach instead of the trend in machining everything for 'professional' results. 3DR seems very popular and I put that down to the majority of parts still being 3D printed, even if they are a little more complicated and time consuming to produce parts than other RepRap machines.

Other than lots of variants and diversification by other people in the community, I have not needed to do anything to the original design of the 3DR, it's still my go-to printer for many objects.

I want to expand on the 3DR family, this post is an overview of the work in progress machines I have going on at the moment and a little more about them.

And before we go any further, I firmly believe we can't have enough RepRap designs, variation and machines, the more the better. None of the following replace 3DR, they all add to the RepRap family.

3DRnano - 
Back in December Gina Häußge(the creator of the awesome Octoprint) asked the G+ 3D printing community if any small 3D printers were available, for demonstrating and transporting to shows, events etc.


I had a few things underway and 3DRnano is starting to be a very capably and portable 3D Printer.

The clear/Polycarbonate carriage in the middle is a normal 3DR using LM6UU linear bearings. On the left is a 3DRmega (see below) Using LM10UU bearings and rods and finally on the right is a 3DRnano that uses tiny little LM4UU bearings.

For some idea of scale, left is the nano almost fits inside and actually provides more print area over the physical size than a normal 3DR.

Using the j-head as a light-weight hot-end for now, but a smaller or stainless steel trimmed down e3d V6 would be great ;)

It uses tiny little everything, including LM4UU bearings and 4mm rods ! Spools, carriages and spectra-line, all small and detailed.

Very tiny carriages, even the smallest Ty-wrap looks large with a 4mm Bearing.

Arm assembly is similar to the normal 3DR, just using even smaller parts.

The assembled nano arms do not compromise much on print area or movement, and are just a little scaled down from normal 3DR arms.


It's designed to be Battery and/or Solar powered, light and all the 3D printed part to fit on a 200mm x 200mm bed.

Motor choice -

Top to bottom NEMA17, NEMA14, NEMA11 & NEMA8

The spool for a NEMA8 was so small to print, but actually came out and performed very well.

For the prototype I experimented with NEMA8 motors, you can see one fitted above, for this size printer NEMA8 proved to be just a little weak, but you could make an even smaller printer using one (3DRpico?)

I settled on the NEMA11 for the 3DRnano

And full one piece solid prints for all the main structural parts.

It's using the Awesome tiny Makerbeam 10mm x 10mm Aluminium extrusions - standard stock size of 300mm long - so it's a compact printer with still a decent 160mm build height.


My kids selected some stunning Faberdashery colours for the 3DRnano prototype, Punk star Pink, Aurora and Pearly White.

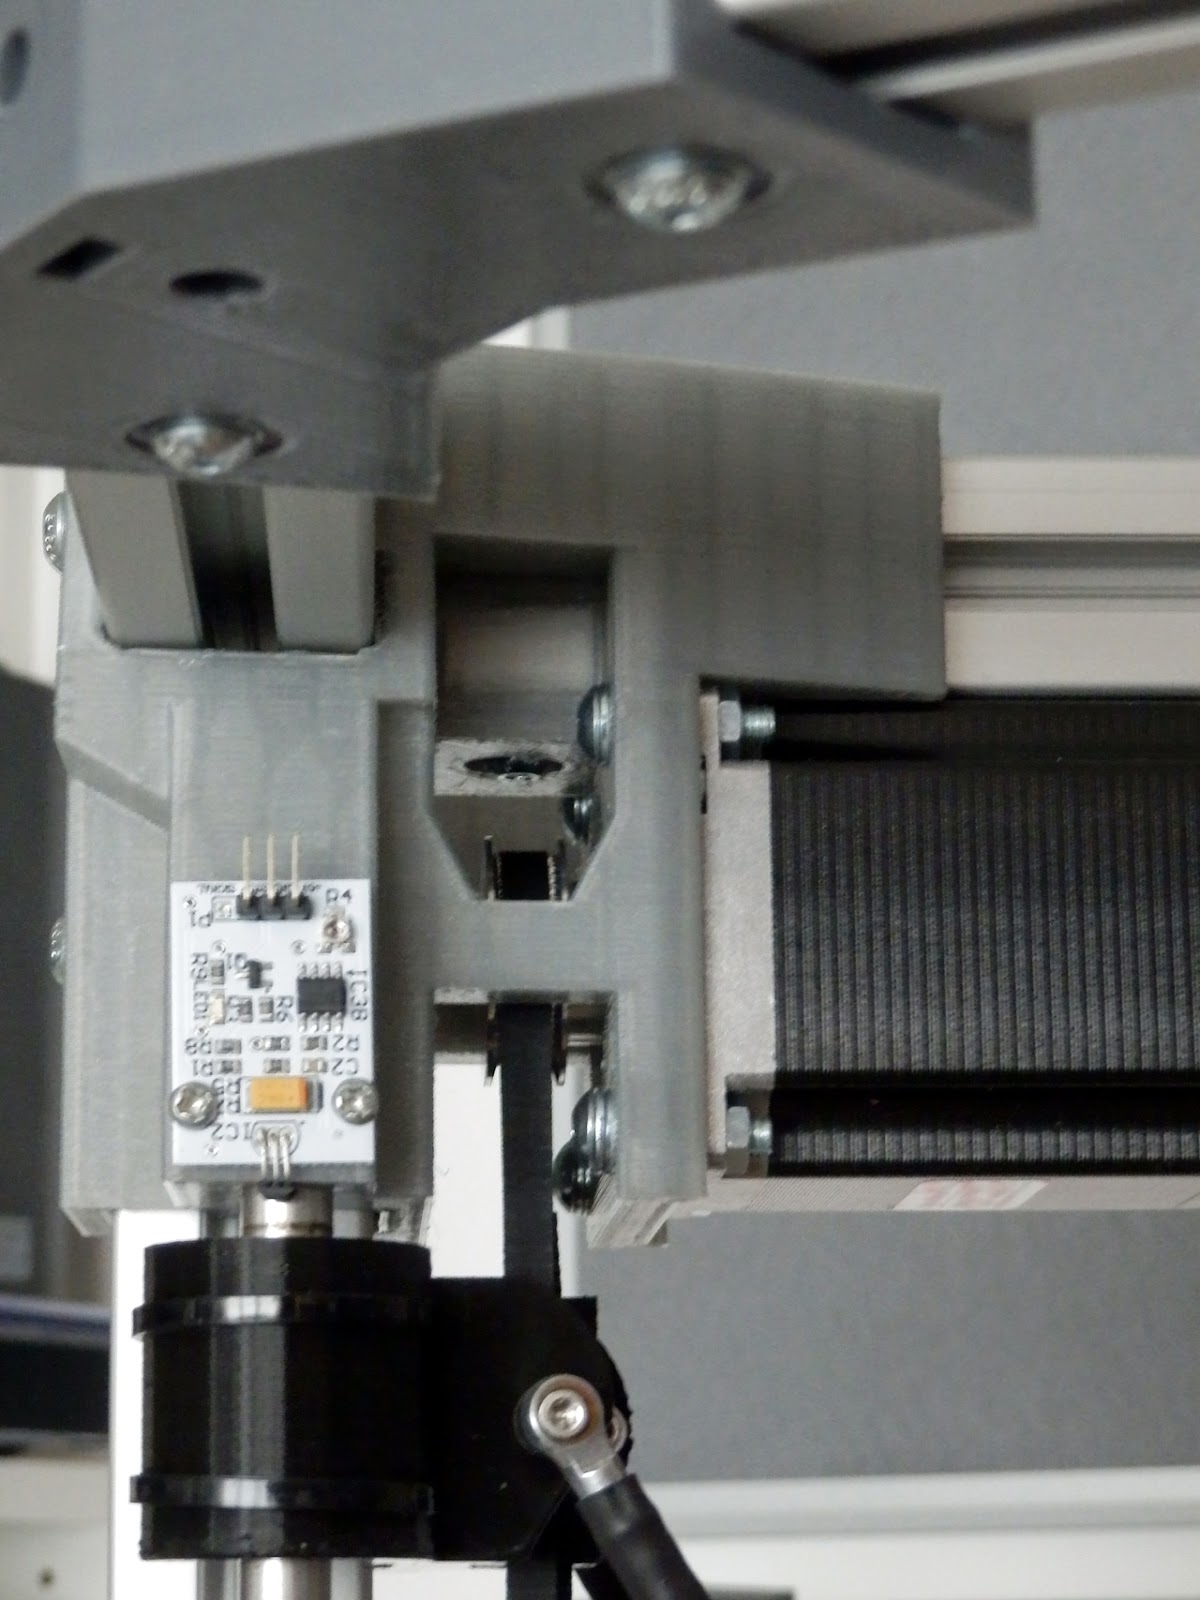
Hall effect end-stop sensor's have always been good for me, so again I used them on the nano, they could do with being a little smaller, but work exceptionally well for this machine.

If you are wondering the hole in the middle is where the extruder motor goes :)

The top electronics section and LCD enclosure is going through a re-design at the moment, this was one part I was not happy with on the original design.

More build info, files and video's on 3DRnano. It will be up on Youmagine here as soon as I can.

Lots of people said after I posted various images of 3DRnano - put it up on Kickstarter, and yes I could especially as even the most unbelievable things seem to get funded without any issue at all - Anyone for Potato salad? - head in hands, they are not even trying, and it's working...

Now for something rather BIG - 

3DRmega - 
This one is kind of self explanatory, it's big and most things are scaled-up -


This is a really old picture, apologies for that, where it's being developed at the moment I simply cant get back enough to fit it all in the photo.


Sketchup again for the design, what can I say. It still works well for me and it's so nice to see a model turn into a real thing without errors or problems. I only made one set of files from the design and everything fitted perfectly.

Painful development - 

This development has gone really well for the printed and mechanical design, and much less smoothly almost everything else, especially with choices of electronics, power, wiring and the (arrggghhhh - see below for my pain) heated bed.

Success! (prototype, should have just stopped) - 

I actually has the prototype up-and-running without a heated bed in Feb2014, my aim then was to work more on cement printing and more exotic extruders (more on that in the next post).

I made the mistake of doing a re-design and adding a heated bed :(, new Smoothie electronics :) and industrial stepper drivers, all great things, but so much more development pain. To give you an idea of the up's and downs on this project, I totally designed, refined and finished Sli3DR (see below) during my sulking phase of V2 3DRmega...

Well it's almost all finished now and worked out, here is more of the progress and some of the setbacks.

Outline (new) spec-
  • Bigger Motors - NEMA 23's
  • Bigger Drivers - Dedicated 3A 128microstep (prototype used normal Ramps and drivers)
  • Bigger Electronics - The great ARM based Smoothie board is being used for the (new) prototype.
  • Bigger Rods and Frame (10mm Rods and 30mm Aluminium box-section)
  • Bigger Printed parts - most parts are 100+mm is size (total printed parts weight is just under 2KG)
  • Bigger Print head / multiple / materials / feeds etc.
3DRmega now stands around 1.8M tall.

For some time now I have specifically wanted a printer that I could place down onto almost any surface (to print directly onto) - that means not having parts, electronics, motors or even any real structure at the bottom of the machine. The reason for this is so you can print things 'in place' - like a Stone sculpture directly onto a paving slab already fitted - cool !

The nano and mega for scale.

A set of 3DRmega 3D printed frame parts, just under 2Kg of filament used for these, they are also designed to minimize warp and maximise adhesion to the build platform.

The carriages snap-fit onto LM10UU Linear bearings and are running on 10mm smooth stainless steel rods, just like 3DR but bigger and stronger.

Left to Right - LM10UU, LM8UU, LM6UU and LM4UU

Integral belt lock and points to attach the delta arms.

When assembling the delta arms, it's vital to get the flat surfaces of the universal joints parallel and spaced perfectly apart. I used a simple wooden Jig and bolts to make sure everything was lined up before tightening everything and adding super-glue.

The arms are made from carbon fiber tent poles, cut to size and have an all metal universal ball joint fitted to each end. This allows the center carriage to move in any direction as each arm moves up and down.

The center carriage is one of my favorite mega parts, it's solid and not yet quick-fit is easy to install alternative extruders.

The entire frame is made of just three different lengths of 30mm Aluminium box section.

When designing the printed parts I added various viewing windows, in this one you can see the pencil center line on the aluminium section lines up the the point of the RepRap logo, this makes it easy to get everything lined up correctly before doing a final check and tightening. 

The frame is solid but to aid with both thermal stability when printing very large parts and for extra light-weight support, 10mm clear corrugated poly-carbonate roofing sheeting is wrapped and fixed around the outer frame, an opening door allows full access inside the build chamber.

Smoothie electronics, power supplies and industrial stepper drivers sit inside the top cover for the V2 design.

Like the nano, but unlike the standard 3DR I have mounted the Motors at the top, this allows much more freedom for the design and flexibility of printing on almost any surface.

Even with everything fitted including side panels 3DRmega can still be lifted, moved and re-positioned by hand with only one person. I have not weighed it, but I'm estimating it's under 18Kg in total.

Extruders - 

I designed a few different extruders for the mega, the main requirement was at least one design that didn't use a bowden feed and fed 3mm material, after some interesting re-design around the available 3D space when the arms move around, I ended up with a nice vertical geared design that's stable and works amazingly well.

I have a few other very exciting extruders to share soon, stay tuned for more info :)

Glass - 

For the heated bed I had been on the lookout for some round sheets for a while, whilst on a routine shopping trip I spotted a vintage 70s mirror, almost the correct size, I bought it for £2.50 and was rather impressed with it.

Upon closer inspection it had a date on the back of the mirror, 1977, it's almost the same age as me! I decided not to use it as the glass and mirror looked quite brittle.

For ease of use, simple fitting and a solid base. I ended up with a 12mm Ply base, Cork insulation, thermally reflective sheets (see below) heated bed and a 4mm sheet of glass on top.

These grill and oven pads are amazing, they have a highly reflective metal surface, and thermal insulation on the back - I use them on all my heated bed's - One fits a normal Prusa heat-bed, tape more together with PET or Kapton for bigger requirements. Very easy to cut to size too.

and a cork base is not required for a normal heat-bed, but I added one underneath the fat pads to be sure no heat would be wasted.  

Disaster strikes - 

I spent quite a while on the heated bed design for 3DRmega. It's a big sheet of glass to heat and insulate well.

Shortly (like 5 mins) after completing the one-of-a-kind and very large 36V heated bed prototype, with glass top and triple insulated base. I went and dropped a heavy NEMA23 motor right onto one corner causing this wonderful mess.

I had just tested it, worked perfectly... then butterfingers, smash :(


If it had only been the glass that got damaged I would not have been so annoyed with myself, but a NEMA23 is heavy and the heated bed and wiring needed repair. Also sourcing more (toughened - this time) glass ended up taking a lot longer than I expected.

And guess what? When I posted about 3DRmega in February, I had a flood of requests for design files (I posted way too early, sorry) and also hundreds of people saying I should put it up on Kickstarter...

That's enough of the mega for now, I'll post more and release the design files when I'm in a better mood with it :) and I can document them a little better. I will also get some video's done to show it printing, it's even more impressive than when you saw your first delta printer, big smiles for big 3D printers.

More info and design files will be up on Youmagine here as soon as I can

3DRultra - 
Well, not yet. but for a really massive Delta printer, moving to LM16UU / LM20UU or linear Rails would start to give you a very large printable area indeed - Bigger frames can be made out of even larger Aluminium box sections, even scaffolding poles if you want. If someone wants to fund the parts, I'll design and make it... (seriously, get in touch).

This post is getting rather long, so I'll delay the full post about Sli3DR for a few days, here is a little of what it's all about and as so many people asked me about the mechanism, that's shown below too -

Sli3DR - (pronounced Slider)
Sli3DR is not a Delta based printer, rather it's based on an intriguing 'unnamed mechanism' that was floating around on the RepRap Forum and G+ last year. Billy ZelsnackIdentified it as used in a very old (Rikadenki) Pen Plotter design here.  A few people have tried it out for 3D printing using off the shelf mechanical parts, I wanted to make it with 3D printed parts and Spectra Line based on this mechanism. 


Edit - This bit's updated for correct back credit of bringing the mechanism to the attention of the RepRap and 3D printing community - David Moorhouse over on G+ showed a cable bot design 1st November 2013, see here -https://plus.google.com/104904818050178236499/posts/WpzzVuULM2z

David's original video sparked great discussion over the mechanism, Tim Rastall Made a great sketch of the 'unnamed mechanism' - still unnamed as far as I know. 


Maybe it was fate but it was also only a few weeks after the Ultimaker 2 was announced, and not yet actually ever managing to be an Ultimaker owner (one day) - I always wanted to build something similar.


After using the Tantillus (very similar to Ultimaker position mechanism) and looking into both CoreXY and HBot systems for a while this 'unnamed mechanism' seemed perfect. It's very old, not patented, (or if it ever was that's expired), and I can use the same Spectra line as the Tantillus and 3DR's - Now to design it.

It's using Spectra Line on all the axis drives, including the Z axis - my quest for ideal Z movements moves ever closer to perfection.

Tim Rastall was also designing a Super-big Tantillus called the Ingentis around the same time. I printed an early set of Ingentis parts, but after seeing the above mechanism I just had to design a printer based on it. I did borrow the style of Tim's Z-Axis arms, (Thanks Tim) everything else needed to be designed and had to be able to be scaled up or down.


I used Sketchup again, I still find it east to use but I must admit after getting in all the 2D dimensions and measurements, moving to 3D parts does not give you much chance to refine the concept into a beautiful looking 'product' before you get trapped into blocky looking parts. But it did the job for a new concept design. - I desire a much more Organic feel for the the next project.


If you were wondering, the parts are printed in Faberdashery Cyber Yellow, it's ultra day-glow Yellow and looks great, day or night.


Hot end and carriage system


That's not all Kapton tape - It has some layers of ceramic insulation.
Side and back panels too, and a clear door.

Sli3DR is actually the closest to be releasable, I need to attach a few licenses to the design files and then it will go up on Youmagine here - I have put up lots more pictures too.

Yea, I know, I should put it up on Kickstarter, thanks.

If you want to spontaneously fund me 'without a Kickstarter' I have a donate button over on the left of my blog.

Potato salad is over $35K and rising as I type this - madness, total madness. - That said I do make a wicked Chili...

RepRap Barcelona - mash.

And talking of Potatoes, RepRap Barcelona have done a mash potato extruder based on my Universal paste extruder design - great work guys :)

Other news / updates - 

The UK 3D Printing TCT Show is happening in 30th Sept - 2nd October, over three days this time, the RepRap hub is planned to be bigger and better than ever, but only if people get involved and want to help make it a success - if you want to take part please e-mail me on - tctshow@reprapmagazine.com

Many companies have decided to take their own spaces so if you want to be part of the RepRap Community Hub, then do let me know.


3D Printing development and the 3D Printing industry is a massive roller-coaster, I would have to say that at the moment I'm on a big downward plunge into a dim tunnel, my wallet has fallen out and people are screaming all around me. See you next time.

Rich.