Thursday, 10 February 2011

Y- Finished And Toner Transfer DIY RAMPS+ PCB

A Big delay since the last post, and unfortunatly not much progress due to lack of time for Reprapping :(
But I'm back on with development now, My Repstrap has been named (Screwball strap) and all the mechanical construction has been completed.

I also got my parts from Mendel-Parts (Camiel) So I can finish my Dual extruder design and start experimenting with 1.75mm PLA.

Also had the rest of my deliveries so I now have lots of new parts for quick DIY build of RAMPS+ electronics and more work on my own controller.

Screwball Strap

Y Bed Forwards and Back with frosted Glass Build Area Aprox 32cm x 42cm


So A quick DIY RAMPS+ PCB Shield for the MEGA.
Some tips if you want to know how to do this, the easy way -
  • Make sure your Artwork is reversed !
  • Laser Print out the PCB onto Photo-Glossy Inkjet paper. - I have not yet found one that does not work.
  • Clean your Copper clad board really well (Yes I had a fingerprint -top right and even that caused a problem later)
  • You can also pre-etch it to clean it (Only a little) if you like, until it goes pink (Just 20-30 seconds is usually enough), this really helps the toner stick (I didn't this time, but will make a few more doing that)
  • Put your Iron to the hottest setting (Cotton or Linen).
  • Pre heat your copper clad board, and don't scratch the copper, just lay the Iron on it for 10 seconds all over.
  • Lay on the Paper toner side down and just place the iron in the middle to stick it in place.
  • Then you can iron the paper all over, it helps to do this on a flat surface or even better place a round bar or dowel under the PCB and roll the Iron over the top paper, this produces the best results.
  • Lift a corner to check the toner has transfered, if not just heat it longer.
  • The Toner should completly stick to the Copper, if any is on the paper, you need more heat. 

When you know it's all fused to the copper, let it cool down, you can run it under a cold tap but try not to get the paper wet.

Then remove the paper, it should only lightly stick and not toner should come off.


You can heat up your etchant, I did this at room temperature so it will take a little longer to etch.
You can also use a bubble tank and ideally the PCB should be on it's side not flat down.
If you do use a tray like me, then just make sure you move it around every few minutes.


Going, Going...

Keep it moving and after about 10-12 mins it should look like this.


Gone.

Clean and dry it off.

I used 2oz Copper, so the etch time was longer and some parts started to over etch (it does this by eating into the sides of the tracks) but it turned out ok.
Next time I will go back to normal 1oz copper and spend a little more time doing it well.


Clean off the Toner and you have a pcb ready to drill and build.

And remember the fingerprint, well that caused a track break in the top right of the picture (6th Setpper controller), easily repaired but make sure you have clean copper before you transfer the toner.

And if you are wondering what RAMPS+ is, well it's RAMPS but with better motor terminal outputs, another two Pololu stepper positions (that can be remote from the main PCB). Two extra ADC (Thermistor inputs) and also another Mosfet (Heater output) for the Third Extruder.

Now to build it up and wire up the Screwball Strap.

Rich.

Friday, 14 January 2011

Ballscrew motion - X axis completed

X Axis Ballscrew mounted in support and rails attached.

Underside of X axis.

Completed X Axis with 20mm T-slot Guides for alignment of Extruder / head / etc.
This provides about 32cm of build-bed coverage and only slightly less with a dual extruder design. 

Just managed to also get the Y Axis bed supports drilled, these will allow a flexible build-bed size and an easy way to fix and remove it.

My first bed on this design will be Glass, so I want some replacements to swap-out quickly.

Complete mechanical assembly over the weekend, I will be getting onto the electronics next week hopefully.

Rich.

Thursday, 13 January 2011

Ballscrew and motor brackets

Ballscrew and Motor brackets now made.
These will connect the ballscrew to the Y and X stages.
R/H picture shows a NEMA17 motor mount for the X stage.

I will be fitting them later, more photo's if they fit.

Rich.

Tuesday, 11 January 2011

Homemade Delrin Nuts for Z Axis - first go at using my Lathe

So the Plan with the Z stage is now to use M8 Rod and make some Delrin Nuts for it to move up and down.
I will change over to M10 Trapezoidal leadscrews if this arrangement actually works.

Delrin Bar stock and M8 rods.

Not bad for a first stab at it? - Delrin seems easy to machine on the Lathe, much easier than Aluminium.
I don't need it to look pretty as it's going inside the Z framework.

Drill out a 6mm hole so I can hand-tap the M8 Thread.

Needs to be parted and cleaned up.

Hand Tapped and ready for ramming into the 30mm x 60mm Framework.

They line up with 10mm Holes drilled through the frame so the M8 rod can run up and down.
The Rectangular nature of the centre hole digs into the Delrin and stops it turning around.

M8 Rods cut to size and an 8mm Clamp and washer is used to translate the load onto the bearing.

This mount allows the bearing to rotate and fixes movement.

Seems to work well.


I has a small problem with my Flexible motor couplings. They were 6.35mm and the shafts of a NEMA17 motor are 5mm, so I used a section of 6mm Nylon tube and heated it in a kettle for 2 mins then forced it onto the motor shafts, giving a very snug fit on the coupling.

NEMA 17 Motor (one at each end)
Then Flexible Coupling.
M8 Rod
and Delrin nut inside the Frame Mount for the X Axis.

So the updated RepStrap V2.0 Machine now looks like this.

I need to make the Ballscrew mounts tomorrow, so more updates shortly. 

Rich.


Sunday, 9 January 2011

V2.0 X+Z

Machine stripped back to just the frame and now the Y axis (bed) is moving so no more slow Gantry. This means that the frame is fixed in the middle for the X and Z stages to move on and Y will move back and forth like Mendel.  

Frame is made from 30x30 and 30x60 Aluminium MCS (Machine Construction system)
Some parts like the bed and Extruder mounts are made from 20x20mm to reduce size and weight.

Most of the mounting brackets will be re-made from Aluminium Angle and a small number of parts made from Wood or Polycarbonate, like the motor mounts and Ballscrew attachments.
X Stage mounts (x 2)

Drilled - ready for assembly.

The two X stage mounts hold the two 12mm Rails using off-the-shelf rail clamps.
X stage that is mounted to a 30mm x 60mm Rail to attach to the moving Z frame.

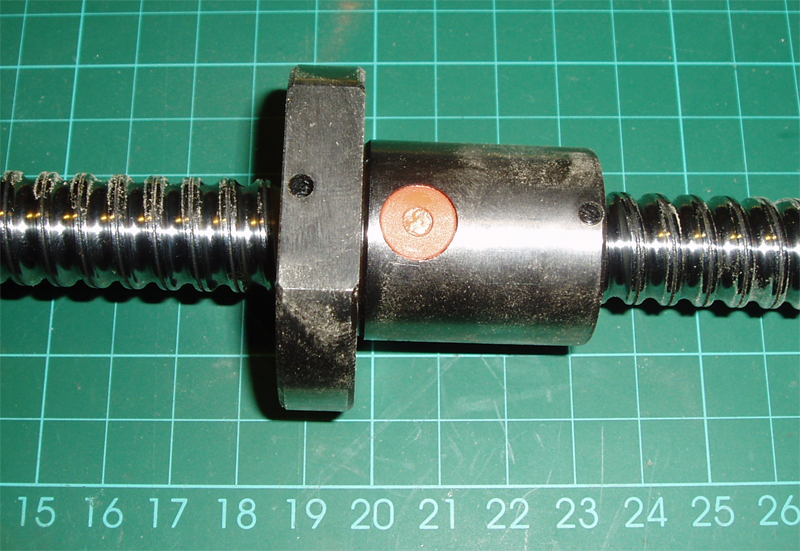
The Linear bearing blocks ( x 4, only 2 shows in photo) and the 16mm Ballscrew allow 32cm of X movement.


Z NEMA 17 Motor Brackets (Left and Right mirrored) from 50mm Alu Angle

Drilled - ready to mount the two NEMA 17 motors that will drive the Z axis.
Flexible motor couplers connect to the Z drives (M8 rod for now) maybe change to Trapezoidal lead-screws later (if it all actually works)...

Looking like a machine again. You should be able to see the 16mm Vertical rails that guide the X stage up and down.

Wiring should be integral into the frame (but I may decide not to do that).
It should be easily enclosed in Polycarbonate or Acrylic if desired.

The next job is getting the whole Z axis to move on home-made Delrin bushes. I plan to fix them inside the 60 x 30mm X Axis frame so it can move up and down. This will require my now working OLD Lathe and it will be the first time I actually use it for anything.


Rich.

Friday, 7 January 2011

Goals for RepStrap V2.0 Machine

My Design Aims for the RichRap RepStrap Version 2.0 Machine are - 
  • Faster print speed - (This is my main driving factor after having a slow Repstrap for 6 months).
  • Change to Ballscrews on X and Y Axis (not sure about Z at the moment).
  • Revised Electronics (Mega based - interim version for 2011, until I get my other set finished).
  • Integral Electronics Tray and wiring with reliable connectors.
  • Change from a fixed to Moving Y bed and print platform.
  • Remove the Gantry head arrangement for the Z axis - Need to think of a simple way to do this...
  • Simplify the Z axis by using dual Nema 17 motors (I may regret that decision...).
  • Increase build-area to 300mm x 450mm x 300mm (Y being easily changed from 100mm upwards).
  • Have easy-fit/remove build platform at different sizes and thickness.
  • Vertical mount Extruders.
  • Dual Extruder ends with remote mounts for Bowden mounted extruders
  • Switch to Herringbone Extruder Gears.
  • Filament coil store and supply feed for 2 reels built into the machine.
  • Heated bed.
  • Resistor block Hot-ends.
  • Multiple Thermistors / readings.
  • Use as many off-the-shelf components as possible.
  • Use the off-the-shelf parts to maintain quality and accuracy in the design.
  • Do the minimum amount of machining as possible. - But I may do some just for fun as I have a shabby Lathe and Band saw now.
  • Where I need to do machining then it needs to be non-critical or easily adjusted to retain quality.

I Intend to be inventive to keep costs down.

* I don't intend to use Belts in this model, but I have a long-term plan for a miniature design using belts instead of Ballscrews maybe directly after this one.

So why don't I just make a Mendel?
 - Well I like the thought of a machine I can build and design myself and I have learnt alot from the first attempt last summer.
And finally it should cost the same to update my RepStrap as it would to make a Mendel, so here we go!


First Z Motor Mount plate (50mm Alu Angle)

First parts of the new X stage, supported with 16mm Linear Bearings and a 30mm x 60mm Aluminum frame that will incorporate the Z vertical movement by using Delrin and leadscrews.


The above plan may sounds like this will be far away from the reprap project goals as it's still using Aluminum and machined components, but I intend that this machine will make it easier for me to develop real self replicating machines in the future. Also Aluminium is 100% recyclable so on that front it's not anti-reprap.

Rich.

Thursday, 6 January 2011

The Plan! RepStrap V2.0

I have no machine! it's stripped for a complete makeover...

The RepStrap makeover uses more MCS Aluminium framework.

And Ballscrews for the X and Y Axis.
Z Axis will be Trapezoidal lead-screw or just M8 rod to start with.

I also invested in a Fury3 Chop-Saw for Christmas, this can cut Steel, Aluminium and Wood with one blade - Nice!

Some off-the-shelf Internal R/A fittings and also external brackets will be used this time instead of R/A cut Aluminium.


It's easy to cut, drill and fix together with T-nuts and bolts.

And the last things I printed with Repstrap V1 before taking it apart included a load of Extruder parts, including these nice Herringbone Gears by Rhys Jones -Here > Thingiverse - Rhys Jones Herringbone

Quite a few people have done work on Herringbone gears, Forrest Higgs has a nice post here about them Here > -Forrest Higgs (Herringbone Rack and Pinion) -

Forrest's RepRap Blog is here -http://technocraticanarchist.blogspot.com/ 

These parts will hopefully get me printing again if the V2 RepStrap does not go to plan...

This is the point I should have made a 3D model of my new machine, but I have a whole load of Ideas that may or may not work and I always find it better to evolve as I go.

I'm going to start cutting Aluminium later, hopefully I will have something to post in the next few days, and I'll try to get up a list of what I'm planning to achieve with this new design.

Onwards - >

Rich.