December advent calendar - modular Christmas tree
3D Printing advice #Day 23 & 24
For the background and introduction - Day #1 Post click here
Day #22 (Christmas scene) was printed in Polyalchemy natural *snow white
Christmas Advent 2017 Download on Thingiverse here - designed by Tom Van den Bon @geekc0der With some help for each day by the South African Makers team.
It's time for Days #23 and 24
Day 23 gift is designed by Chris Venter - It's a Heart box printed in Ruby Red Taulman3D t-glase (Red Star).
Day 24 gift is designed by Shaun Nadan - It's a Grinch


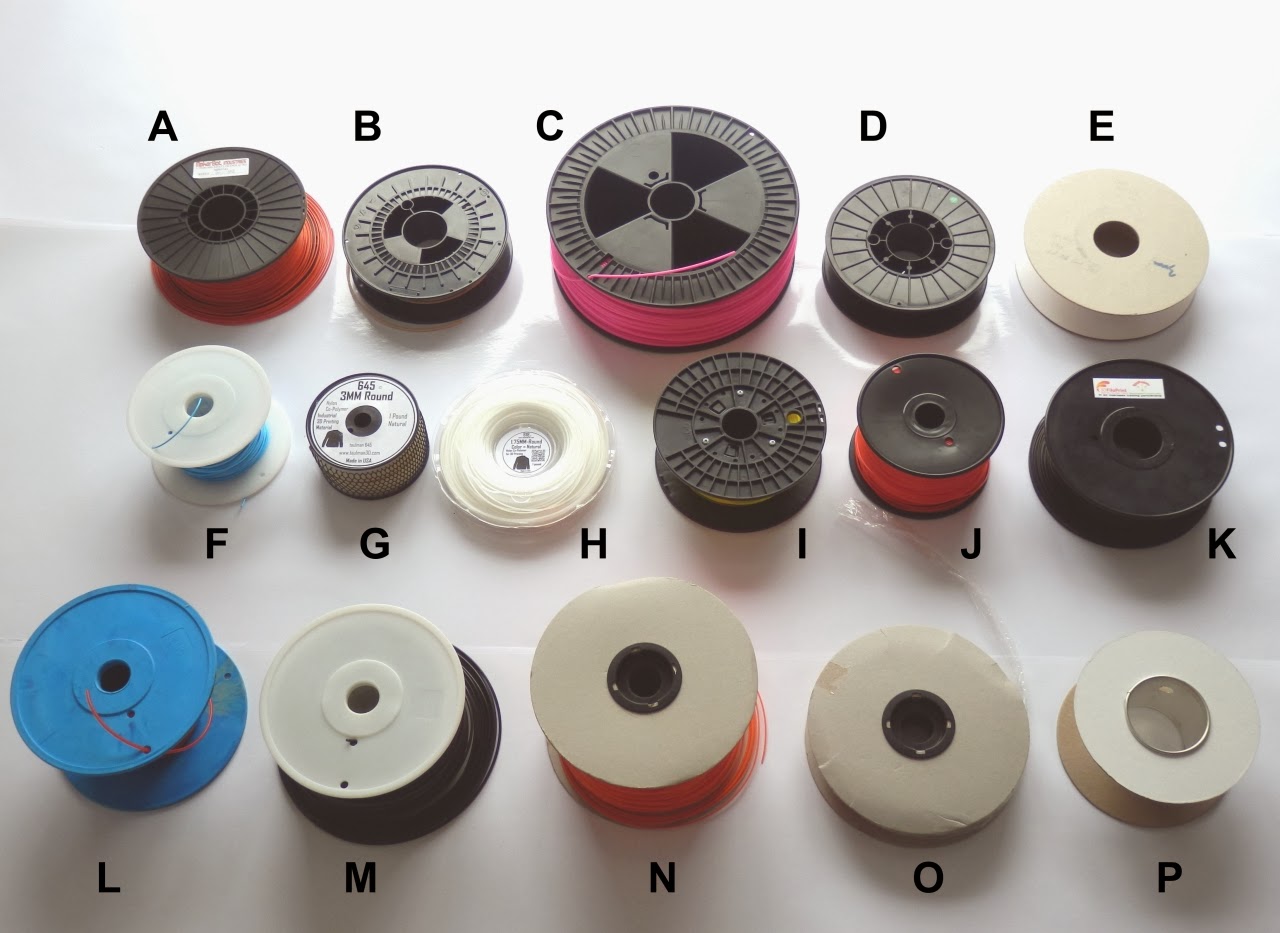
Small rolls, but amazing filament.

t-glase from Taulman3D is one of my all time favourite materials to use. I always have some stock for projects like this. It shines and shimmers and can be used for LED light guides or just to look beautiful.

t-glase is a PETT based material. You are more often likely to find PETG (Glycol modified) versions of polyester (polyethylene) being sold by many manufacturers.

Both PETT and PETG can print very nicely in 3D printers, I tend to use PETT for high optical clarity, bigger layers and anything using light or for beautiful objects & gifts in general.
I will use PETG for large strong functional parts, you can get a semi-clear finish with PETG, some formulations can produce reasonable optical clarity with the right settings and nozzle size.

For this heart I'm keeping to a chunky layer height, and a specific infill type.

It's worth thinking about the first bottom layer for objects like the heart box. The lid will be the bottom face when assembled, so you want that to look as nice as possible.

I also printed the final gift in the tree - Day 24 - The Grinch.


Day 23 gift is designed by Chris Venter - It's a Heart box printed in Ruby Red Taulman3D t-glase (Red Star).
Day 24 gift is designed by Shaun Nadan - It's a Grinch

Yes! I finally get to use t-glase, this model is perfect printed in t-glase Red Star.


Days 23 & 24 tree sections are printed in Polyalchemy Elixir.

Small rolls, but amazing filament.


Taulman t-glase with a Red laser beam catching the front edge.
t-glase is a PETT based material. You are more often likely to find PETG (Glycol modified) versions of polyester (polyethylene) being sold by many manufacturers.

Both PETT and PETG can print very nicely in 3D printers, I tend to use PETT for high optical clarity, bigger layers and anything using light or for beautiful objects & gifts in general.
I will use PETG for large strong functional parts, you can get a semi-clear finish with PETG, some formulations can produce reasonable optical clarity with the right settings and nozzle size.

Back-lit with a small white led - t-glase really shines (concentric infill - see below)
For this heart I'm keeping to a chunky layer height, and a specific infill type.

Left shows traditional rectilinear infill, and right shows a concentric infill.
It's worth thinking about the first bottom layer for objects like the heart box. The lid will be the bottom face when assembled, so you want that to look as nice as possible.

Likewise, the heart box bottom is also using a concentric infill. Look at those chunky 0.3mm layers, they look amazing on an object like this.
I also printed the final gift in the tree - Day 24 - The Grinch.

I have absolutely no idea how the yellow overhang worked. This had no support and should have failed at this point, but when I came back after switching materials, it was done and asking for the next colour! I can only think it must be some Christmas Magic?

Days 23 and 24 completed.
Print advice - (Taulman t-glase - PETT material)
What settings did you use? - t-glase needs some odd slicing setting. I will talk about a few, but as they are an odd mix of tricks and balance, I'll also include the Slic3r settings I use to help you tune t-glase perfectly.


Is it strong? - Yes, it's very tough, impact resistant and just a tiny bit of flex.
Is it easy to use/print - Yes, as long as you spend time tuning the speed, temperature and odd nozzle settings I have shown above.
Do you have to dry it before/after use? - Not really, but I do dry it out before use if I want the very best clarity or optical performance. Keep it dry / sealed etc.
Do i need a 'special' nozzle? - No it's not abrasive at all. All nozzles seem to work well, Bigger nozzles are glorious with t-glase. Just try it with a 1.2mm nozzle and a 1.0mm layer height, it's astonishing.
Does it smell when printing? - No.
Does it come on a eco friendly spool? - No :( They are usual Taulman micro-spools, can be tricky to mount as they don't have a 'standard' 52mm mount hole.
Conclusion for Taulman t-glase - If you have not tried it out yet, you are missing out. From the very first sucesful print, you will be hooked. It also not comes in more colours, that I'm going to get hold of in the New Year. It's in my top 5 list of most useful and great looking materials.
Olsson Ruby Nozzle check -
I thought it would be good to check on the Ruby Nozzle at this point.


I just removed the nozzle (when it was at full 260 Degrees C temperature). It has not been cleaned in the image above. In the image below the same nozzle has been cleaned and refitted.

Print time check -

I installed this first Olsson Ruby nozzle in the summer of 2017. I reset the firmware timer at that point to keep track of the total print hours. This nozzle has now clocked up 16days 3hours 48mins.
That's around 387 hours of constant print time with almost every single type of material I have.
1.32km of filament length (1.75mm) is also around 4.2kg of filament so far.
To put this figure of 387 total hours of Ruby nozzle print time into context, this entire advent Christmas tree - printed on this Prusa i3, the Lulzbot TAZ6 (also fitted with a Ruby high-flow Nozzle) and one print made on the Sigma R17 was a total print time of - 139.5 Hours.
This splits into the following -
All Advent gifts = 44 Hours 20 minutes total print time (Excluding the top star)
Sigma Dual print (Jeep) = 2.43mins
Top star = 5.5 Hours - check tomorrows post to see that :)
All Tree sections = 88 Hours (including top tree section for star)
2/3 of all parts were done on the Prusa i3 MK2 with a V6 Olsson Ruby Nozzle fitted (0.4mm).
1/3 of all parts were done on the LulzBot Taz6 with the High-flow V6 (Volcano) nozzle fitted (0.6mm)
1 part was printed on the Sigma.
The Olsson Ruby (Volcano) nozzle in the TAZ6 has only had around 50 hours of use, so I'll check the status at around 300 Hours.
Remember this Advent tree is scaled at 150% of the original files posted. The tree sections are also scaled at 150% but only 120% in depth (to make the gifts appear to pop-out more).
Can you guess the total weight of the finished advent 2017 tree? (and also how much filament has been used)? And also how tall the finished tree is?
Send me a tweet over on Twitter @RichRap3D with your guess. I'll post the weight and filament used in tomorrows post.


0.3mm layers (0.4mm nozzle) work really well with t-glase / 5 top and bottom solid layers.

Use an infill of under 25% to get the best optical clarity from t-glase - Using honeycomb is also important, you need an infill that does not cross over line-fill paths. (honeycomb is ideal)
Finally I'm using concentric for top and bottom layers, but that is because of the object here, you can use rectilinear if more appropriate.

Balanced with the temperature I use, you need a relatively slow speed to get the best from t-glase
Especially the first layer, you want that to be neat and tidy for this object.

Make the extrusion widths around the same size as the actual nozzle size. Normally you would go slightly bigger.

250 degrees C - it will print lower and hotter, but for the speed balance, this will give clear (not frosty) results during printing.
80 Degrees C heated bed.

This is a really important one, don;t use too much fan cooling for t-glase. Max 40% unless bridging.

Finally, this is the really odd one - For a 0.4mm nozzle you need to tell Slic3r it's 0.45mm in diameter - with all the other settings above, this produces great results.
You can go to the same layer height as nozzle size for t-glase (here we could go 0.4 layer with 0.4 nozzle)

Is it strong? - Yes, it's very tough, impact resistant and just a tiny bit of flex.
Is it easy to use/print - Yes, as long as you spend time tuning the speed, temperature and odd nozzle settings I have shown above.
Do you have to dry it before/after use? - Not really, but I do dry it out before use if I want the very best clarity or optical performance. Keep it dry / sealed etc.
Do i need a 'special' nozzle? - No it's not abrasive at all. All nozzles seem to work well, Bigger nozzles are glorious with t-glase. Just try it with a 1.2mm nozzle and a 1.0mm layer height, it's astonishing.
Does it smell when printing? - No.
Does it come on a eco friendly spool? - No :( They are usual Taulman micro-spools, can be tricky to mount as they don't have a 'standard' 52mm mount hole.
Conclusion for Taulman t-glase - If you have not tried it out yet, you are missing out. From the very first sucesful print, you will be hooked. It also not comes in more colours, that I'm going to get hold of in the New Year. It's in my top 5 list of most useful and great looking materials.
I thought it would be good to check on the Ruby Nozzle at this point.

Olsson Ruby nozzle after ~387 Hours of printing (not cleaned)

The ruby is looking perfect! no surface wear and hole size is still 0.4mm

This was how it looked originally (still in the box)

'Cleaned' and fitted back into the Hot-end for another print run - I'll check again in 1500 hours.
Print time check -

I installed this first Olsson Ruby nozzle in the summer of 2017. I reset the firmware timer at that point to keep track of the total print hours. This nozzle has now clocked up 16days 3hours 48mins.
That's around 387 hours of constant print time with almost every single type of material I have.
1.32km of filament length (1.75mm) is also around 4.2kg of filament so far.
To put this figure of 387 total hours of Ruby nozzle print time into context, this entire advent Christmas tree - printed on this Prusa i3, the Lulzbot TAZ6 (also fitted with a Ruby high-flow Nozzle) and one print made on the Sigma R17 was a total print time of - 139.5 Hours.
This splits into the following -
All Advent gifts = 44 Hours 20 minutes total print time (Excluding the top star)
Sigma Dual print (Jeep) = 2.43mins
Top star = 5.5 Hours - check tomorrows post to see that :)
All Tree sections = 88 Hours (including top tree section for star)
2/3 of all parts were done on the Prusa i3 MK2 with a V6 Olsson Ruby Nozzle fitted (0.4mm).
1/3 of all parts were done on the LulzBot Taz6 with the High-flow V6 (Volcano) nozzle fitted (0.6mm)
1 part was printed on the Sigma.
The Olsson Ruby (Volcano) nozzle in the TAZ6 has only had around 50 hours of use, so I'll check the status at around 300 Hours.
Remember this Advent tree is scaled at 150% of the original files posted. The tree sections are also scaled at 150% but only 120% in depth (to make the gifts appear to pop-out more).
Can you guess the total weight of the finished advent 2017 tree? (and also how much filament has been used)? And also how tall the finished tree is?
Send me a tweet over on Twitter @RichRap3D with your guess. I'll post the weight and filament used in tomorrows post.

Days 1 to 24 of the Advent Christmas Tree.
Today story is simply about making beautiful objects with 3D printing. What I have now is another wonderful, creative and exciting advent Christmas tree, full of stories and interesting materials. We still get out the original 2012 advent tree every year. Now we have this one too.
I want to thank all the South African makers and designers for this amazing Christmas gift. it was a real pleasure to print these parts. I also hope you also learned some neat things to try yourself.
I want to thank all the South African makers and designers for this amazing Christmas gift. it was a real pleasure to print these parts. I also hope you also learned some neat things to try yourself.
Christmas Day tomorrow. Have fun.
Thanks for reading and Merry Christmas everyone.
Rich.
Please join me on Twitter @RichRap3D
My profile and posts over on Google+
Files and designs shared on YouMagine
Files and designs shared on GitHub
Files and designs shared on Repables